
By Jason E. Fountain
My application: 1992 Ford Ranger Custom 3.0 v6
MSD has positive comments across the board in just about every field of performance there is. I decided I wanted to get a little more spark out of my 3.0 so I opted to get the MSD 6A ignition system. The ignition itself cost $149.95 and is part #MSD-6200 at Summitracing.com. To get even better combustion, I also ordered a blaster 2 coil. For those of you who like a little shine, get the chrome one like I did; part #MSD-8200 and cost $33.95 at Summit. The last part I ordered was an aluminum bracket; part #SME-2804 and cost $19.95. The bracket is pretty solid, and comes with shock boots to keep the ignition from jerking over bumps or when offroading.
On a side note: If you would like to have a built in rev limiter, get the MSD 6AL ignition. This should allow you to override the rev limiter but I do not know if it will disable your governor. I don’t have a governor and I already redline at 5,800rpms so….
The first step is to buy all the parts. Then sort them out on a table and read the instructions! MSD ignition systems are very versatile, and can be installed in more than one way. The way I will show you is the easiest and quickest for this application.
If you have a ford TPI coil like the one pictured below, then these instructions are for you!
The first step is to mount everything before wiring it up. You have to see if everything will fit before you start cutting or splicing wires.
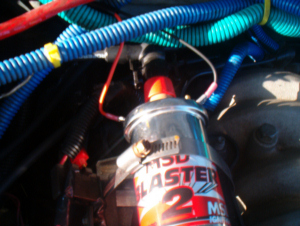
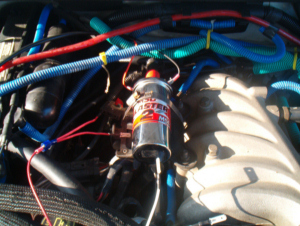
Disconnect the plug on the stock TPI coil. Then remove the coil by taking out the four screws that hold it down. With the coil out of the way, put the new MSD blaster coil in it’s place. Look at the picture below. The coil’s tower should be facing the firewall. Now, using a screw down 3” clamp, mount the MSD coil onto the stock coil mount. This setup is more than stable enough. Trust me, this baby will not budge!
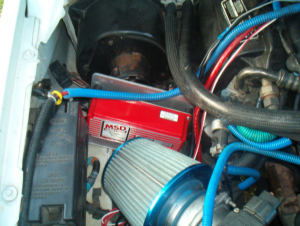
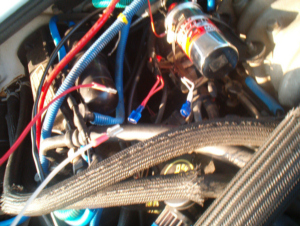
Now, let’s mount the MSD ignition system. This is the hardest part of the entire install. If you did not get the mounting bracket, you must drill four holes that line up with the ones in the ignition box. If you did buy the mount, you have the advantage of only drilling 3 holes. Two holes was more than enough for me. You drill them into the bracket, then into the frame or wherever you choose to mount. I found that in between my blower motor and cone air filter was ideal. See picture below.
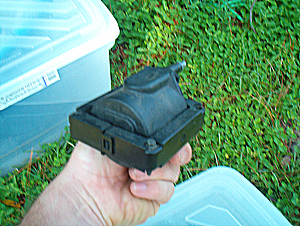
Now that the ignition system and blaster coil are installed, let’s start wiring it up! The ignition system has all the wiring you will need. There is also a magnetic pickup connector that you will NOT need. Just leave it alone. This is the wire on the left in the picture below.
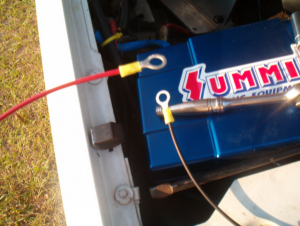
The ignition also contains a heavy red wire to be connected to the battery, and a heavy black wire for a ground. (I suggest connecting it to the battery for the best ground available. Wires are shown in the picture below.
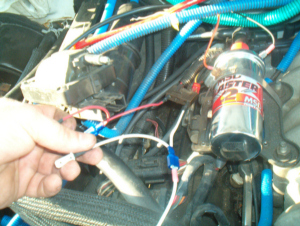
There is also a white wire and a red wire that connect to the stock plug which originally connected to the stock coil. The white wire from the MSD plugs into the connector side with the dark green and yellow wire. The red wire from the MSD plugs into the connector side with the red and light green wire. This can be seen in the pic below. The installation kit includes the red and white connectors with dual wires that make a y shape. They say to tape up the ones you do not use, such as the one’s I am holding.
The only wires left are the ones from the MSD ignition to the blaster 2 coil. The orange wire from the ignition connects to the positive terminal on the coil. The black wire on the ignition connects to the negative terminal on the coil. Now connect the spark plug wire that was originally on the stock coil to the MSD coil and you are almost finished. You have the option of adding a tachometer to your system if you did not have one from the factory. I already had one installed on my stock ignition, but converted it to use the MSD 6A’s tachometer output.
Yes everything that needs connecting is done, but now you have to check for clearance issues. Make sure everything clears nicely and all wires are out of the way and secure. You don’t want any problems in this area of performance. MSD recommends you open up your spark plug gap to .050- .060. When I did this I accidentally got carbon in one of the holes and one of my lifters started tapping, so USE A SHOPVAC OR CLEAN BEFORE TAKING OUT YOUR PLUGS! It sounds like a stupid mistake, but that stupid mistake is costing me money! So take my advice and be careful!
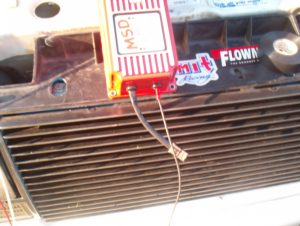
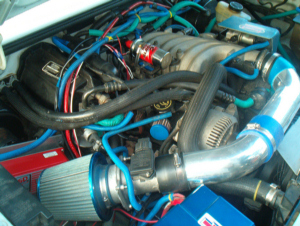
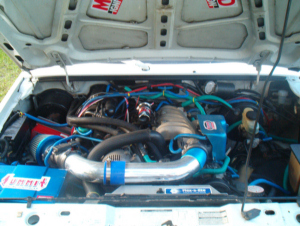
Pictures of the finished product.
About The Author
Jim Oaks is the founder of TheRangerStation.com, the longest-running Ford Ranger resource online since 1999. With over 25 years of hands-on experience building and modifying Ford Rangers — including magazine-featured builds like Project Transformer — Jim has become one of the most trusted authorities in the Ford Ranger off-road and enthusiast space.
Since launching TheRangerStation.com, Jim has documented thousands of real-world Ranger builds, technical repairs, drivetrain swaps, suspension modifications, and off-road adventures contributed by owners worldwide. TheRangerStation.com has been referenced in print, video and online by enthusiasts, mechanics, and off-road builders looking for practical, and experience-based information.