
Introduction
This article demonstrates how to swap a Dana 44 steering knuckle and locking hub onto a Dana 35 TTB. The goal is to improve axle strength, use ½ ton hubs, and upgrade wheel bearings, rotors, and calipers without performing a full SAS (solid axle swap).
The Swap
Parts and tools needed for the swap include:
- Dana 44 upper (K80026) and lower (K8195T) ball joints
- Offset Dana 44 alignment cams
- 1-1/2” taper per foot reamer
- 90 weight gear oil (for cutting lubrication)

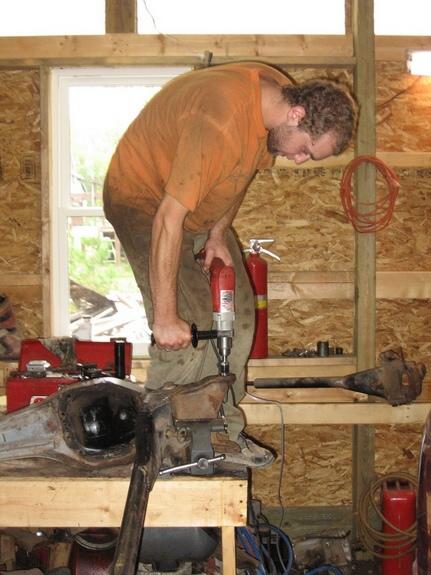
First, the proper ream must be obtained to re-taper the lower ball joint mounting location, and to ream the Dana 44 knuckle from the top of the steering arm. This is necessary because the Dana 44 mounts from the bottom of the steering arm while the Dana 35 mounts from the top.

To measure the depth of cut:
- Bottom the reamer into a Dana 44 lower ball joint taper.
- Mark the depth with tape. This is the depth you will need to ream the Dana 35 beam.
- During cutting, use slow speed with constant pressure. Do not spin the ream fast, it will cut very poorly.
- Use liberal amounts of cutting lubricant, such as 90 weight gear oil.
- Check often when approaching the depth mark. Test-fit the lower ball joint to ensure proper fit.
The margin of error is slim. If not enough is taken out the ball joint will not fit. If too much is taken out the press fit cannot be obtained.

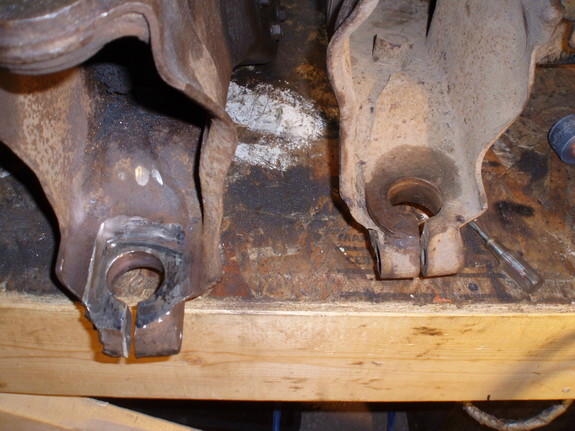
Depth of cut measurement on 44 beam.

Un-reamed Dana 35 beam

Reamed Dana 35 beam

Dana 44 lower ball joint in reamed Dana 35 beam

Dana 44 upper ball joint and alignment cam in Dana 35 beam
The reaming process, slow and steady.
Reaming the Steering Arm
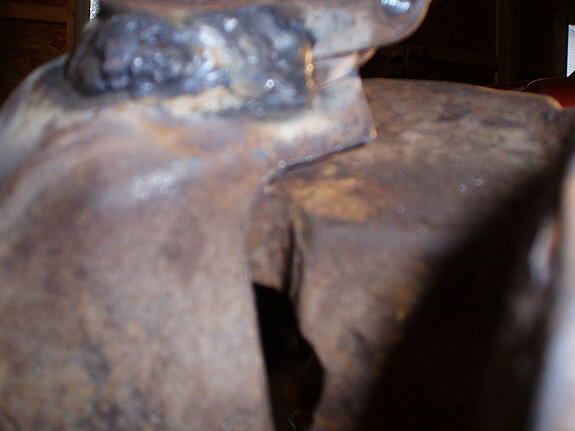
The steering arm is cast steel and slightly easier to remove material from compared to the lower ball joint mount. Reaming must be done carefully to avoid removing too much material.
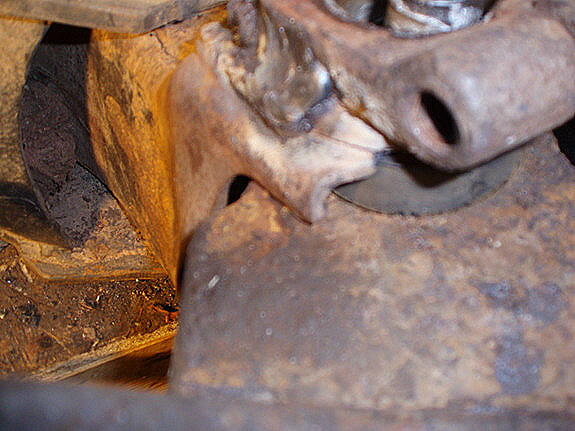
Upper Ball Joint Clearance
To accommodate the Dana 44 upper ball joint, some material must be removed from the inside of the Dana 35 beam. Depth of cut is easy to see from the pictures. The thinner layer is ground off flush. Test fit often for proper clearance.

Clearance 35 beam

Un-clearance 35 beam
Side by side

Clearance process, notice the layer that is ground off.
After this, a few weld beads around the upper ball joint pinch were added for strength (optional).
Installing Ball Joints
The lower ball joint is installed and torqued to spec. Without the Dana 44 alignment cam in place, move the knuckle from lock to lock in different orientations to identify interference with the Dana 35 beam. Mark and remove material as needed.

Interference of Dana 44 knuckle on Dana 35 beam
Interference of 44 knuckle on Dana 35 beam
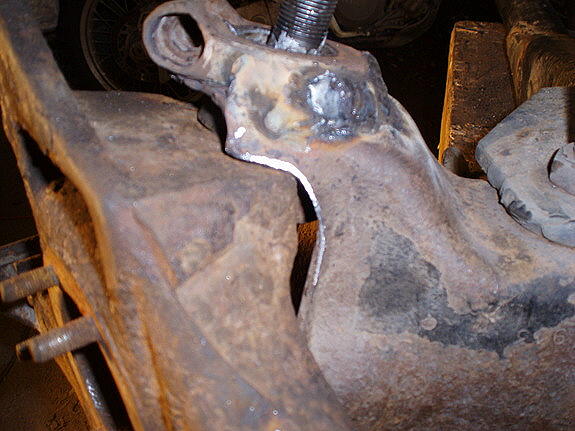
Clearance of Dana 35 beam
Clearance of Dana 35 beam

Final Assembly
Once clearance is complete, beams can be installed in the truck. Set toe, caster, and camber using the top alignment cam just as on a Dana 35. Torque the upper ball joint nut to spec taking care to not spin the alignment cam and then torque the pinch bolt.
The procedure for the upper ball joint differs from that of the Dana 35 as the Dana 35 upper ball joint does not have a taper, the pinch bolt holds the upper in the cam. While the Dana 44 upper does have a taper. So, the upper ball joint nut presses the ball joint stud into the Dana 44 alignment cam retained a press fit. Then the pinch blot holds the alignment cam thus retaining the upper ball joint.
Assembled without upper ball joint nut or pinch bolt in place.

Stock Dana 35 brake lines bolt to Dana 44 calipers without modification.

Rollin on Dana 44 outers
Why I Did It
I already had a lot of time in fabbing my own Dana 35 lift. I kept blowing Warn hubs and didn’t want to buy Warn Jeep hubs. The Dana 35/44 hybrid provides:
- ½ ton outers for better hubs and wheel bearing spacing
- Larger rotors and calipers than the Dana 35
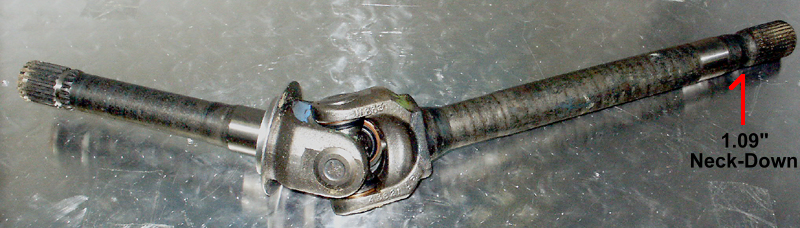
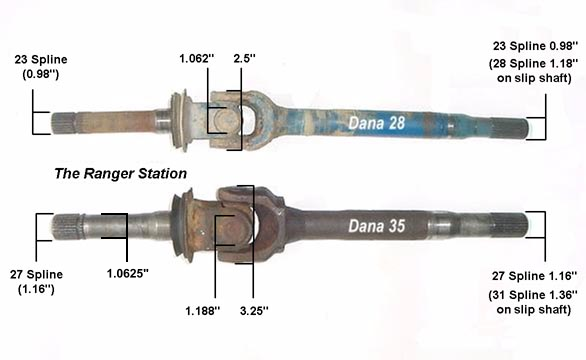
- Larger stub shafts than Dana 35, despite the neck-downs in Dana 44 shafts
- Way faster and cheaper than doing a SAS.
The Dana 44 shafts have a neck-down on them that tapers down to 1.09″ inches. The smallest point on the Dana 35 shafts is 1.16″ inches where it tapers down to go in to the carrier. The only shaft on a Dana 35 that is smaller than the neck-down on the Dana 44, is the Dana 35 stub shaft, which is 1.0625″ inches. Therefore, swapping the Dana 44 stub shaft on to a Dana 35 will actually result in an axle assembly with larger axles than the Dana 44.

This method was faster and cheaper than performing a SAS.
Additional Notes
- Knuckles used were 1984–1986, but most TTB Dana 44 knuckles should work.
- Special tool needed: 1-1/2” taper per foot reamer.
- Dana 44 stub shafts use the same U-joint as Dana 35, assembly is identical.
- Stock brake master cylinder works fine with Dana 44 calipers.
Related Articles
Dana 44 Knuckle Swap On To Dana 35
Should You Replace A Dana 35 TTB With A Dana 44?
Dana 44 Spindle & Hub Conversion On Dana 35 TTB
Beefing Up The Ford Ranger Dana 35 TTB
The Mappyjack Dana 44 Spindle & Hub Conversion
Ford Ranger Dana 44 TTB Conversion FAQ’s
James Duff Ford Ranger Dana 44 Axle Swap
Chico4554’s Dana 44 Ranger Build
Early Bronco Dana 44 Swap Into A Bronco II / Ranger
Ford Ranger Solid Axle Swap (SAS)
Dana 44 Solid (Live) Front Axle
Frequently Asked Questions
Can any Dana 44 knuckle work on a Dana 35 TTB?
Most 1984-1986 Dana 44 TTB knuckles work. Other years may require minor modifications.
Do I need a new master cylinder when swapping Dana 44 calipers?
No, the stock brake master cylinder works fine with Dana 44 calipers.
Co-Author
This modification was performed by TRS forum member ‘Todd’, who submitted the information for publication on The Ranger Station for other Ford Ranger owners.
Last Updated:
About The Author
Jim Oaks is the founder of TheRangerStation.com, the longest-running Ford Ranger resource online since 1999. With over 25 years of hands-on experience building and modifying Ford Rangers — including magazine-featured builds like Project Transformer — Jim has become one of the most trusted authorities in the Ford Ranger off-road and enthusiast space.
Since launching TheRangerStation.com, Jim has documented thousands of real-world Ranger builds, technical repairs, drivetrain swaps, suspension modifications, and off-road adventures contributed by owners worldwide. TheRangerStation.com has been referenced in print, video and online by enthusiasts, mechanics, and off-road builders looking for practical, and experience-based information.