
This page discusses plumbing your stock steering box to operate a hydraulic ram for hydro assist steering.
This is not a full how-to write up.
This information is intended to those who already understand hydro steering and are just needing information on where to install their fittings on the steering box.
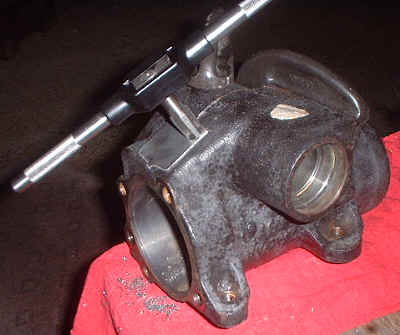
Here’s the modifications Casey (Redriverranger) made to his steering box for hydro assist steering. The brass fittings were just to mock it up. He used steel fittings and hydraulic hoses to finish it. The Ranger’s stock steering pump doesn’t have enough flow volume and steering response will be slow. You’ll need to swap in a Saginaw pump from a 1991(?) Ford van.
Here’s the general idea of how this works:
You tap the steering box in (2) places; (1) on each side of the piston. You get a hydraulic cylinder, mount it to the axle and attach the end of the ram to the drag link going to the steering knuckle. You then run hydraulic lines from the place tapped in the steering box to the cylinder.
As you turn the wheel the steering box along with the power steering pump sends pressurized fluid to the ram, therefore it has the power of an additional hydraulic cylinder helping to turn the wheels, but the safety of having an actual drag link and tie rod incase a hose fails or gets ripped off. Don’t forget to carry block off plugs, or better yet caps for your fittings in case you blow a hose or cylinder.
Tools Needed:
- Assorted Wrenches
- Drill
- 7/16″ Drill Bit
- 1/4″ NPT (National Pipe Thread) Tap
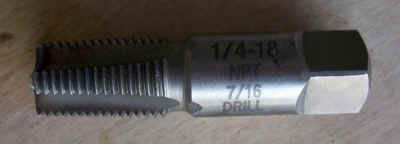
(1/4-18 NPT Tap)
Material:
- (2) 1/4″ NPT Fittings
- (2) 1/4″ NPT to 3/8″ Pipe Adapter
- (2) High Pressure Lines With 3/8″ Fittings. Make sure (1) end is a swivel type.
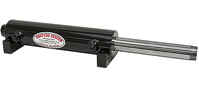
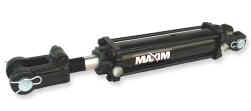
- 2×8 Hydraulic Ram
- Pipe Tape
- Steering Box Rebuild Kit
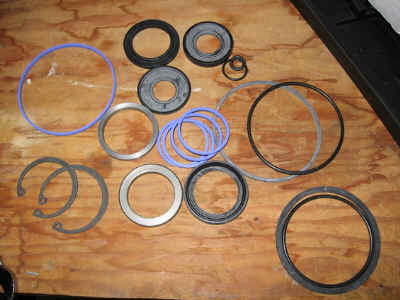
(Steering Box Rebuild Kit)
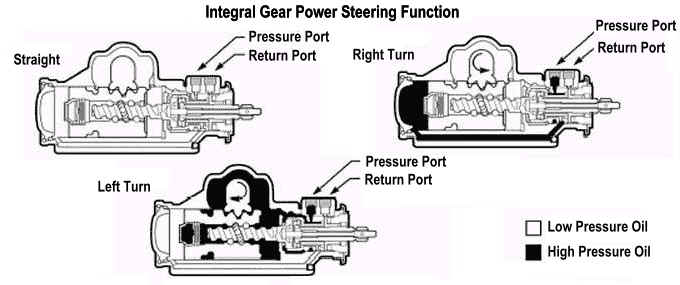
How The Steering Box Works:
When you turn the steering wheel, you are also turning the Input Shaft and the Worm Gear. Due to the screw-like design of the Worm Gear, the Piston moves up and down on the Worm. The teeth on the piston also move up and down in the box and push or pull on the teeth of the Sector Shaft, causing it to rotate. The rotation of the Sector Shaft causes the Pitman Arm to move left and right in the vehicle, moving the steering linkage with it. This movement of the steering linkage causes the spindles to rotate on the ball joints and turn the wheels and tires. Simple.
The design of the Worm Gear and Valve Assembly converts the twisting action of the steering wheel into a forward/rearward reciprocating action in the box. The design of the Valve Assembly and Sector Shaft converts the forward/rearward action into a side-to-side reciprocating action that can then move the steering linkage as it needs to.
When you add the two fittings to the steering box, one will have high pressure when the steering wheel is turned left. The other will have high pressure when the steering wheel is turned right. The pressure is either in front of the piston or behind it when turning.
Adding The Fittings:
Looking at the image above, you can see how one area of the box has high pressure oil flowing through it turning left and the other has high pressure oil fluid flowing through it turning right. There’s either high pressure oil in front of the piston or behind it. There’s no pressure flowing through going straight. You need to add fittings so that you can access the fluid at each side of the piston to control the ram when you turn left or right.
It’s best to completely disassemble the steering box before drilling and tapping it and then reassembling it with a rebuild kit.
Click HERE for disassembly and rebuild instructions.
We’ve also heard of people slowly drilling and tapping the holes with a magnet on the drill and tap and then flushing it with a steering/transmission flusher. Disassembling it will allow you to better see where you’re accessing to get your pressure.
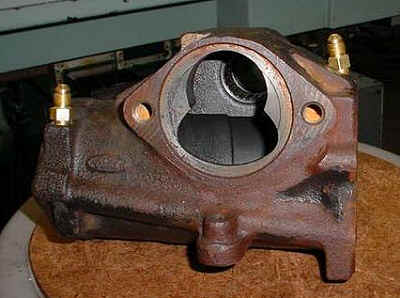
Once you have the box disassembled, locate the first hole to be drilled. In order to tap the steering box and add fittings. You’ll be drilling 7/16″ holes in two locations in the steering box and using a 1/4″ NPT tap in them. Don’t tap all the way through the hole. Just tap about 1/2 to 3/4 of the hole or the fitting won’t tighten. The first hole should be drilled in the flat square are seen in the next two pictures.
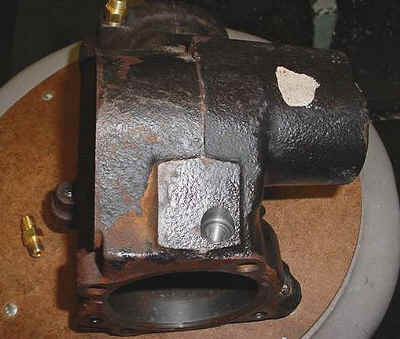
These are two different boxes, but accessed in the same area.

The second fitting can be seen in the right of the picture above. It’s accessing the opposite end of the box.
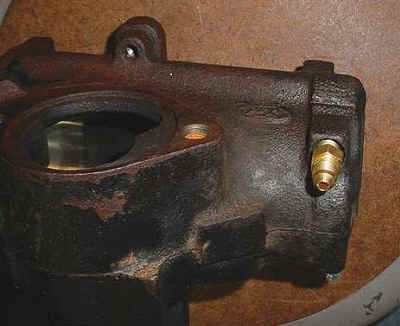
Here is a better view of where Casey mounted his second fitting. Strange how there’s a flat spot there for your fitting huh?
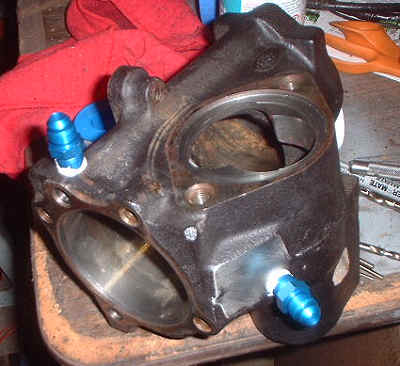
We’ve also seen the boxes drilled and tapped for a fitting as shown in the above photo left.

With Casey’s steering box, we marked a blue circle where the fitting (in the picture above this one) was placed. The fitting was placed here instead of where Casey’s was mounted to the left in the picture directly above.
Warning: You are accessing a fluid passage way here (where the blue circle is). DO NOT drill all the way through it or you will ruin the box.
Cleaning:
Make sure you thoroughly clean all of the shavings out of the box from where you drilled and tapped it before reassembly.
Hydro Assist Kits:
There are company’s out there offering hydro assist kits. Here’s a couple:
Rockstomper.com
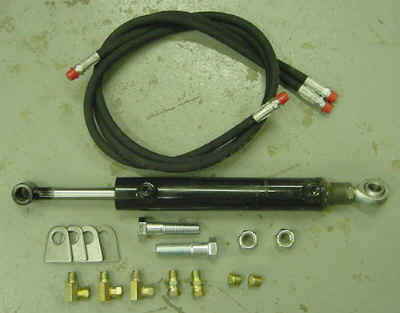
Their most popular ram assist kit uses a 1.5″ bore cylinder. This provides significantly increased power to turn larger tires, especially off road and while working against a front locker. This kit is recommended for the four-wheeler who needs additional power but prefers to keep the steering system fairly responsive for street driving.
Includes:
(1) 1.5″ bore specially modified welded cylinder
(2) 1/4″ industrial hydraulic hoses
(4) weld-on mounting tabs
(2) mounting bolts with Nylock nuts
Assorted fittings for connecting the lines to the cylinder and steering box
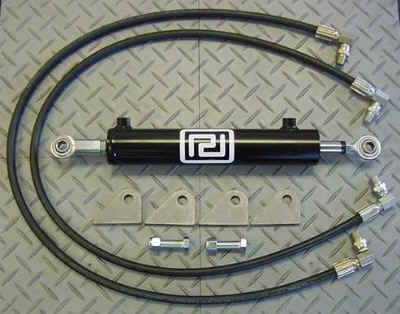
Rocklogic4x4.com
Assist Kit includes:
RockLogic 4×4 Steering Assist 8″ Ram
(2) Hydraulic send/return line hoses
(4) Mounting Tabs & Hardware
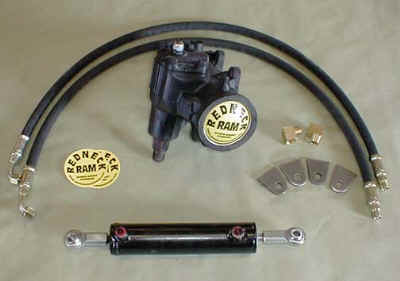
West Texas Off Road
Starts with your existing steering box. The box is disassembled cleaned, rebuilt, modified and hydraulic fittings added. In addition the Stage II kit includes the mounting hardware kit and rod ends.
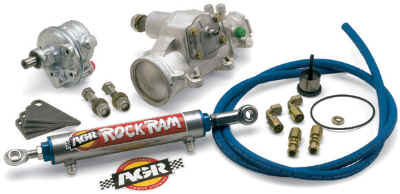
AGR Performance
The AGR ROCKRAM* System features all the performance upgrades included with the improved streering gearbox and Ford Super Pump plus the addition of the ROCK RAM* cylinder. Adding the Ram Cylinder effectively doubles the turning force available. The ROCKRAM* makes short work of turning oversize tires, even 44s. In addition to doubling the turning force the Ram Cylinder becomes a powered steering stabilizer. The ROCKRAM* cylinder holds the tires in line, eliminating most tire shimmy and wobble. Tests have shown that the ROCKRAM* actually increases tire life by reducing or eliminating tire cupping.
Just Wanting A Ram? Check These Out:
Miscellaneous Diagrams:
About The Author
Jim Oaks is the founder of TheRangerStation.com, the longest-running Ford Ranger resource online since 1999. With over 25 years of hands-on experience building and modifying Ford Rangers — including magazine-featured builds like Project Transformer — Jim has become one of the most trusted authorities in the Ford Ranger off-road and enthusiast space.
Since launching TheRangerStation.com, Jim has documented thousands of real-world Ranger builds, technical repairs, drivetrain swaps, suspension modifications, and off-road adventures contributed by owners worldwide. TheRangerStation.com has been referenced in print, video and online by enthusiasts, mechanics, and off-road builders looking for practical, and experience-based information.