- Joined
- May 10, 2010
- Messages
- 4,171
- Reaction score
- 68
- Location
- haida gwaii
- Vehicle Year
- 1991
- Make / Model
- ford
- Engine Size
- 460
- Transmission
- Manual
after forming up the fuel tank parts for the gt,i posted a pic of this;
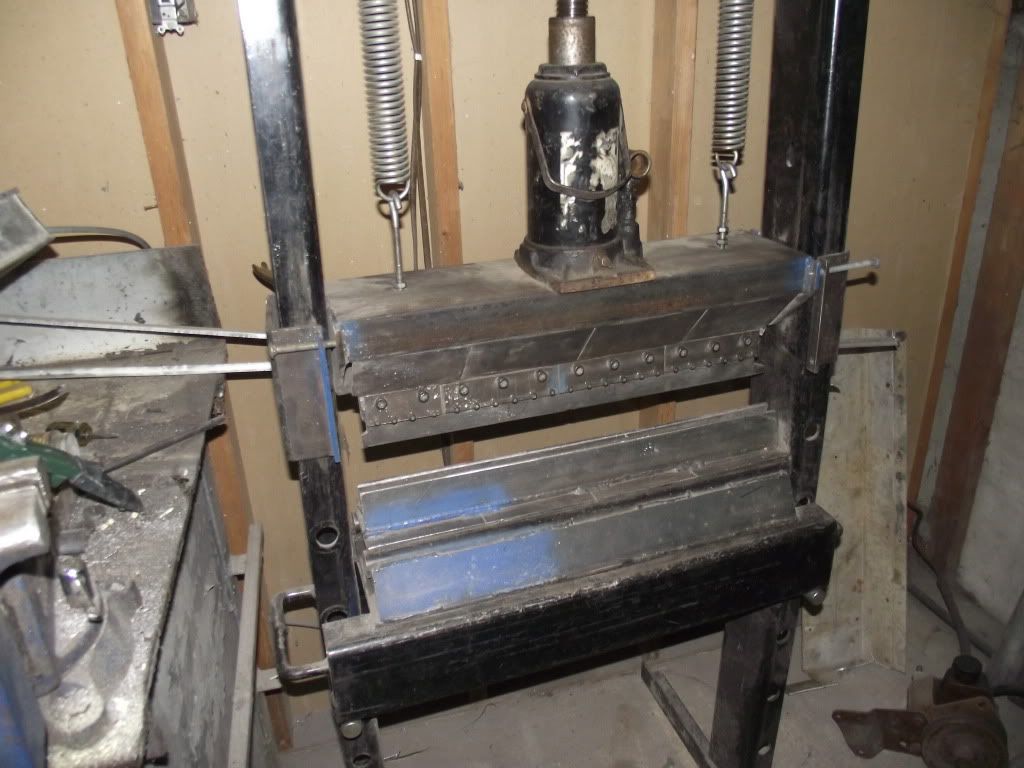
which i used to form up the parts.there were some questions about it's construction which i will try to address here.
at the same time it would be interesting to see some of the homemade tools others have come up with to do various jobs.
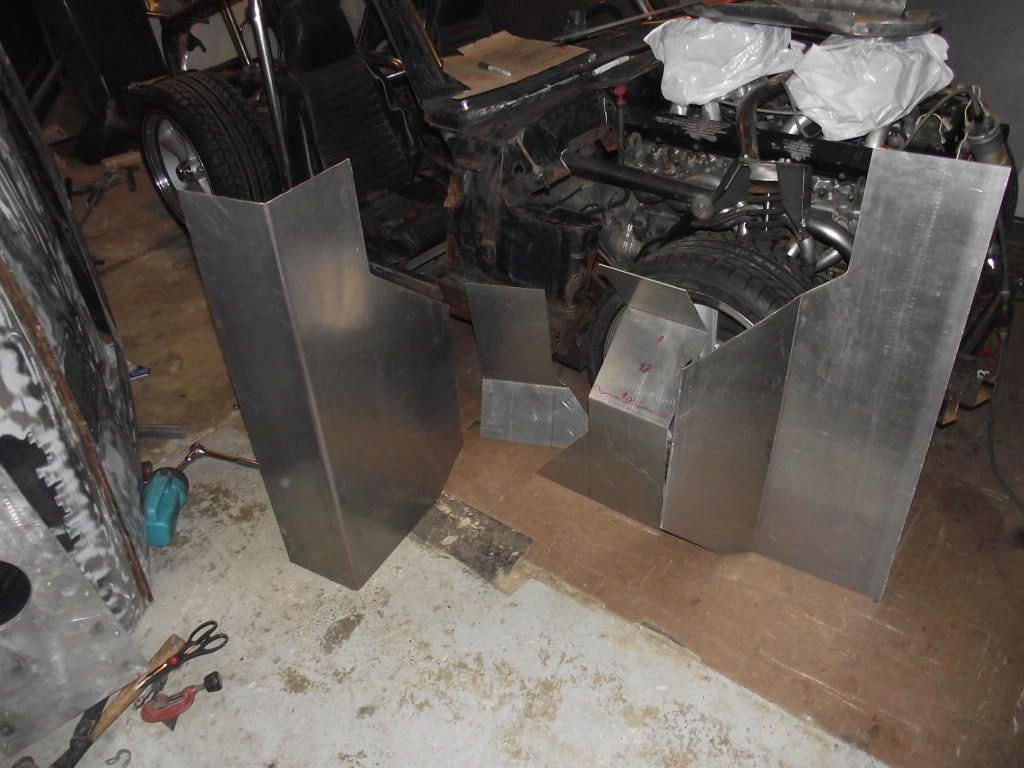
first,these are the parts for the fuel tank in question.where possible,bends will make the project look better and save on welding.
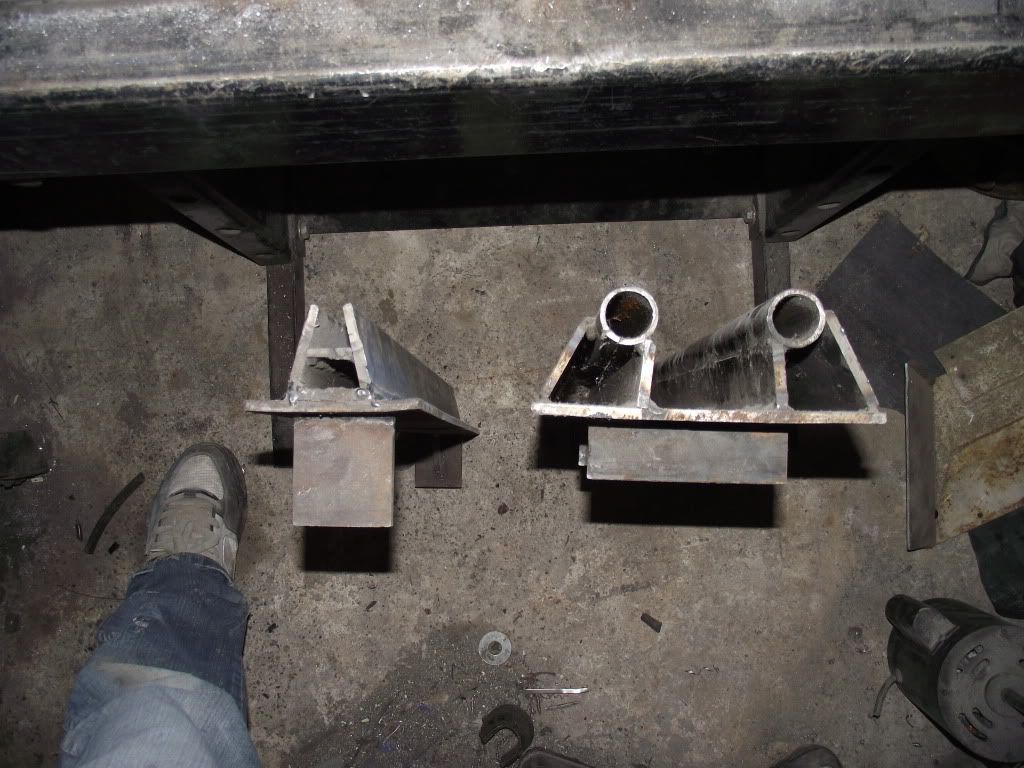
an end shot of the lower dies shows their construction,which is fairly simple but must be reasonably accurate.the two working edges must be parallel and level with each other,or the bend will not be even.
the wider die was made to fit directly on the press base frame,and the narrower die sits in the wider one.
i use the wider die to form up to 1/4'' steel,and do large radius bends on sheet metal.the narrow die is used for tighter bends on 12ga and under steel or 1/8'' and under aluminum,though it has been used for 3/16'' aluminum for certain jobs.
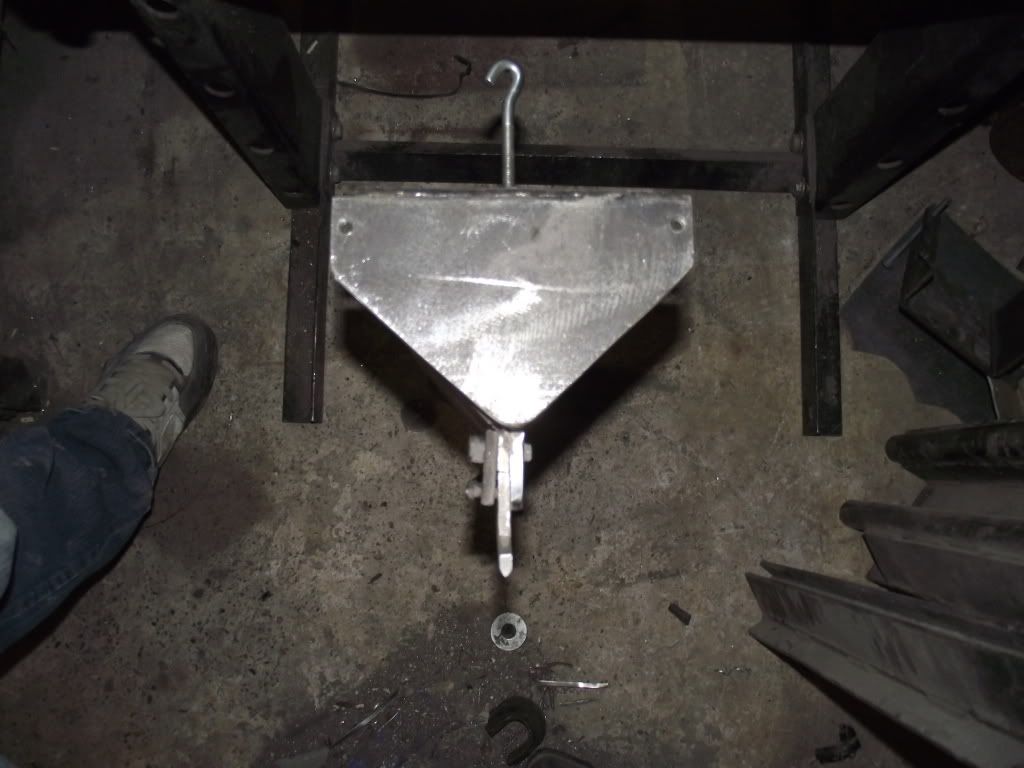
an end shot of the upper die.this part is made much more substatially,as it needs to take the loads from it's full width and transfer them to the jack base at it's center so there is always a large bending load on it.
i started with a piece of 6'' channel iron turned leg down to make the top plate.a length of 5/16x4'' bar stock was welded perpendicular to the center of the channel pointing downward.
this is the working surface for the die to push against.a 4 1/2'' piece of 1/4'' was plug welded to the backside of this,forming a backing step to clamp against.clamp sections are bolted through these to hold the dies in place.
angled pieces of 1/4'' give stabillity and help transfer forces to the outer legs of the channel iron.
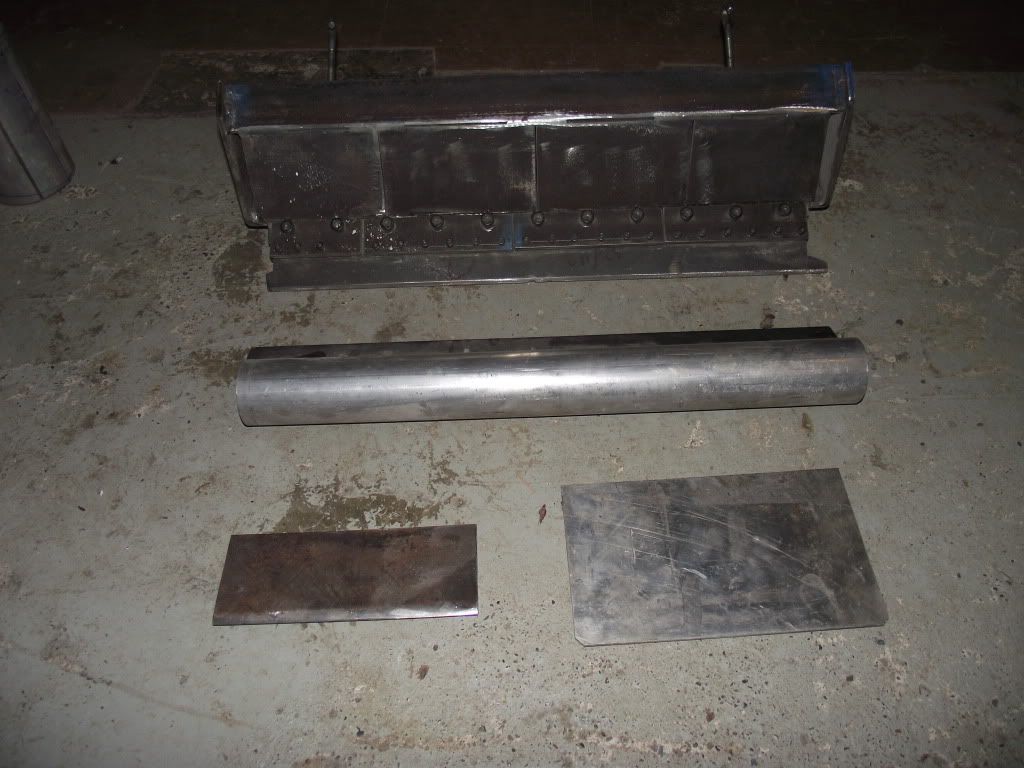
some of the dies i've made for different jobs.this is why i went to the trouble of making the dies removeable,by changing them out it substantially increases the versatillity of the press brake.
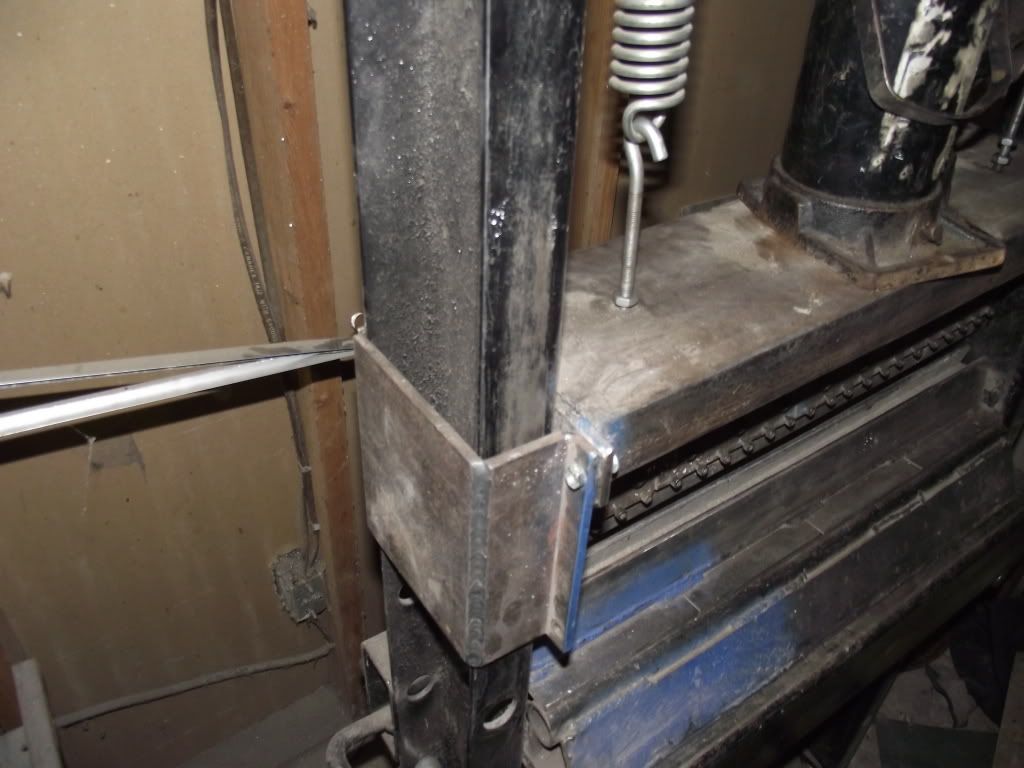
another important item is these brackets on the outside of the upper die.they keep the die lined up on the uprights but still leave enough room for the assembly to slide up and down.also,the hooks that go on the regular press upper slide for the return springs are put on this die when it's used.
changing over from press to brake operation takes about 3 minutes.
the blue paint is to mark the front of each of the parts,so setup goes quicker.
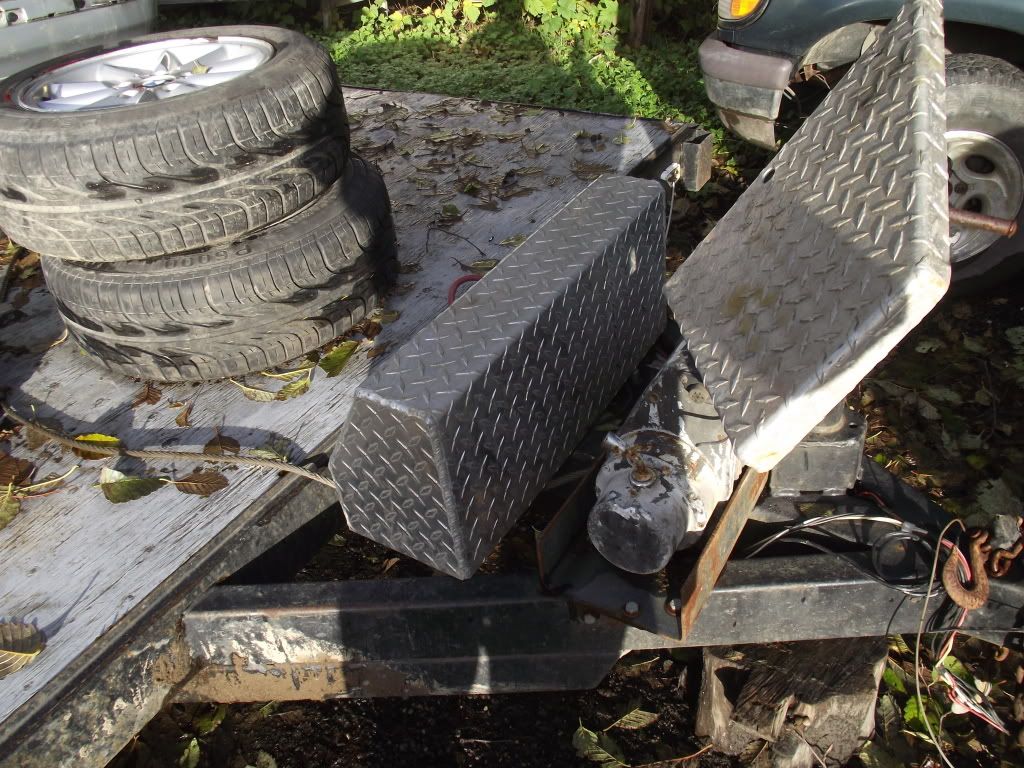
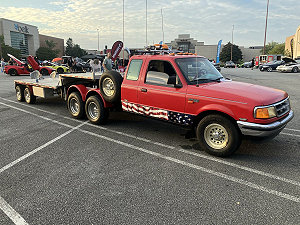
the installation of the winch on my car trailer illustrates how usefull this machine can be.the winch tray was formed out of 3/16'' steel,24'' wide.the winch cover was formed from 3/16'' aluminum checker plate,as was the battery cover sitting on top of the winch.

which i used to form up the parts.there were some questions about it's construction which i will try to address here.
at the same time it would be interesting to see some of the homemade tools others have come up with to do various jobs.

first,these are the parts for the fuel tank in question.where possible,bends will make the project look better and save on welding.

an end shot of the lower dies shows their construction,which is fairly simple but must be reasonably accurate.the two working edges must be parallel and level with each other,or the bend will not be even.
the wider die was made to fit directly on the press base frame,and the narrower die sits in the wider one.
i use the wider die to form up to 1/4'' steel,and do large radius bends on sheet metal.the narrow die is used for tighter bends on 12ga and under steel or 1/8'' and under aluminum,though it has been used for 3/16'' aluminum for certain jobs.

an end shot of the upper die.this part is made much more substatially,as it needs to take the loads from it's full width and transfer them to the jack base at it's center so there is always a large bending load on it.
i started with a piece of 6'' channel iron turned leg down to make the top plate.a length of 5/16x4'' bar stock was welded perpendicular to the center of the channel pointing downward.
this is the working surface for the die to push against.a 4 1/2'' piece of 1/4'' was plug welded to the backside of this,forming a backing step to clamp against.clamp sections are bolted through these to hold the dies in place.
angled pieces of 1/4'' give stabillity and help transfer forces to the outer legs of the channel iron.

some of the dies i've made for different jobs.this is why i went to the trouble of making the dies removeable,by changing them out it substantially increases the versatillity of the press brake.

another important item is these brackets on the outside of the upper die.they keep the die lined up on the uprights but still leave enough room for the assembly to slide up and down.also,the hooks that go on the regular press upper slide for the return springs are put on this die when it's used.
changing over from press to brake operation takes about 3 minutes.
the blue paint is to mark the front of each of the parts,so setup goes quicker.

the installation of the winch on my car trailer illustrates how usefull this machine can be.the winch tray was formed out of 3/16'' steel,24'' wide.the winch cover was formed from 3/16'' aluminum checker plate,as was the battery cover sitting on top of the winch.
Last edited:


