nice job! can you post more pics and info one yout SASswap? i like seeing everyones ideas before starting mine
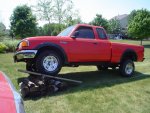
Sure, The axle started out as a 78-79 F150 axle, i didnt want full width, so i narrowed it down 6" per the tech section. Next i filled it with an Aussie locker and 4.56 gears. The drivers side axleshaft is out of the original 78-79 axle, with a new spicer 297x ujoint and full snap rings. The passenger is a chromoly knockoff from Bronco Graveyard for an early Bronco, it was already ground out for full snap rings, so i also put in a new Spicer joint. All the rest was standard replacement stuff; balljoints, knuckles, spindles, hubs, bearings. After a few test drives i changed the front brake calipers out for the larger Thunderbird calipers and an 1 1/4" master cylinder from a '96 F350 with the funky brake adapter available only from a Ford dealer. See Plumcrazys build for more info on the Thunderbird caliper upgrade. The Radius arms are cut orignals that i bought from a member on here. Then i added 3' long pieces of 2" .250 wall DOM. See BrayD's "Daily Doubler Build" for more into on radius arms, i build mine just like his. For radius arm bushings i used MetalCloaks Duraflex joints. They are a Clevite rubber joint that work and flex like a heim, and worth every penny!!!! The crossmember i build out of 1 1/2"x 6" 3/16" wall steel, about 32" long. I welded 3/16" plate to the sides to make the crossmember to make the crossmember bolt onto the chassis, and easy to remove. I attached it with 8- 9/16 grade 8 bolts. The axle end of the radius arms i used James Duffs 7 degree c bushings. The Trackbar bracket i had a hard time with, but finally settled on James Duffs Ranger SAS bracket for $150. It was costly, but it triangulates the lower drivers side coil bucket bolts to the engine crossmember. It bolts in using the coild bucket bolts, the engine mount bolt, and 2 more bolts that you drill into the engine crossmember. I did have to slighly grind it to fit. Its VERY stong. The coil buckets are original, but where the original shock was i cut and added 1/8" plate to make it a stand alone coild bucket, and used F250 shock towers that i extended 3". Then i used the longest shocks i could find; Rancho's with 15" travel. The steering was Ruffstuff's Gm 1 ton steering kit. The trackbar was also 1 1/2" .250 wall DOM, this time with Ruffstuffs heims.
For the record, using the James Duff trackbar bracket, the original steering pitman arm, Ruffstuffs Gm 1 ton steering kit, the original axle's trackbar mount, and Rough Country 6.5" XJ springs.... The trackbar and draglink were only 1/8" different in length and almost perfectly parallel!!!
With this setup i have yet to come up with a bumpstop, but have an idea once summer comes. I also tested everything for clearance and everything was good to go, i see no areas that SHOULD contact.
I wish i had more pics, but thats a pretty accurate parts and info list. Any other questions please ask. As of today i have about 850 miles on the SAS.

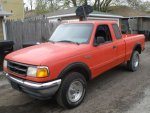 50.8 KB Views: 300
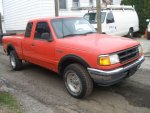 50.6 KB Views: 304
 47 KB Views: 290
 44.8 KB Views: 292