- Joined
- Aug 30, 2007
- Messages
- 2,439
- Reaction score
- 17
- Points
- 38
- Age
- 36
- Location
- Cass Co, Missouri
- Vehicle Year
- 1994
- Make / Model
- Ford
- Engine Size
- 4.0L
- Transmission
- Manual
I bought 2 HID kits, from http://www.vvme.com 9007 & H3 both single beam. I opted for the 6K sets, because I would rather have more lighting performace than the bright blue color.
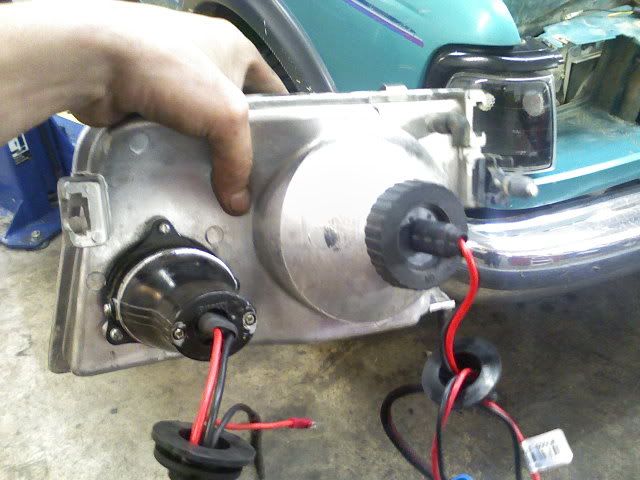
I used the regular lights as high beams and the projectors as low beams.
The projector housings have a shield in them that only allows light to shine down, thus they make a perfect low beam for HIDs.
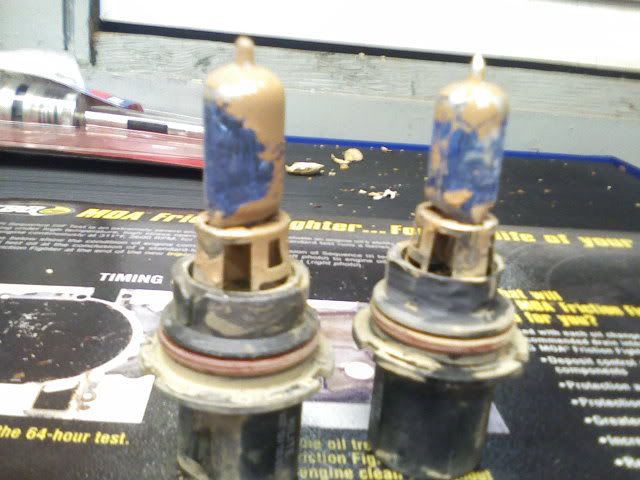
These are my old "xenon" bulbs. They worked ok, even with mud on them. But there was much need for improvement.
This was the origonal H3 bulb, this happened after 5 min of first being turned on. Somebody must have touched the glass at the factory.
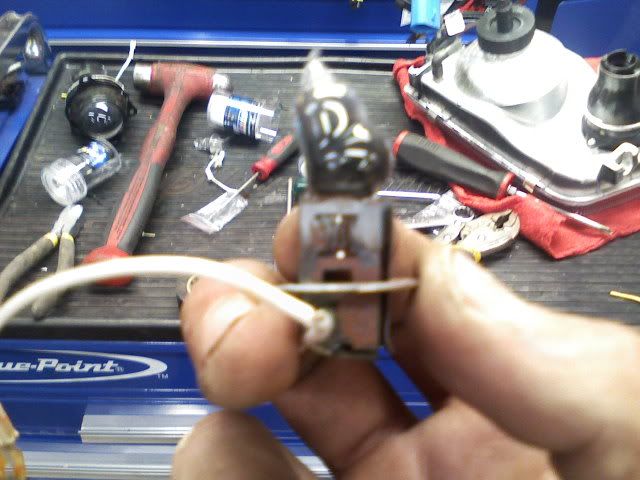
These are the modifications needed to be done to the projectors to run a HID bulb. First, you must drill a 11/16 hole in the tail cap of the housing, then cut a notch so you can slide the wires through it. Then you need a spacer to hold the bulb in, I made mine from a piece of clear tubing (vacuum or fuel hose would work too), you must have a slice in it to put it around the end of the bulb.

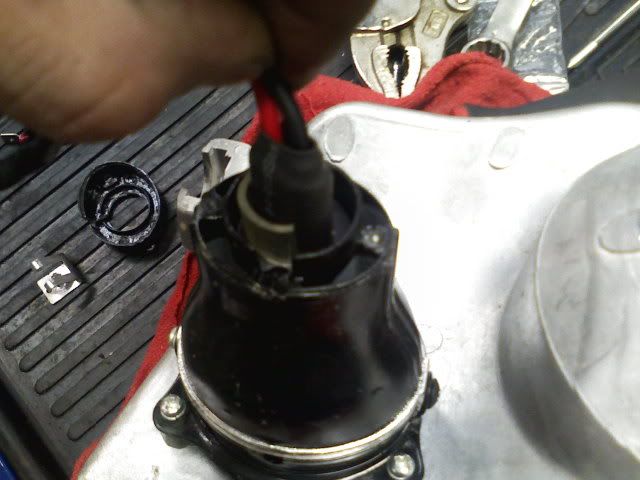
Put the bulb in the back of the housing. Make sure it is completely seated and square in the housing. Then add your spacer.
Then put the tail cap back on, and tighten up all the screws.
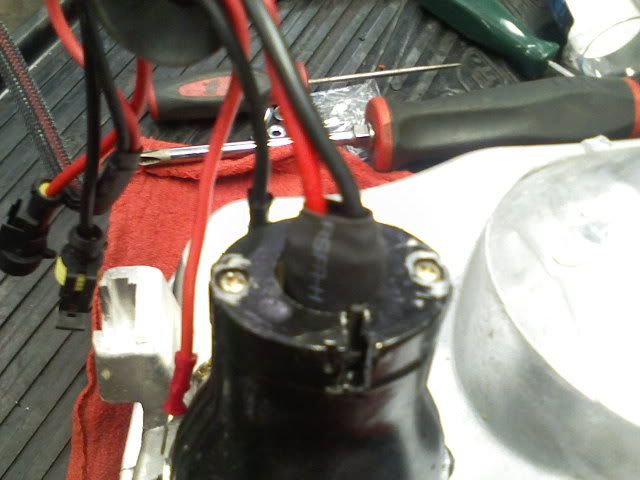
This is what it looks like all done. the other bulb installs just as the origional ones do.
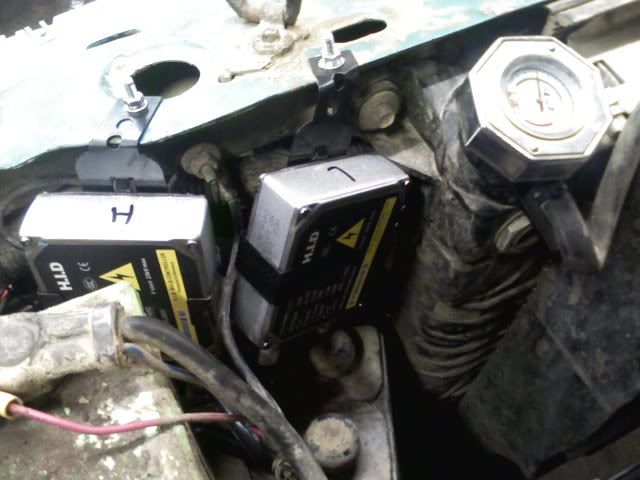
This is where and how I mounted the ballasts for the drivers side. Note that I labeled the boxes "H" and "L" for easy ID if I run into problems later on.
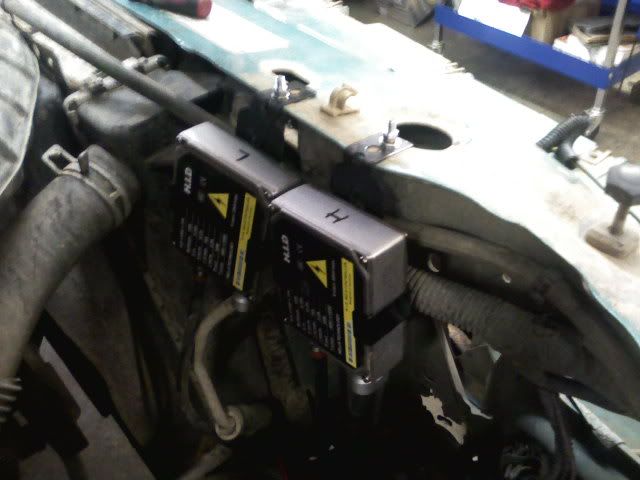
And this is where I mounted the passengers side ballasts. Labeled as well.
The Wiring...
The high beams/9007s: all your have to do with these is swap the pin from the left side to the right side of the plug on the bulb end of the harness, the middle pin is the ground, dont do anything with the middle pin. This makes it so that this bulb is turned on by the high beam instead of the low beam.
The low beams/H3s: The red wire of the 3 in the headlight plug must be cut and stripped, crimp/solder a male spade connector to it. That is now the power wire to run these as low beams. Then you must run a ground wire for each of the bulbs. Now the projectors are wired as low beams.
The HID setup:To wire up the HIDs is so simple you will laugh, no other cutting and splicing. A simple plug and play, just follow the suppied directions, if you think you need them.
It was easier to remove the grill and headlight housings to do this.
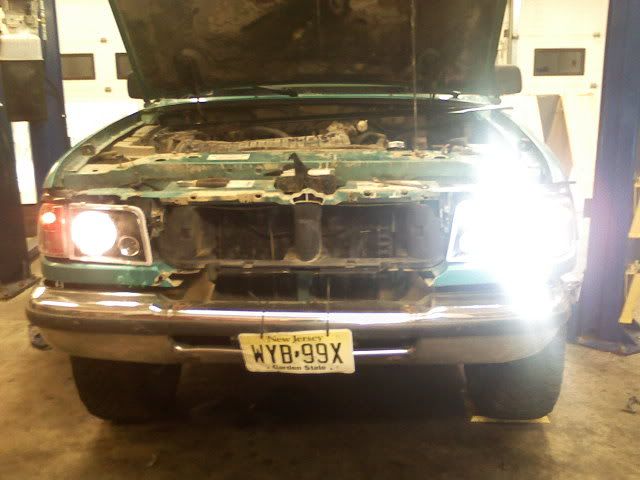
Halfway done, Halogen Vs HID
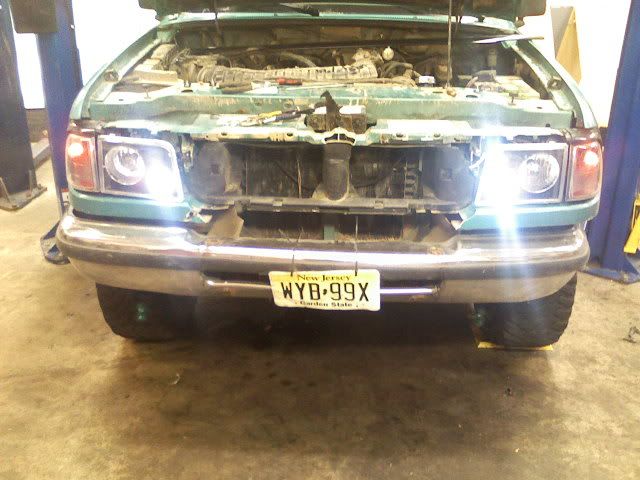
HIDs installed in the low beams/ projectors. Note that then don't glare upwards. Also note how bright they are in a very well lit shop.
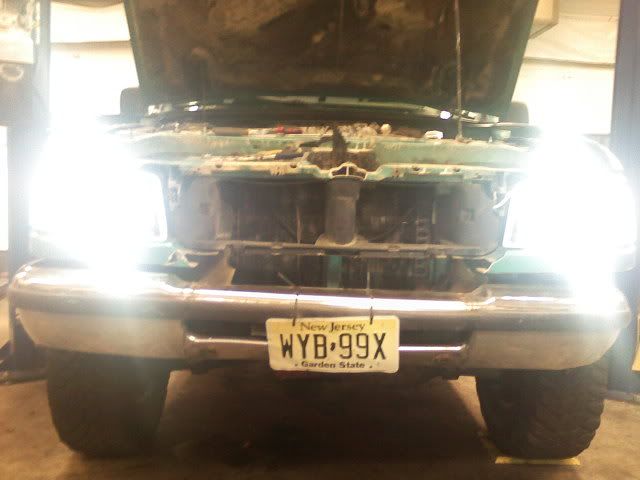
HIDs installed in the high beams. Theres the "burn your retinas out" HID performance. Also note that this pic was also taken in a very well lit shop.
I used the regular lights as high beams and the projectors as low beams.
The projector housings have a shield in them that only allows light to shine down, thus they make a perfect low beam for HIDs.
These are my old "xenon" bulbs. They worked ok, even with mud on them. But there was much need for improvement.
This was the origonal H3 bulb, this happened after 5 min of first being turned on. Somebody must have touched the glass at the factory.
These are the modifications needed to be done to the projectors to run a HID bulb. First, you must drill a 11/16 hole in the tail cap of the housing, then cut a notch so you can slide the wires through it. Then you need a spacer to hold the bulb in, I made mine from a piece of clear tubing (vacuum or fuel hose would work too), you must have a slice in it to put it around the end of the bulb.
Put the bulb in the back of the housing. Make sure it is completely seated and square in the housing. Then add your spacer.
Then put the tail cap back on, and tighten up all the screws.
This is what it looks like all done. the other bulb installs just as the origional ones do.
This is where and how I mounted the ballasts for the drivers side. Note that I labeled the boxes "H" and "L" for easy ID if I run into problems later on.
And this is where I mounted the passengers side ballasts. Labeled as well.
The Wiring...
The high beams/9007s: all your have to do with these is swap the pin from the left side to the right side of the plug on the bulb end of the harness, the middle pin is the ground, dont do anything with the middle pin. This makes it so that this bulb is turned on by the high beam instead of the low beam.
The low beams/H3s: The red wire of the 3 in the headlight plug must be cut and stripped, crimp/solder a male spade connector to it. That is now the power wire to run these as low beams. Then you must run a ground wire for each of the bulbs. Now the projectors are wired as low beams.
The HID setup:To wire up the HIDs is so simple you will laugh, no other cutting and splicing. A simple plug and play, just follow the suppied directions, if you think you need them.
It was easier to remove the grill and headlight housings to do this.
Halfway done, Halogen Vs HID
HIDs installed in the low beams/ projectors. Note that then don't glare upwards. Also note how bright they are in a very well lit shop.
HIDs installed in the high beams. Theres the "burn your retinas out" HID performance. Also note that this pic was also taken in a very well lit shop.
")