dhkonrad
2013 Offroad TOTY
Supporting Member
OTOTM Winner
Solid Axle Swap
2013 Truck of The Year
TRS Banner 2012-2015
- Joined
- Nov 8, 2010
- Messages
- 890
- Reaction score
- 1
- Location
- Auburn California/ Boise Idaho
- Vehicle Year
- 1993
- Make / Model
- Ford
- Engine Size
- 4.0L
- Transmission
- Manual
Original Poster: dhkonrad
Difficulty: 1 out of 10
Time to install: 1-2 hours
Disclaimer: The Ranger Station.com, The Ranger Station.com Staff, nor the original poster are responsible for you doing this modification to your vehicle. By doing this modification and following this how-to you, the installer, take full responsibility if anything is damaged or messed up. If you have questions, feel free to PM the original poster or ask in the appropriate section of The Ranger Station.com forums.
Fender flares! Whether you want fender flares to keep mud off the side of your truck, or merely to have fender flares to comply with state laws, this article will show you how to make and install fender flares very inexpensively.
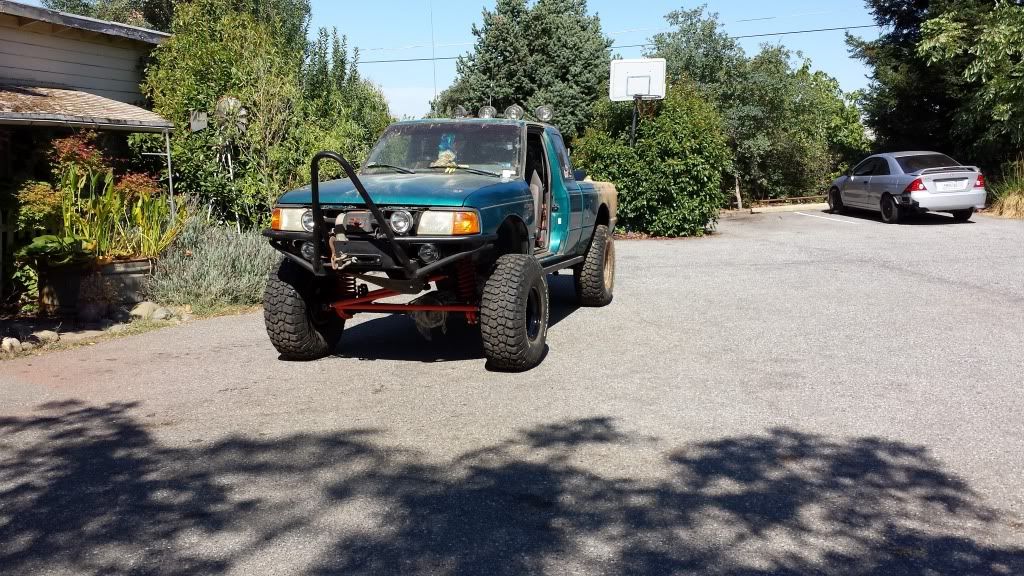
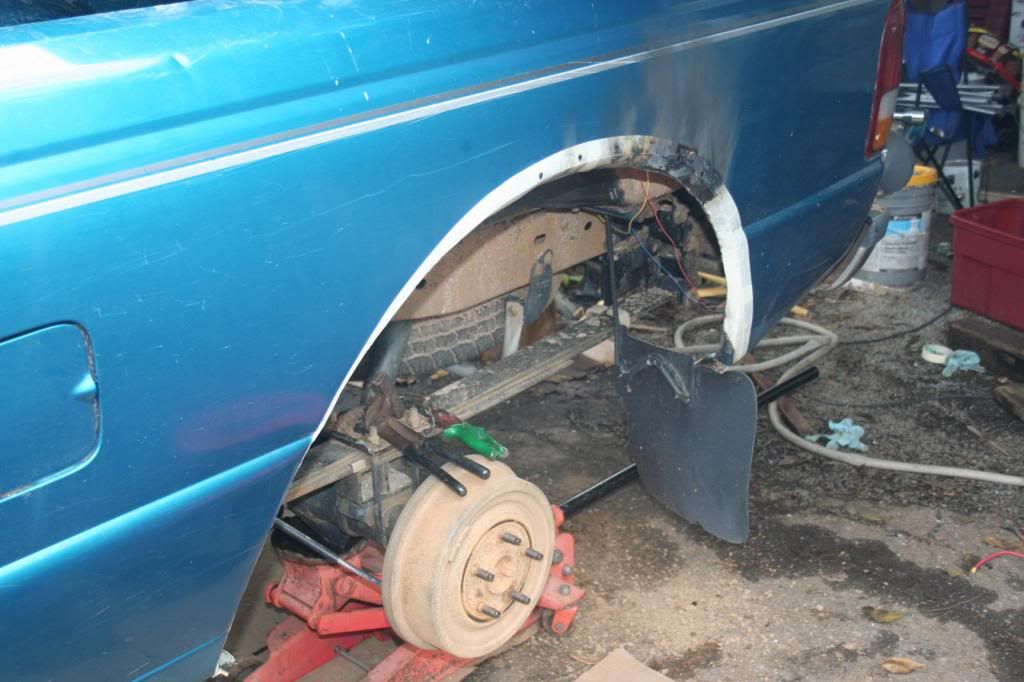
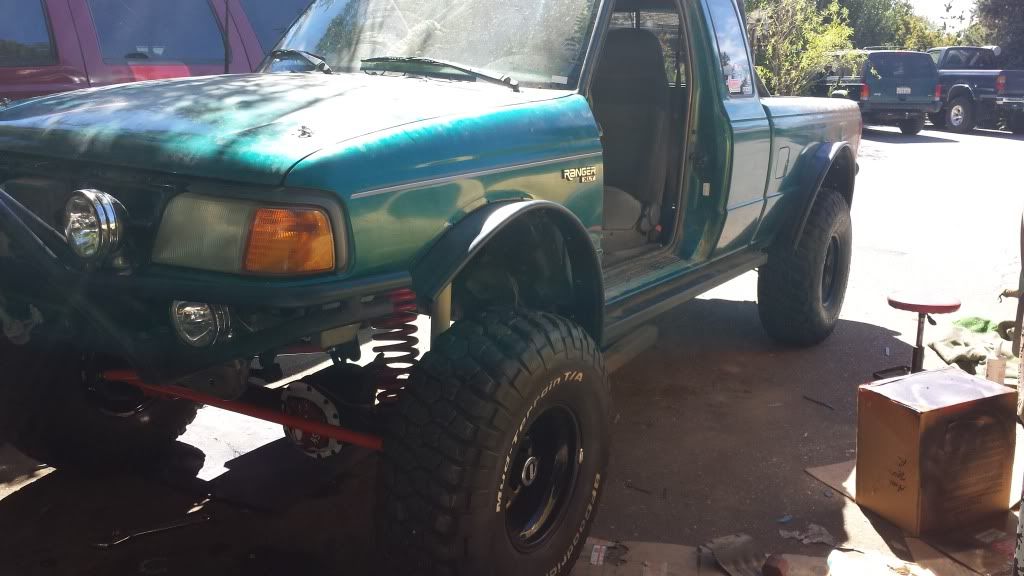
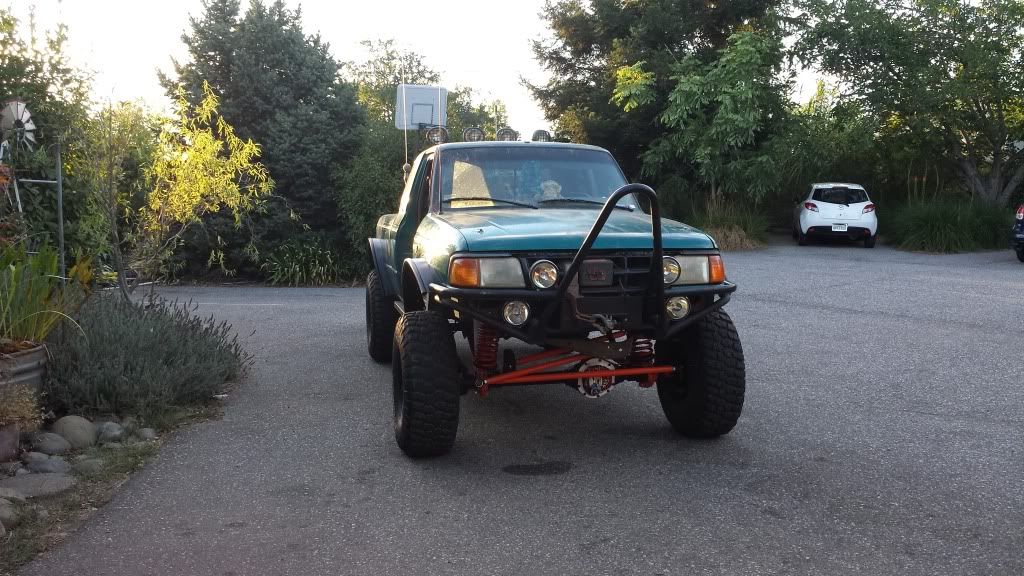
Take your truck from this:
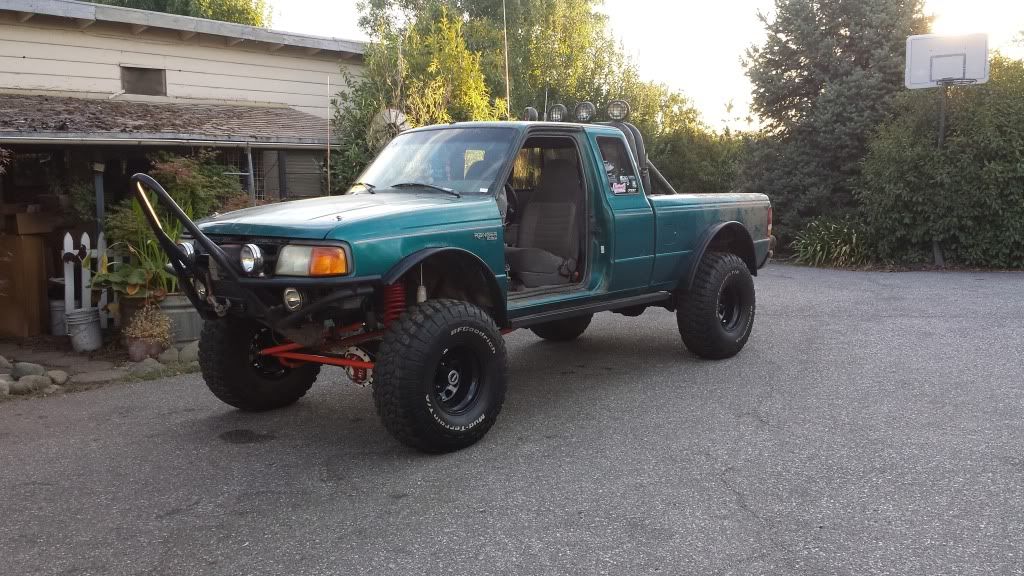
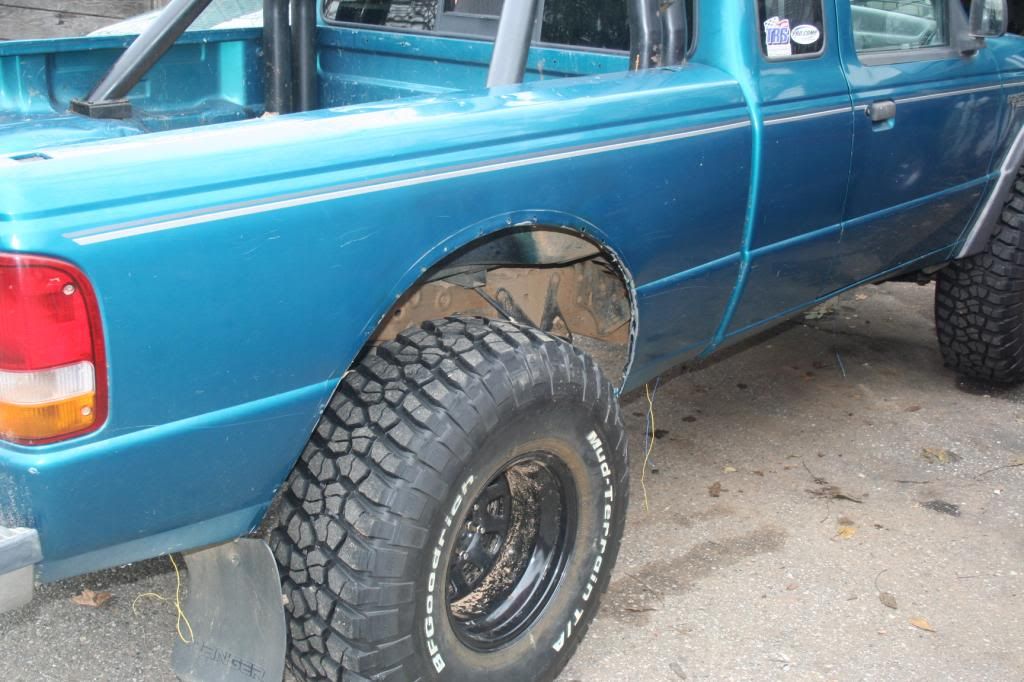
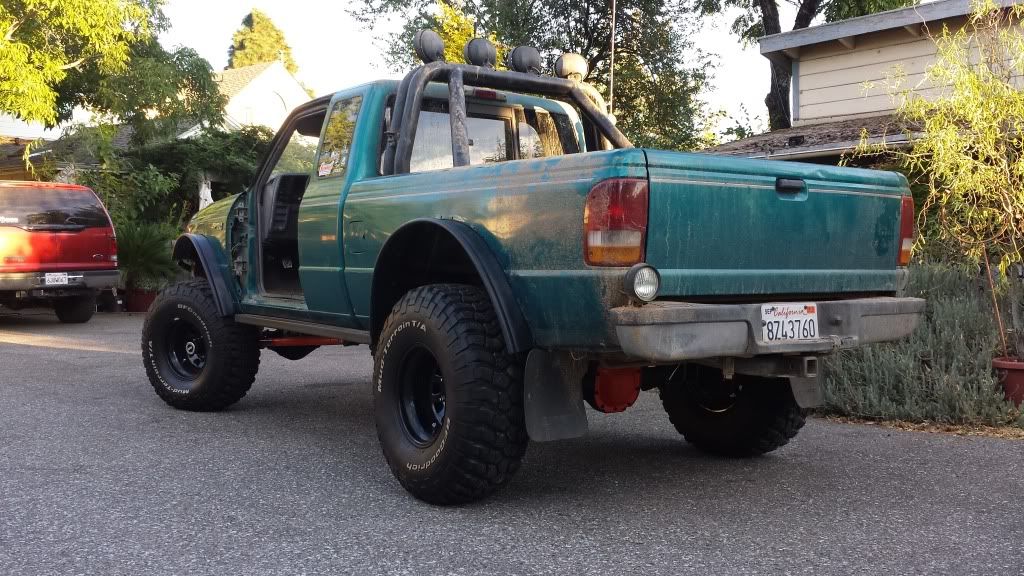
to this!
Tools Needed:
- drill gun
- tin snips, large scissors, or a sharp knife
-a second pair of hands may be helpful, but not necessary
-pliers or preferably sheet metal pliers Example clicky!
Parts Needed:
- sheet metal screws with a large head, or with washers
- lawn edging (readily available at home depot)
----------------------------------------------------------------------------------------------------------------------------------------------------
This write up is assuming you already have cut fenders. If you do not, here is an article on that.
If you do not have cut fenders, the procedure may be modified to fit, but the rest of the article will assume you have cut fenders.
The type of lawn edging you purchase is up to you, depending on what you think will look best, but I used this type
clicky!!
And it worked really well for this application.
----------------------------------------------------------------------------------------------------------------------------------------------------
Now that you have all the required materials, lets start.
1) first we will need to prepare your cut fenders for attaching the lawn edging.
If your fenders do not already have a "lip" at the bottom
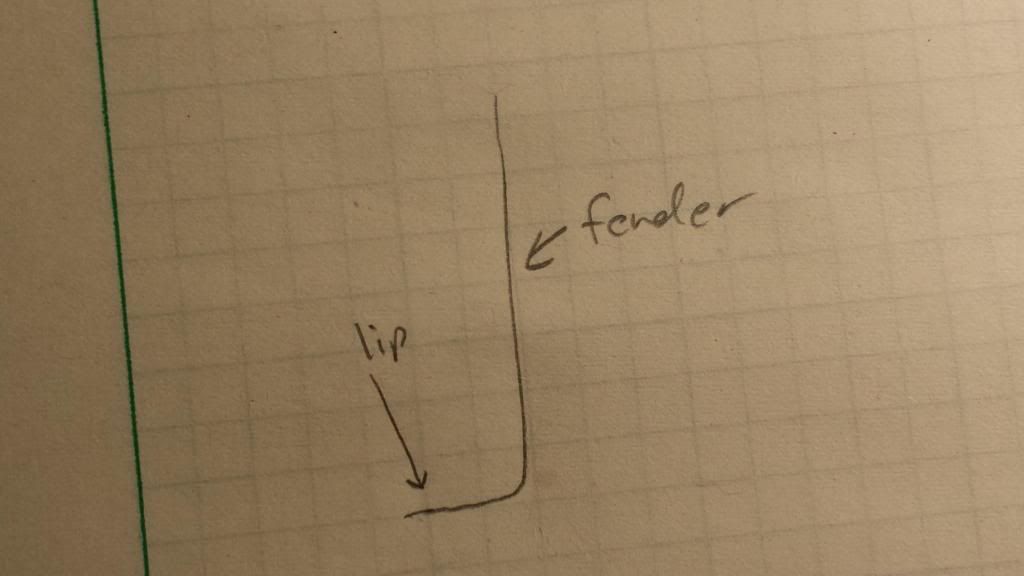
then you will need to add one. This can be done simply by using your pliers (or sheet metal pliers) to gently fold over the bottom inch or so of fender. This should be done in small increments to avoid wrinkling the fender
Here is a picture during the folding over
and here is approximately what it should look like after the fact
----------------------------------------------------------------------------------------------------------------------------------------------------
2) Cut the edging material to the desired length for each wheel well.
----------------------------------------------------------------------------------------------------------------------------------------------------
3) Now comes the step of attaching the material to the fender. This part is a little tricky and may take a little massaging to have it look exactly how you want, but is relatively pretty simple.
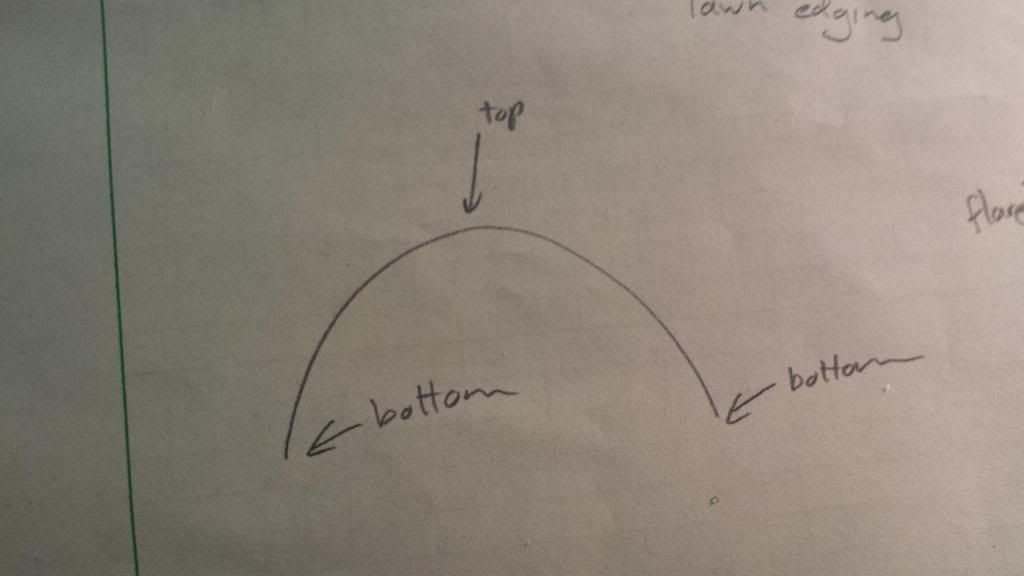
The general idea how the edging is attached to the fender is shown in this diagram:
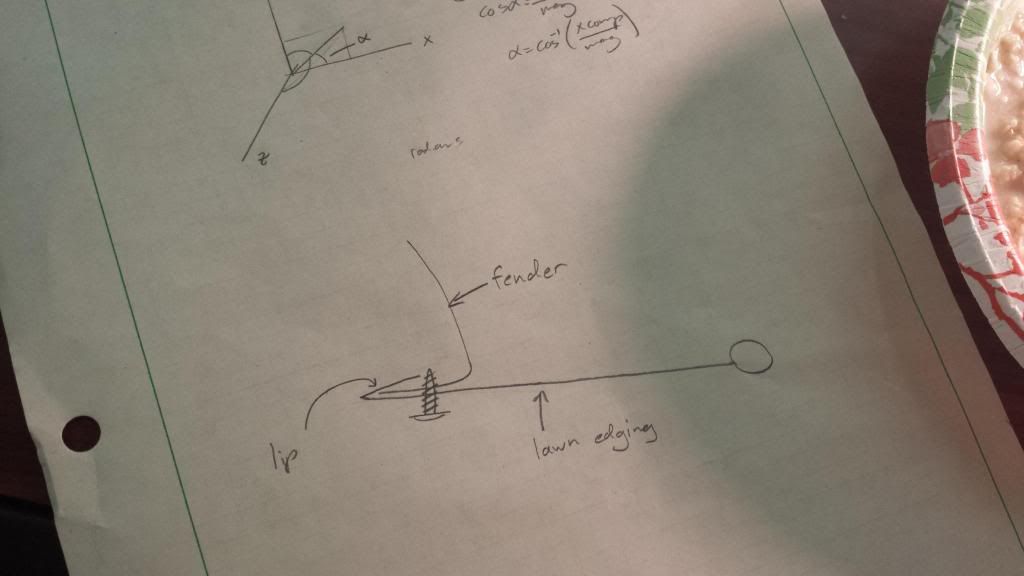
As you can see, there is a lip on the bottom of the lawn edging (at least there was on all the different types I saw at home depot) and you will hook that on the lip of your fender all the way around.
You can then run a sheet metal screw through the lawn edging into the lip of the fender to hold them secure. Be careful not to over tighten the screws as it will deform the plastic flares and possibly pull a screw right through the plastic.
I chose to use screws like this
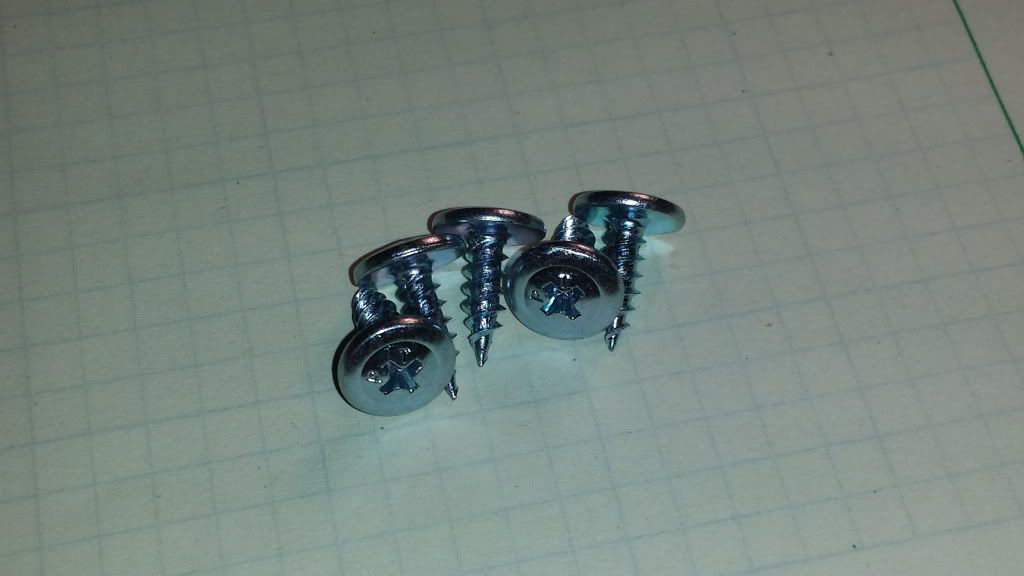
for two reasons. One because the head was large so it wouldn't slip through the plastic fender flares, and two because the heads are rather flush so it wont chew up your tire if you happen to stuff one all the way into the fender.
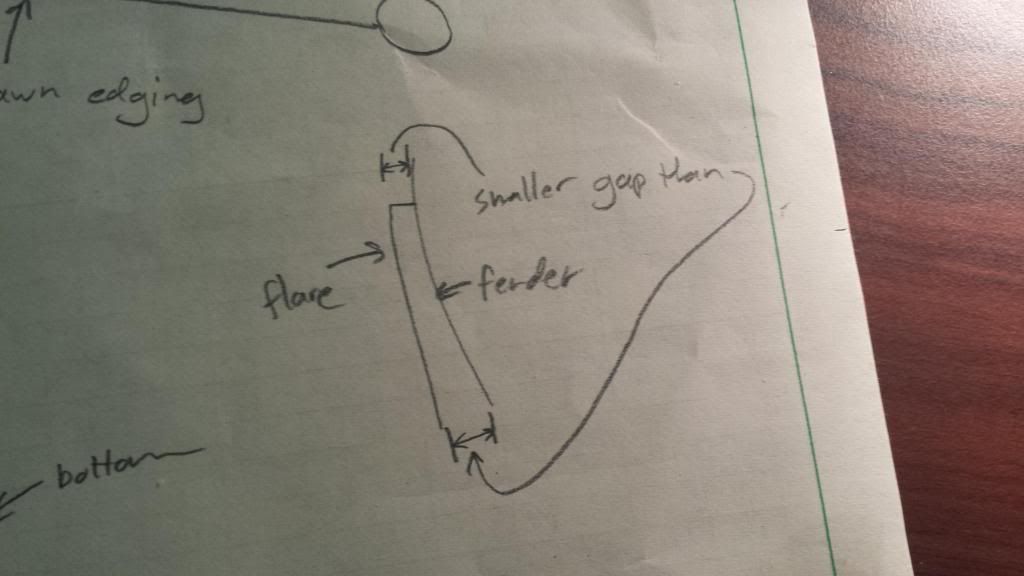
The tricky part is on most rangers, the fenders are not straight up and down, as seen here:

If you pull the edging out as far as you can so that the lip of the fender is right up against the lip of the lawn edging, it will cause the fender flare to take on a funny shape as seen here:
It is rather flat in the front and the curve comes to a point at about 2 o'clock of the wheel well.
In order to counteract that, I pushed the fender flares in slightly at the top, and cut the lip off at the bottom of the fender, so that I could pull them out slightly (see diagrams)
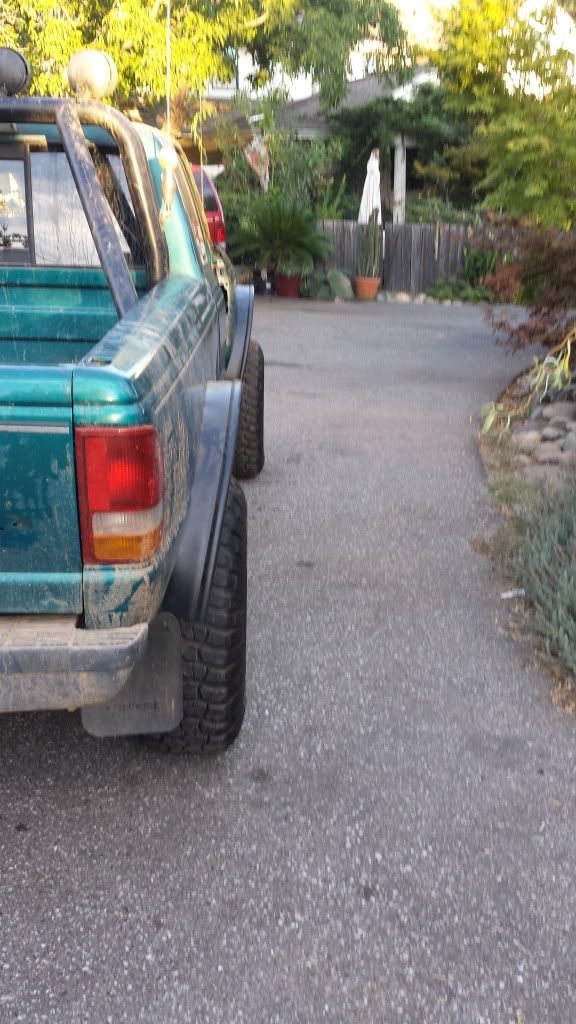
You can see the results of what I am talking about in these pictures
Something to note is that the rear fenders have an inner fender that comes out to meet the outer fender. When I cut my fenders I cut into the inner fender so I was able to slide the lip of the fender flare in between them. This however may not be the case with your application, and some modifications may be necessary.
----------------------------------------------------------------------------------------------------------------------------------------------------
Again, if you have any questions, please feel free to PM me.
Difficulty: 1 out of 10
Time to install: 1-2 hours
Disclaimer: The Ranger Station.com, The Ranger Station.com Staff, nor the original poster are responsible for you doing this modification to your vehicle. By doing this modification and following this how-to you, the installer, take full responsibility if anything is damaged or messed up. If you have questions, feel free to PM the original poster or ask in the appropriate section of The Ranger Station.com forums.
Fender flares! Whether you want fender flares to keep mud off the side of your truck, or merely to have fender flares to comply with state laws, this article will show you how to make and install fender flares very inexpensively.
Take your truck from this:

to this!

Tools Needed:
- drill gun
- tin snips, large scissors, or a sharp knife
-a second pair of hands may be helpful, but not necessary
-pliers or preferably sheet metal pliers Example clicky!
Parts Needed:
- sheet metal screws with a large head, or with washers
- lawn edging (readily available at home depot)
----------------------------------------------------------------------------------------------------------------------------------------------------
This write up is assuming you already have cut fenders. If you do not, here is an article on that.
If you do not have cut fenders, the procedure may be modified to fit, but the rest of the article will assume you have cut fenders.
The type of lawn edging you purchase is up to you, depending on what you think will look best, but I used this type
clicky!!
And it worked really well for this application.
----------------------------------------------------------------------------------------------------------------------------------------------------
Now that you have all the required materials, lets start.
1) first we will need to prepare your cut fenders for attaching the lawn edging.
If your fenders do not already have a "lip" at the bottom

then you will need to add one. This can be done simply by using your pliers (or sheet metal pliers) to gently fold over the bottom inch or so of fender. This should be done in small increments to avoid wrinkling the fender
Here is a picture during the folding over

and here is approximately what it should look like after the fact

----------------------------------------------------------------------------------------------------------------------------------------------------
2) Cut the edging material to the desired length for each wheel well.
----------------------------------------------------------------------------------------------------------------------------------------------------
3) Now comes the step of attaching the material to the fender. This part is a little tricky and may take a little massaging to have it look exactly how you want, but is relatively pretty simple.
The general idea how the edging is attached to the fender is shown in this diagram:

As you can see, there is a lip on the bottom of the lawn edging (at least there was on all the different types I saw at home depot) and you will hook that on the lip of your fender all the way around.
You can then run a sheet metal screw through the lawn edging into the lip of the fender to hold them secure. Be careful not to over tighten the screws as it will deform the plastic flares and possibly pull a screw right through the plastic.
I chose to use screws like this

for two reasons. One because the head was large so it wouldn't slip through the plastic fender flares, and two because the heads are rather flush so it wont chew up your tire if you happen to stuff one all the way into the fender.
The tricky part is on most rangers, the fenders are not straight up and down, as seen here:

If you pull the edging out as far as you can so that the lip of the fender is right up against the lip of the lawn edging, it will cause the fender flare to take on a funny shape as seen here:

It is rather flat in the front and the curve comes to a point at about 2 o'clock of the wheel well.
In order to counteract that, I pushed the fender flares in slightly at the top, and cut the lip off at the bottom of the fender, so that I could pull them out slightly (see diagrams)


You can see the results of what I am talking about in these pictures


Something to note is that the rear fenders have an inner fender that comes out to meet the outer fender. When I cut my fenders I cut into the inner fender so I was able to slide the lip of the fender flare in between them. This however may not be the case with your application, and some modifications may be necessary.
----------------------------------------------------------------------------------------------------------------------------------------------------
Again, if you have any questions, please feel free to PM me.
Last edited: