
Quick Answer: This guide explains how to lift and modify the Independent Front Suspension (IFS) used on 1998–2011 Ford Ranger 4×4 models. It covers torsion bar lifts, torsion keys, pre-key mods, full suspension lift kits, coilover conversions, rear lift options, and how suspension changes affect CV joints, axles, tire size, gearing, and off-road reliability.
What Is the IFS Suspension on a 1998–2011 Ranger?
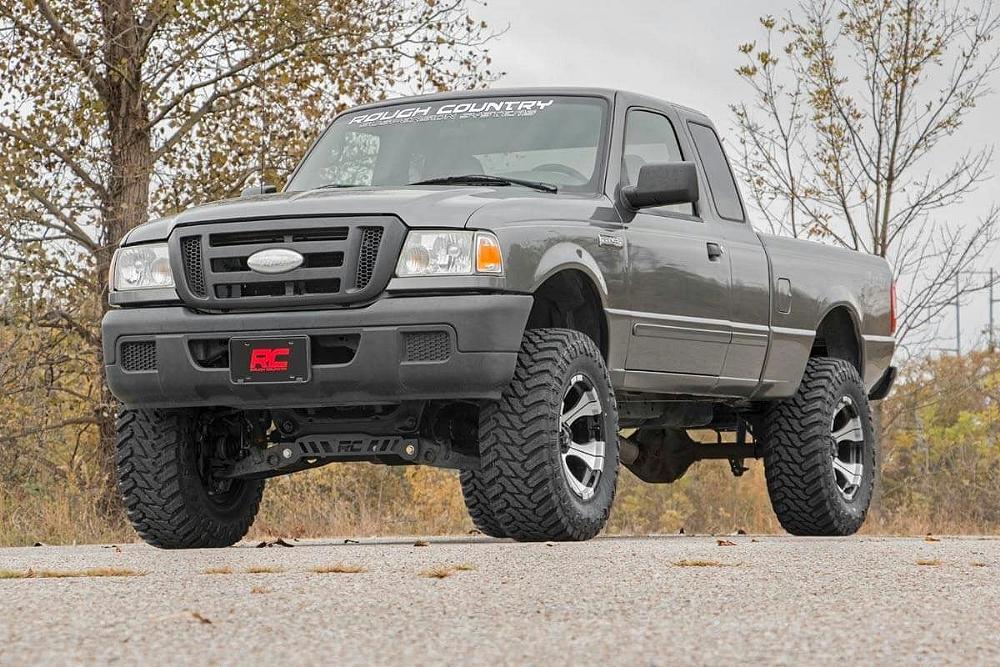
The 1998–2011 Ford Ranger 4×4 uses an Independent Front Suspension (IFS) featuring torsion bars and a leaf spring rear suspension. Each front wheel moves independently, improving on-road ride quality and steering precision compared to earlier TTB systems.
This suspension uses:
- Torsion bars instead of coil springs. This system uses long steel bars (torsion bars) that twist under load. One end is keyed to the lower control arm, and the other is indexed into a torsion key at a crossmember near the middle of the truck.
- Upper and lower control arms
- CV axles to deliver power to each front wheel
- A front differential (Dana 35) mounted to the frame
- Rear (Leaf Springs): A standard solid axle setup with multi-leaf spring packs located under the frame.
If you’re not familiar with how this differs from earlier Rangers, start here: Ford Ranger Front Suspension Types Explained.
The factory Ford engineering overview can be found here: 1998 Ranger Front Suspension PDF.
Note: The standard rotation Dana 35 is not the same as the reverse rotation Dana 35 used in the 1990-1997 Ford Ranger.
Commonly Referred to as a Short-Long Arm (SLA)
The 1998–2011 Ford Ranger 4×4 uses a Short-Long Arm (SLA) independent front suspension setup.
Key Characteristics of the SLA Setup
- Double Wishbone Design: It features two control arms of unequal length: a shorter upper control arm and a longer lower control arm.
- Purpose of Unequal Lengths: This specific design is engineered to minimize track width changes during suspension travel, which helps keep the tires flatter to the road (better camber control) as the suspension compresses and rebounds.
- Spring Type: While most modern SLA systems use coil springs, the 1998–2011 Ranger 4×4 and “Edge/Sport” models specifically use torsion bars as the spring medium
How the IFS Suspension Is Lifted
Lifting an IFS Ranger is fundamentally different from lifting a solid axle or TTB truck. Instead of changing spring height, most IFS lifts work by:
- Increasing torsion bar preload (cranking or re-indexing)
- Replacing factory torsion keys with lift keys (leveling kits)
- Lowering front differential and control arm pivot points (suspension lift kits)
- New, taller knuckles raise the connection points (ball joints) for the upper and lower control arms, and the tie rod ends to a position that mimics the factory angles at the new, lifted height to correct steering and CV geometry
Unlike TTB, IFS lifts are limited by CV joint angles and control arm travel. Push it too far without correcting geometry, and reliability suffers.
1998-2011 Ford Ranger 4×4 Suspension Kit
Rear Suspension Components and Axle Wrap
Suspension lift blocks significantly increase axle wrap, while add-a-leaf’s and full replacement lift spring packs reduce or prevent it by increasing the stiffness of the spring pack. Axle wrap is the “S” shape bending of the leaf springs under acceleration or braking forces.
Suspension Lift Blocks
- Description: A spacer block is installed between the rear axle and the leaf spring pack to increase ride height. This is a cost-effective lifting method.
- Axle Wrap Relationship: Blocks increase the vertical distance between the axle and the leaf spring, which provides the axle with more leverage to twist or “wrap” the spring during acceleration or hard braking. This added leverage makes axle wrap worse and can lead to issues like wheel hop, premature U-joint wear, and leaf spring damage.
- Mitigation: If using lift blocks, especially taller ones (over 6 inches), traction bars (also known as ladder bars) are recommended to prevent the axle from twisting and stop axle wrap.
Add-A-Leaf’s (AAL)
- Description: An extra leaf spring is added into the existing leaf pack to provide additional support and lift (typically 1-3 inches). This is a more involved installation than lift blocks as the spring pack needs to be disassembled.
- Axle Wrap Relationship: The additional leaf increases the overall stiffness and load capacity of the spring pack. A stiffer spring pack is more resistant to the twisting forces that cause axle wrap, thus reducing or helping to eliminate the problem.
- Drawbacks: Adding a leaf can make the unloaded ride quality stiffer and harsher.
Replacement Lift Spring Packs
- Description: The entire factory leaf spring assembly is replaced with a new, custom-designed multi-leaf pack engineered for a specific lift height and weight capacity.
- Axle Wrap Relationship: These are the ideal solution for lifting a vehicle because they are specifically designed to handle the intended use (e.g., heavy hauling, off-roading, specific lift height) and are engineered to minimize axle wrap. A well-designed full leaf pack provides the proper balance of flexibility and stiffness, and the multi-leaf design naturally resists the S-shape bending of axle wrap better than stock springs or those with simple block additions.
- Benefits: Full replacement packs generally offer better ride quality and durability compared to blocks or AALs because every component is matched and engineered to work together as a complete system.
IFS Suspension Limits, Geometry & Reliability
The 1998–2011 Ranger IFS has very real mechanical limits. Unlike a solid axle, increasing ride height does not increase suspension travel — it usually reduces it.
CV Joint Angle Limits
The biggest limiting factor in any IFS lift is CV joint operating angle.
- Stock CV axles are designed to operate within a narrow angle range.
- Cranking torsion bars or installing lift keys increases the resting CV angle.
- Excessive angle causes accelerated CV boot wear, joint binding, and axle failure.
Once CVs approach their maximum angle, the suspension cannot droop further — limiting articulation and increasing stress on drivetrain components.
Downward Travel Loss
Torsion bar lifts work by pre-loading the suspension.
- This raises the truck but reduces downward wheel travel.
- Less droop means tires lose contact with the ground sooner off-road.
- The result is harsher ride quality and reduced traction.
Common Failure Points on Over-Lifted IFS
- Inner CV joints and boots
- Upper ball joints operating near bind
- Torsion key adjuster bolts and crossmembers
- Premature front wheel bearing wear
Important: If a lifted IFS Ranger feels stiff, tops out over bumps, or frequently breaks CV axles, the suspension geometry is likely beyond its intended operating range.
Alignment & Steering Geometry Considerations
Any front suspension modification on an IFS Ranger directly affects alignment and steering geometry.
Factory Alignment Limitations
- Stock upper control arms have limited camber and caster adjustment.
- Moderate torsion bar lifts may push alignment beyond factory specs.
- Some lifted trucks cannot be properly aligned without aftermarket components.
Upper Control Arms (UCAs)
- Aftermarket UCAs provide increased adjustment range.
- They improve ball joint operating angles at lifted ride heights.
- Recommended for trucks lifted beyond ~2.5–3 inches.
Steering Geometry Effects
- Lifted suspension alters tie rod angles.
- Excessive angles increase bump steer and steering wear.
- Drop-bracket lift kits include corrected steering geometry.
Always: A professional alignment should be performed after any torsion bar, key, or suspension lift — even minor adjustments.
1998-2011 Ford Ranger Lift Options (Leveling → Long Travel)
Depending on the desired height and budget, several methods are used to lift this specific generation of Ranger 4×4:
Leveling and Minor Lifts (1–3 Inches)
Budget lifts rely on increasing torsion bar preload. They’re inexpensive and effective for mild builds.
- Torsion Bar “Crank”: The most cost-effective method involves tightening the factory adjustment bolt on the torsion keys. This increases the pre-load on the torsion bars to raise the front end but often results in a stiffer ride: Cranking Your Torsion Bars
- Aftermarket Torsion Keys: Specialized “re-indexed” keys replace the factory ones, allowing for up to 3 inches of lift while maintaining more adjustment range: Torsion Key Lifts Explained
- Pre-key modifications (2008–2011): Involves using the torsion bar keys from a 1998-2007 Ford Ranger 4×4 to lift a 2008-2011 Ford Ranger 4×4: Pre-Key Modification Guide
- Rear Shackles or Blocks: To match the front lift, owners often install lift shackles (which lower the rear spring eye), lift blocks (spacers placed between the axle and leaf springs), or add-a-leaf’s (a small leaf spring that installs in your existing leaf pack).
First-hand note: I’m not a fan of cranking torsion bars. You gain height, but you lose downward travel, which hurts off-road performs and causes a harsher ride.
Pro Tip: If you cranked your torsion bars you’ll need longer front shocks. The Rancho RS5374 is the only shock I’m aware of that will fit with cranked torsion bars: Shocks For Your Torsion Cranked Ranger
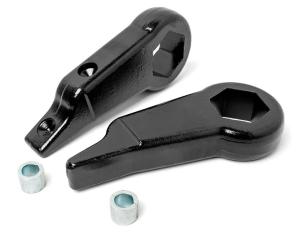
1998-2011 Ford Ranger 4×4 Torsion Keys
These lifts usually retain factory control arms but require proper alignment and careful attention to CV angles.
Full Suspension Lift (4–5 Inches)
Once you go beyond 3 inches, you’re no longer “adjusting” the suspension — you’re re-engineering it.
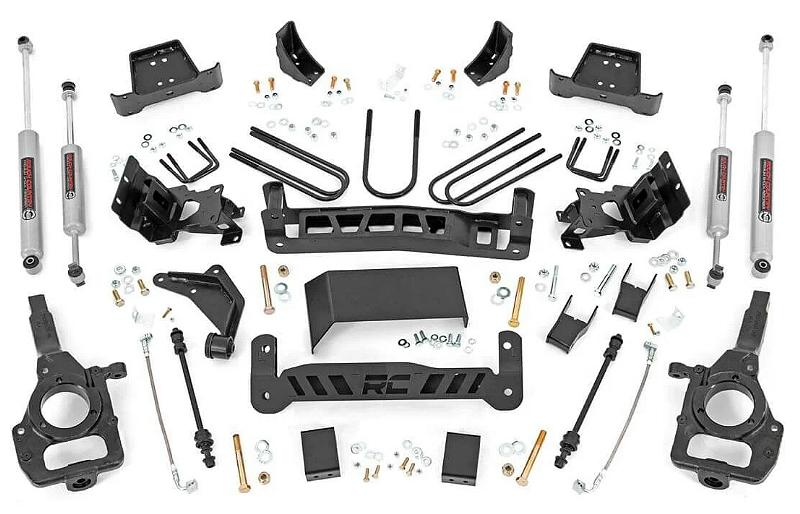
- Drop Brackets and Knuckles: Comprehensive kits, such as those from Rough Country, use heavy-duty crossmember drop brackets to lower the entire front differential and control arm mounting points: 1998–2011 4×4 Lift Kits Overview
- Lifted Knuckles: These kits include new steering knuckles (spindles) to maintain proper steering geometry at the increased height.
- Differential Drop: These kits drop the front differential, control arms, and steering to restore geometry and protect CV joints.
- Rear Shackles or Blocks: To match the front lift, owners often install lift shackles (which lower the rear spring eye), lift blocks (spacers placed between the axle and leaf springs), or add-a-leaf’s (a small leaf spring that installs in your existing leaf pack).
- Rear Leaf Springs: I’m not aware of any companies offering springs in 1998-2011 Ford Ranger lift kits, but the 4-Inch rear leaf springs by Skyjacker and Deaver leaf springs will work.
Coilover Conversions
For builders who want improved ride quality and tunability, coilover conversions replace the torsion bars entirely.
This is not a bolt-on beginner mod, but it offers:
- Better damping control
- Improved off-road performance
- More predictable suspension tuning
Coilover conversions are generally performed in addition to aftermarket suspension lift kits. Learn more here: SLA Coilover Conversion Guide
To see a Ford Ranger with a coilover conversion, check out Mr Bossley’s 2008 Ford Ranger Overlander
Performance/Long-Travel Kits
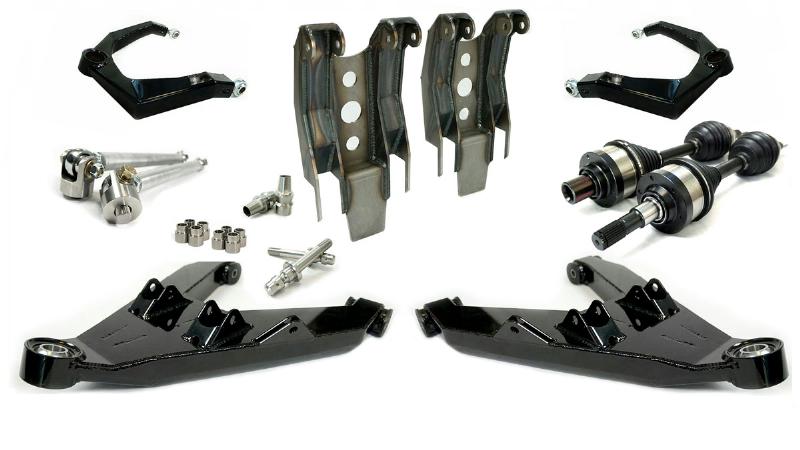
A long travel kit works by replacing the restrictive factory Short-Long Arm (SLA) components with a wider, high-performance suspension system designed for extreme articulation and wheel travel.
- Increased Track Width: The kit uses longer upper and lower control arms, typically widening the truck by 4.5 to 5.5 inches per side. By extending the arms, the wheels travel in a much larger vertical arc, which dramatically increases wheel travel—often reaching 12 to 18 inches, roughly double the stock capacity.
- Elimination of Torsion Bars: Standard long travel kits for this generation eliminate the factory torsion bars. They are replaced by coilover shocks (typically 2.5″ diameter) and often secondary bypass shocks, which provide significantly better damping control and a superior ride.
- Extended 4WD Drivetrain: To maintain 4×4 functionality with wider arms, the kit includes extended axle shafts. Specialized high-angle CV joints (such as 930 CVs or RCV axles) are used to allow the axles to articulate at extreme angles without binding or breaking.
- Geometry Correction: The kit repositions the front wheels roughly 1 to 1.5 inches forward. This provides better firewall clearance, allowing the use of larger tires (up to 35″ or 37″) during full suspension compression.
- Torsion Bar Elimination: High-performance “long-travel” kits (e.g., from True Travel Dynamics or Blue Torch Fab) completely remove the torsion bars.
- Coilovers: These kits replace the bars with coil-over shocks, providing significantly more wheel travel (up to 16 inches) and superior ride quality for off-roading.
- Boxed Control Arms: Fabricated, internally braced lower and upper arms replace weak factory units and utilize high strength uniballs instead of standard ball joints for greater range of motion.
- Rear Leaf Springs: These kits are usually used with Deaver rear leaf springs.
Body Lift vs Suspension Lift
- Body Lifts involves placing spacers between the truck body and the frame.
- Body lifts improve tire clearance only.
- They do not increase suspension travel or ground clearance.
- Often combined with suspension lifts for larger tire fitment.
- Does not alter the suspension geometry or ride quality.
Note: Tire size is ultimately limited by suspension compression, steering lock, and firewall clearance — not ride height alone.
Tire Size, Clearance & Real-World Fitment
Larger tires are one of the biggest reasons Ranger owners lift their trucks — but you need to know what tire sizes will physically fit, and what suspension and body modifications are required to make them work without rubbing. Tire fitment on a 1998–2011 Ranger is limited more by suspension travel and fender clearance than by lift height alone.
General Tire Size Expectations
- 31″ Tires: 31×10.5R15 will fit on stock 15-inch rims with no rubbing issues.
- 33″ Tires: A 4-inch suspension lift or 3-inch body lift is needed
- 35″ Tires: A 6-inch suspension lift and 3-inch body lift or fender trimming is required (or a 6-inch lift and a decent amount of fender trimming)
- 36″+ Tires: Most builds with these require extensive suspension mods, solid axle swaps, and significant body clearance work.
Fitment Tips:
- 1998-2011 Long Travel Suspension Kits can generally fit up to a 35″ tire.
- Fiberglass Fenders & Bedsides from Fiberwerx and McNeil Racing have larger wheel openings designed to fit a 35″ tire and eliminates fender trimming.
- Larger tires increase steering and driveline loads.
- Remember that bigger tires mean lower effective gearing; pair tire size with your gear ratios using the Gear & Crawl Ratio Calculators.
For a complete fitment breakdown on what tire sizes will fit 1998–2011 Rangers and what suspension/clearance mods are needed, see our dedicated guide:
1983–2011 Ford Ranger Tire Fitment Guide.
Torsion Bars, Keys & Identification
Not all torsion bars are created equal. Ford used multiple torsion bar rates across engines and trims.
Torsion bar codes and identification: Torsion Bar Code Guide
Torsion bar removal and installation: Key Removal & Installation
Removing torsion bars without special tools: No-Special-Tool Method
Lift Kit Installation Instructions
Pro Comp torsion key install: Pro Comp Torsion Key Instructions (PDF)
Superlift Instructions: Superlift 98-09 Instructions (PDF)
Example installation: Installing a Superlift Kit
IFS Suspension Lift Summary (1998–2011 Ford Ranger)
The 1998–2011 Ford Ranger 4×4 uses a torsion-bar-based Independent Front Suspension (IFS), commonly referred to as a Short-Long Arm (SLA) design. Unlike earlier TTB or solid axle Rangers, lifting this suspension does not increase wheel travel — it primarily changes ride height by altering torsion bar preload or correcting suspension geometry with drop brackets and knuckles.
Minor lifts (1–3 inches) are achieved by cranking torsion bars, installing re-indexed torsion keys, or performing pre-key modifications on 2008–2011 models. These methods are inexpensive and effective for leveling the truck, but they reduce downward suspension travel and increase CV joint operating angles, which can negatively affect ride quality and off-road reliability if pushed too far.
Full suspension lifts (4–5 inches) re-engineer the front suspension by lowering the differential and control arm mounting points and using lifted steering knuckles to restore factory geometry. These kits are the safest way to run larger tires while maintaining CV joint life, steering behavior, and alignment capability.
Coilover conversions and long-travel suspension systems replace the factory torsion bars entirely and are designed for serious off-road use. These setups significantly improve suspension performance but require extensive modifications, wider track widths, upgraded drivetrain components, and careful consideration of tire size, gearing, and intended use.
Rear suspension lift methods, tire size selection, and alignment all play a critical role in how a lifted IFS Ranger performs. Lift blocks increase axle wrap, while add-a-leafs and full replacement spring packs better control rear axle movement. Larger tires place additional stress on CV axles, steering components, and driveline gearing, making proper suspension design and component matching essential.
About The Author
Jim Oaks is the founder of TheRangerStation.com, the longest-running Ford Ranger resource online since 1999. With over 25 years of hands-on experience building and modifying Ford Rangers — including magazine-featured builds like Project Transformer — Jim has become one of the most trusted authorities in the Ford Ranger off-road and enthusiast space.
Since launching TheRangerStation.com, Jim has documented thousands of real-world Ranger builds, technical repairs, drivetrain swaps, suspension modifications, and off-road adventures contributed by owners worldwide. TheRangerStation.com has been referenced in print, video and online by enthusiasts, mechanics, and off-road builders looking for practical, and experience-based information.