By: ‘MudSlanger’s ‘
Truck: 2000 Ford Ranger XLT 3.0 FFV 4×4
Explorer: 1999 Ford Explorer EB edition 5.0 2wd
Parts List:
- Complete Explorer 5.0L engine with all accessories
- Engine Wiring Harness
- PCM
- Battery cable harness
- Cruise cable
- Throttle cable
- Radiator hoses
- high pressure power steering hose and PS cooling line
- A/C lines
- Torque Monster Headers and Catalytic converters
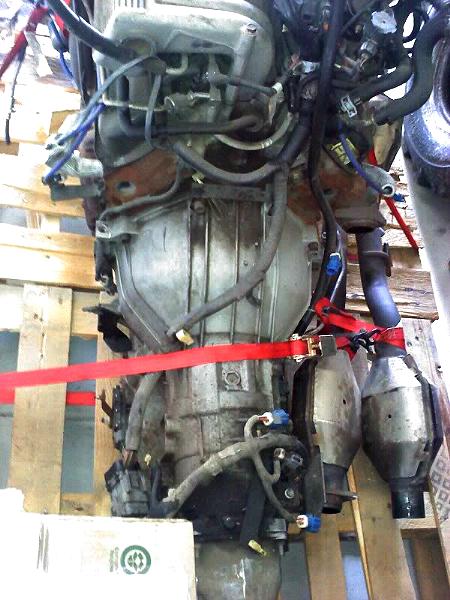
- 2wd Transmission(4R70W)
- Advance Adapter (AOD to BW transfercase adapter kit)
- Airbox, MAF, Zip tube, and Airbox tray
- Ranger Radiator
- Taurus E-Fan with Temp controller kit (70amp relay)
- 5.0L Motor Mounts and Transmission Mount
Notes:
I’m using my existing Ranger radiator for the time being. If I have cooling issues then ill swap it out.
I opted to buy a Taurus Efan and wiring kit for my truck. Hopefully this will keep my motor nice and cool.
I’m keeping my original Borg Warner Transfer Case in my truck but I need to buy an adapter kit for this. Advance Adapters makes a kit that replaces the output shaft and tail housing on your 4R70W transmission. I’m taking the transmission down to a transmission shop because they have to rip open my transmission in order to replace the output shaft. Tail housing just bolts on over that output shaft in the rear of the tranny.
The power steering hose that connects to the bottom of the reservoir to the PS cooler on the Ranger isn’t long enough, so you need to take the one from the Explorer and install it. Also the Power Steering Cooler Brackets need to be bent down some in order for the oil pan to clear it. Its pretty soft metal so it’s easy to bend.
5.0 Motor Mounts and Transmission Mounts will bolt straight into the Ranger.
I was installing the Explorer AirBox in my Ranger and found that the Ranger tray is too small to fit the Explorer airbox, so you will need to swap that tray out too. The tray doesn’t fit directly in the Ranger, so you’ll need to drill (2) new holes and put a sheet metal screw in there. I had to cut a part of the tray because it was coming in to contact with a part of something in my engine bay. Easy fix.
The Battery Cable Harness I got from the Explorer WILL NOT plug into the Ranger chassis harness. What I did here was to cut the wire loom on my Ranger Battery Cable Harness to take out the wires needed to plug in the Ranger chassis harness. The only thing you might need to do is to extend
(1) wire to the starter. You can use your ground wiring (Big Black Wires) from the Ranger, but you must use the Explorer Power wires (The big red wires going to fuse box – the other going to the starter).
I opted for the Torque Monster Headers because they increase MPG and increase power. The factory Explorer exhaust manifolds are restrictive and hurts the motors performance. These are pricey but well worth it. Exhaust will need to be taken down to a shop and have them reroute your piping to make it fit properly unless you have welding skills. I’m having my Truck towed down to the dealership to have my Ranger PATS and Keys synced with the Explorer Computer.
The Advanced Adapter kit that I got is only 5-inches, I wish they would have made a 6 or 7 inch adapter because I had to get both my driveshafts worked. The rear needed to be lengthened about a 1-1/2 inches and the front needed to be shortened 1-1/2 inches. No biggie, but I wish I would have known this earlier.
I had to cut some of the Crossmember in order to fit the Front Drive Shaft. The adapter sits a little lower than what it was before on my 3.0… Oh well, custom always results in modifying something else. Go figure.
Tips:
Ranger/Explorer Comparisons:
Vehicle, Speed, Fuel and PATS
The 99-01 Explorer has the ABS/VSS from Rear Axle, No Fuel Return Line (Returnless) (56-72 psi), AND PATS (Type B)
The 99-00 Ranger has the ABS/VSS from Rear Axle, No Fuel Return Line (Returnless) (56-72 psi), AND PATS (Type B)
Advance Adapters:
The Advance Adapters site lists the 9-inch adapter for the AOD/BW conversion.
This is WRONG INFO…
The 4R70W was 20.5-inches long from bellhousing to where the tailhousing bolts on. The transmission in my truck measured 29.5-inches from bellhousing to transfercase. Cool, with those measurements I thought 9-inch adapter kit. Come to find out, when I installed the 5.0 in the truck and attempted to do a test fit with the transmission with the adapter on, it was too long. looks like the 5.0 sits further back in the transmission section about 4-inches. So 5-inches is the right one I need now. I’m guessing this is the measurement for all XLT Rangers…
Tachometer:
Quote:
Here’s how you modify your Ranger tachometer for V-8 use:
1) Get your dash apart and disconnect the cluster
2) If you have a EVTM turn to the Instrument cluster section
3) Locate Pin 8 on wire connector C216 (Black/Yellow Wire)
4) Use a very small flathead screwdriver to release the pin from the connector housing
5) Find Connector C214 (largest of the 3 for cluster)
6) Install the wire removed from C216 in to slot 16 on C214. This slot is currently vacant.
7) Put everything back together and fire it up. You’re all done.
Speedometer:
Quote:
1998-2000 Rangers: 1999-2001 Explorer uses the same type of speedometer system as the 1998-2000 Ranger – no modifications needed. The 1998-2000 Rangers are not equipped with a VSS (Vehicle Speed Sensor). The PCM (Powertrain Control Module) receives vehicle speed information from the antilock brake system rear wheel speed sensor. The raw signal from the ABS/VSS sensor on the rear axle goes directly to the Explorer 4WABS module where the signal is corrected for tire diameter. Then the corrected signal is sent to the PCM, speed control, cluster, etc. In this system, the PCM is an end user of the corrected VSS signal.
PATS:
Quote:
The 1999-2001 Explorer PATS is 100% compatible with a 1999-2000 V6 Ranger. If the Explorer PATS module and keys are also transplanted to the Ranger, they should work immediately with the Explorer PCM. If the original Ranger PATS module and keys are reused with the Explorer PCM, a dealer would have to “introduce” the new parts to each other before the engine could start.
Question From Hullnass (Forum Member) – ” I’m also am doing a 5.0 swap in my 2000 ford ranger (had a 3.0 flex fuel). I have run into some electrical issues and I was wondering if you could explain in more detail what exacting you did. More specifically how you combined the Explorer harness with the Rangers. I originally was going to retain the Ranger chassis harness up front, but one plug (directly behind the power steering reservoir in your picture) wouldn’t match up. Since I lack good enough wiring diagrams to re-wire, I opted to switch out the mountaineer chassis harness. Now I have more issues and am thinking I’ll have to switch back. When I try cranking the engine the windshield washing pump kicks on and no starter. Any idea what that plug actually goes to? I see in your picture it isn’t attached to anything; is that how its going to stay? Any help would be great.
Oh, by the way, I had the same adapter issue but figured out I REALLY need a 7-inch adapter and only 5-inch and 9-inch are offered. So, I had to modify the trans crossmember and shorten the rear driveshaft and lengthen the front driveshaft.”
Answer: To answer your question. The Ranger plug under the brake master cylinder that you are talking about wont mate up to the Explorer harness. Not a problem, just take your Ranger harness and plug it back up and combine it with the Explorer battery cables. The Ranger battery harness (which plugs into that plug under the brake master cylinder) will plug into everything (starter, alternator, and A/C) the Explorer harness will. You will have to extend one wire though (well I had to anyway). The yellow wire that runs to your starter needs to be extended. Other than that nothing else needs modifying. Maybe that will solve your electrical problems.
And with the Advance Adapter; I WISH they made a 7-inch adapter because I have run into the same issues. I had to cut some of the transmission crossmember and lengthen the rear drive shaft and shorten the front. Not a big deal but I was kind of hoping I didn’t have to do so. Looks like the adapter clocks your transfercase just a tad downward than when it was on the 3.0 transmission which sucks, but nothing a little metal fabrication cant fix!
Here’s the difference between the 5-inch and 9-inch adapters:
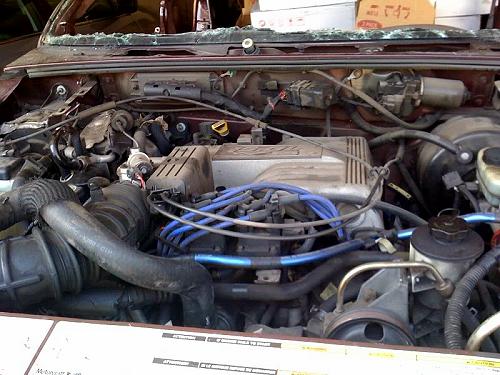
My 5.0 Motor inside the Explorer

The 5.0 motor:

(Note the converters. Don’t forget to grab the converters, pipe and 02 sensors from your donor vehicle)
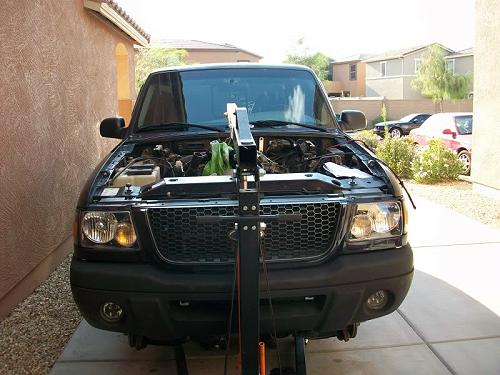
The 3.0 being ripped out:

(Let it all drain out…)
5.0L motor mount (passenger side):
Cruise control cable:
Throttle cable:
(High pressure power steering hose (kind of hard to see, but in that manifold of (4) fittings, its the bottom right hand side in the picture)
The new motor in the truck:
(Note: Motor looks low because the truck has a 3-inch body lift)
Torque Monster headers:
The Advance Adapter:
Transfer Case:
I had to chop off 1/4-inch of the transfer case’s input shaft (above) because the size of the new output shaft on the transmission was so tiny it was a must to fit this T/C on the transmission. It also stated it in the directions AA gave me when they shipped the adapter kit. Don’t worry, I cleaned that up a lot after taking the picture.
Crossmember:
I had to cut some of the Crossmember in order to fit the Front Drive Shaft. The adapter sits a little lower than what it was before on my 3.0… Oh well, custom always results in modifying something else. Go figure.
Air Intake:
(Explorer Express Air Intake)
Exhaust:
(Torque Monster Headers)
(Note the O2 sensors)
(Note that the section of exhaust pipe with the O2 sensors and converters was retained from the Explorer)
Engine Fan:
Here’s the location of my Fan controller AND Relay… Running a 30 amp circuit breaker, 10 gauge wire and 80Amp relay. Running the high side, ill probably hook up the 2 speed later down the road but we will see how this works first.
Complete:
(Note: Motor looks low because the truck has a 3-inch body lift)
See The Original Submission:
