|
By
Jason E. Fountain
Application:
1984-1994 Ford
Ranger/Bronco II with 4-cylinder or 3.0/4.0V6
Looking
for a little more performance out of your Ranger or Bronco II?
Well the modification I am about to tell you about has the potential to
free up to fifteen horsepower and twenty-seven ft. lbs. of torque with
only $191.95 before s/h. Installation is up two hours depending on
your mechanical knowledge. The modification I am talking about is
the electric fan. I purchased an electric fan from www.SummitRacing.com,
part #FLX-40. The brand name is Flex-A-Lite and the kit is
COMPLETE. The kit includes fan, motor, and shroud assembly already
assembled; top and bottom aluminum brackets, mounting and electrical kit
bags, and the instruction sheet. The fan is much more durable than
I expected, and I installed it in under forty minutes, but what I really
like about it is the built in adjustable thermo on/off sensor. The
included instructions are very in-depth and right to the point, however
I ran into a problem trying to find the a/c clutch positive wire that
will turn on the fan when I turn on the a/c. I came to the www.TheRangerStation.com
forum and under thirty minutes solved the problem with the help of a
friend named Jubean. To save most of you some trouble, I will
include a full photo installation of this product on a 1992 Ford Ranger
custom with a 3.0 Liter V6.
This
is what is robbing you of a great deal of horsepower and torque.

Note: This fan is already installed on my truck so I’m taking
the pictures of the stock fan from outside of the vehicle.
First
Step: (as via instruction included, I will include photos, the
instructions include diagrams A and B)
The fan comes already assembled, but you must
attach the brackets and thermo control knob.
Assembling the fan brackets and thermo knob
1) Using the screw, washers, and nuts in the mounting kit bag,
attach the large top bracket to the top of the electric fan shroud.
2) Again, using the screws, washers and nuts provided,
attach the bottom aluminum bracket to the bottom of the electric fan
shroud.
3) Attach the thermostat control knob provided in the
electrical kit bag to the thermostat in the fan shroud.
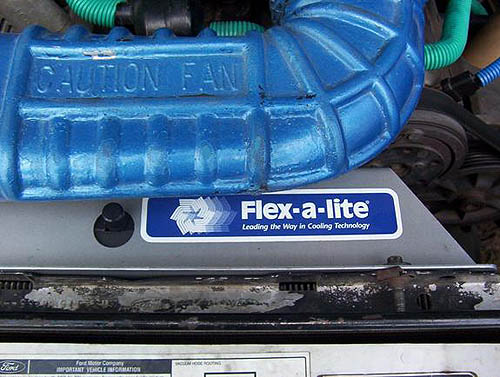
Aluminum bracket and control knob can be seen in the picture below.
Now that the fan is completely assembled, it is time for installation.
Installation
1) Disconnect the battery. (After this, I recommend
removing your intake tube if it is in your way.)
2) Remove the vehicle’s original belt driven clutch and
fan assembly. NOTE: It is not necessary to remove the fan from the
fan clutch. For the 3.0 take a wrench and a rubber hammer, and tap it
lose clockwise, the 4.0 is counter clockwise.
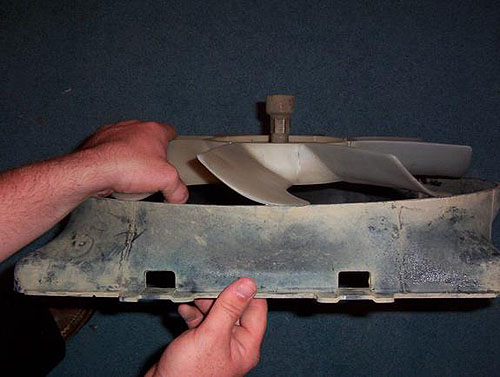
This is what you see when you are taking off the fan from the engine;
except for the fact that I‘m holding the shroud upside down in every
picture (LOL), but you get the picture. I used a 7/8 wrench and a
rubber mallet to tap the fan loose, then I unscrewed it the rest of the
way and pulled the fan and shroud out of the vehicle as one unit.
3) Remove the vehicle’s factory fan shroud. Note:
In some cases it may be easier to remove the fan, clutch and shroud at
once by simultaneously lifting each item upward. (I highly recommend
this!!!)
4) Slide the small bottom bracket into the radiator shroud
clips as the original shroud was mounted.
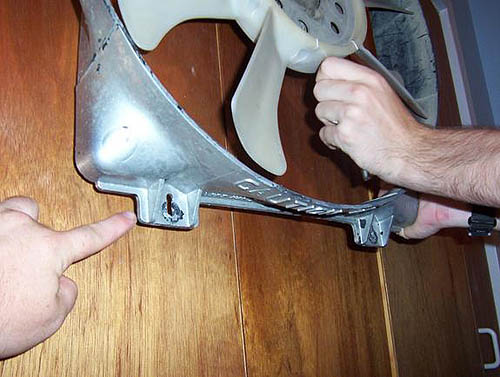
Bottom bracket on stock fan is pictured below just to give you an idea
of the what the new bracket looks like for you to slide into place on
the radiator. Once again, I am holding the shroud upside down, but
imagine I’m pointing at the bottom bracket. LOL
5) Tilt the electric fan assembly forward and match the
bolt slots of the large top bracket to the bolt slots of the radiator
channel. Using the provided hardware, fasten the unit securely.
Nope you are not finished, installation is just
a start. Now you are ready to hook up the wires that’ll kick
this baby to the max.
Wiring
1) Connect the “+” terminal to a 12 volt positive (+)
source. (I.E. fuse box. But I attached this wire directly to the
positive battery terminal.) NOTE: If you do not hook up the fan unit to
an ignition controlled positive, the unit will not turn off when the
vehicle is turned off; only when the engine has been completely cooled
will it shut off. Since I drag race, I prefer it still running if the
vehicle is turned off.
2) Connect the “B” terminal to a 12 volt positive (+)
power source. (I.E. Battery)
3) Connect the “G” terminal to ground. (I.E. chassis,
negative (-) side of battery)
4) If you have air conditioning: with the 3-way connector
provided, pass the A/C clutch positive (+) wire (connected to the a/c
pump) through the connector. Place the black wire provided into
the closed end of the connector. Crimp the metal plate. Snap plastic
cover into place. Attach black wire to the “C” terminal of the
control box.
The a/c clutch positive wire can be seen in the picture below. It is the
purple wire and there are two to choose from.
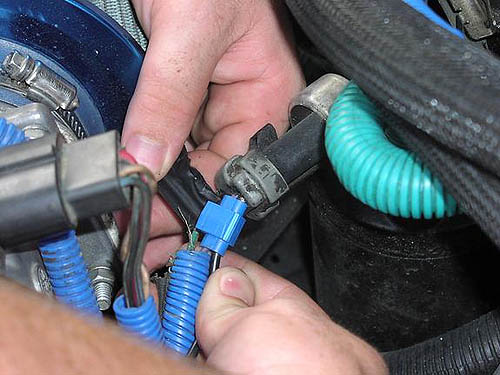
In this pic, you can find the a/c clutch positive wire just above the
map sensor.
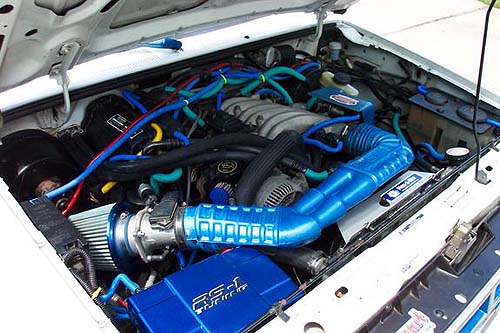
The Air Conditioning Relay activates the fan when A/C is turned on.
Reconnect your negative battery terminal at this time.
Now it’s time to get this baby cranking out
some extra hp and torque; not to mention a slightly cooler running
engine.
Adjusting the Temperature Control (I have mine running as cool as
possible, not because my motor runs hot, I just want it to stay on
“C“ like it always has.)
1)
Turn the adjustable control knob completely clockwise.
2) Idle the vehicle, when the vehicle is at 5 to 10 degrees
higher than “normal” turn the adjustable control knob counter
clockwise until the fan comes on.
3) The fan will now activate at this temperature
automatically and will shut off after it has cooled the vehicle down 7
to 11 degrees. Note: It is typical for this fan unit to cycle on and
off. (DUH)
I didn’t even worry about the optional step
below.
Optional Connection
(Please don’t order this part, you can buy a regular switch if you
intend to perform this.)(Note: Based on Flex-a-lite’s manual
switch part #31148, not included)
1)
Connect the “M” terminal to terminal 1 on the switch.
2) Connect terminal 2 to a 12 volt positive (+) source.
3) Attach terminal 3 to ground to illuminate the switch.
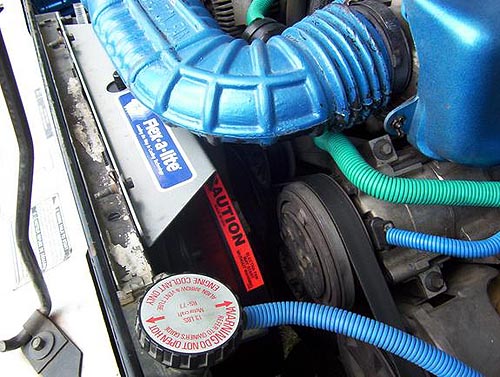
The finished product:


|
