|
|
||||||||||||||
|
|
||||||||||||||
|
|
|
Submitted By: 85_Ranger4x4 Difficulty: 5 out of 10 This really depends on your skill level, since you are putting a V8 in a Ranger you must at least think you have some level of skill turning a wrench. Really nothing that technical just stacking on the right parts in the right order. Time to install: Probably a day or two. This is hard to estimate because of the head scratching involved in doing this the first time. Disclaimer: The Ranger Station.com, The Ranger Station.com Staff, nor the original poster are responsible for you doing this modification to your vehicle. By doing this modification and following this how-to you, the installer, take full responsibility if anything is damaged or messed up. If you have questions, feel free to PM the original poster or ask in the appropriate section of The Ranger Station.com forums. Brief Explanation: How to put a 1996-2001 5.0 Explorer Front Engine Accessory Drive onto a non Explorer engine in an 83 to late 1980's RBV. Tools Needed:
Parts Needed: Parts listed below are for 1996-2001 5.0 Explorer, part number below are for reference using common major brands, different brands with different pricing are available depending on your location. I tried to use common numbers so you could go to just about any parts store website and get a picture of what you need. 50oz engine balancer (mid 1981 and later) Both aluminum brackets with hardware for PS pump, alternator tensioners/idlers and A/C compressor if applicable.
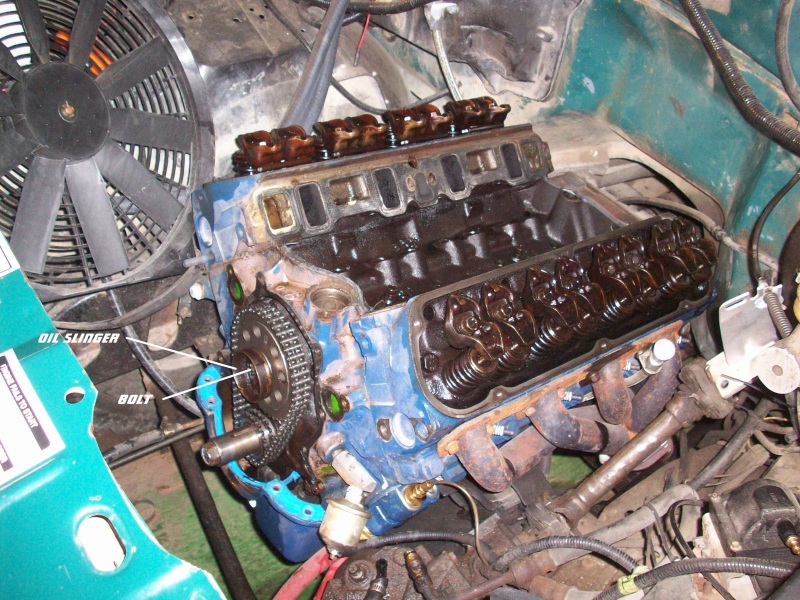
1996-2001 5.0 Explorer belt for A/C (Gates PN K060825) Gates K080625 belt for non A/C Smooth idler (Gates PN 38001) Grooved idler (Gates PN 38008) Tensioner (Gates PN 38161) 1996-2001 5.0 Explorer Alternator (Motorcraft PN GL-607) 1996-2001 5.0 Explorer PS pump with remote plastic reservoir (Pump is Motorcraft PN STP54RM, reservoir is not available new to my knowledge) 1996-2001 5.0 Explorer Harmonic balancer (Dorman PN 594-155) 1994-1995 5.0 Mustang or 1996-2001 5.0 Explorer timing cover with front seal and gasket. (Dorman PN 635-106) 1996-2001 Explorer Water pump and gasket (Motorcraft PN PW343) Vertical thermostat housing and gasket if you don’t already have one. (Murray PN 84884 housing and Murray PN 2150 gasket) 1996-2001 5.0 Explorer Upper radiator hose (Gates PN 22310) 1992 4.0 Ford Ranger power steering sealing washer ) Dorman Help! PN 82540) 1992 4.0 Ford Ranger power steering pressure line (unless of course you have a newer truck that already has the metric pump end on the line) (Gates PN 360530) Length (in): 28.75 End 1 Diameter (in): .3125 End 1 Type: Male Inverted Flare End 2 Diameter (mm): 16 End 2 Type: Swivel O-Ring Includes Switch Port: Yes Optional is an engine driven fan vs. an electric fan like a lot of swaps. You can run a wide variety of fans depending on what you did with your radiator and frankly how dumb lucky you are. I used: Flex-A-Lite 851 RH adaptor hub (Explorer WP is reverse rotation) Flex-A-Lite 2817 Low profile flex fan (all I had room for) 1991-94 Explorer fan shroud (it fit a two row HD radiator if that makes a difference) The main advantages to swapping a 5.0 Explorer FEAD (Front Engine Accessory Drive) onto your older engine is to get easy to service modern accessory drive components (130A alternator) and a Saginaw power steering pump that is vastly superior to the standard issue whiner Ford pump with a plastic reservoir mounted on it… and to top it off it is all the shortest FEAD Ford ever hung on their small block V8. Both the alternator and PS pump bolt on with no hard to get at hardware or long pivot bolts. They are mounted high so you won’t have to dig deep into the bowels of your truck in the middle of nowhere to service them plus there are enough 5.0 Explorers and others that use them to keep parts in stock across the country. It isn’t perfect but for a short high performance OEM quality FEAD it is a pretty good choice IMO. It is pretty much a bolt in for the ‘98+ Rangers but as you go farther back in the RBV timeline things complicate a little. This is what I bumped into converting the 1987 Crown Victoria 5.0 to the FEAD out of a 1997 Ford Explorer with the 5.0. There are a wide variety of engines and trucks out there so things can vary. If you are upgrading your older engine to the Explorer FEAD you will need the brackets, timing cover (same as a 94-95 Mustang GT actually), alternator, harmonic balancer and power steering pump. You will not be able to run a mechanical fuel pump of any kind with this setup so plan to run an electric pump. I replaced the idlers, tensioner and after testing it the alternator as well. The Explorer being a post ‘81 engine is a 50oz counterbalance engine so that will limit this upgrade '81 and newer 50oz engines or some strokers that convert an older 28oz engine to 50oz (it depends on the kit) My ‘85 does not have A/C so I just used a shorter belt and left the compressor in the JY. It looks to have enough room for a compressor, if someone else pipes up about how that would work out on a TTB truck it would be great. I went farther into my engine than just the FEAD so ignore parts of pics with valve covers, heads and intake off, you do not have to do anything with them for this swap. Step One: Demolition Remove everything on the front of your engine down to the block; fan, radiator, all the accessories and brackets, water pump, timing cover and harmonic balancer all have to come out. Carefully clean the gasket surfaces and prep for reassembly. You will also need to remove the pressure power steering line from the steering gearbox. If your engine has an oil slinger/fuel pump drive on the camshaft you will have to remove it. Replace the bolt because it does serve a purpose.
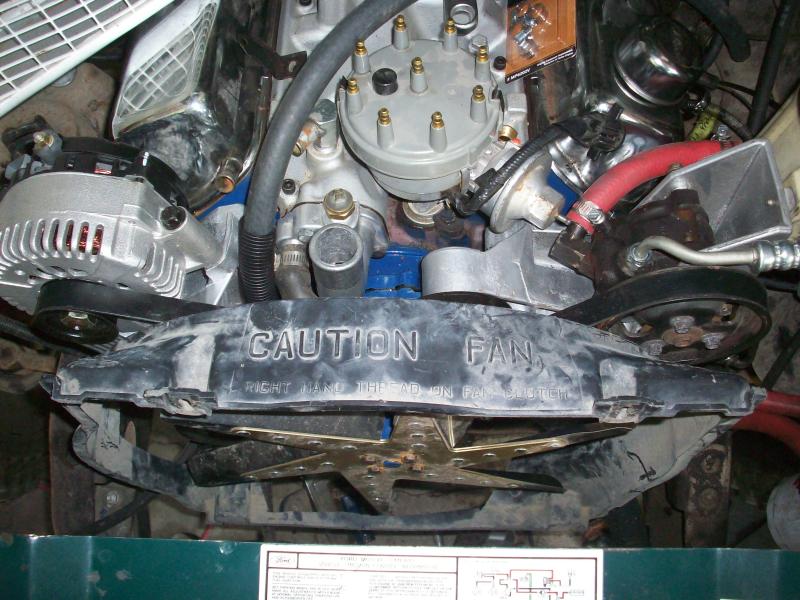
Step Two: Timing cover, balancer and water pump Mount the timing cover and water pump, use paste thread sealer around the four bolts that actually seal the water pump (two per water port) Don't forget the timing pointer so you can set the timing if you are running a setup that requires setting the timing. Go ahead and install the heater hose on the water pump because things will get tight later. Keep an eye for rubbage as this goes together because it will want to get a little friendly with the alternator bracket. I have some accordion type wiring loom on it and a ziptie to hold it away from the alternator. Also don’t forget to install the bypass hose and orient the clamps so they can be removed down the road without having to remove half the truck.
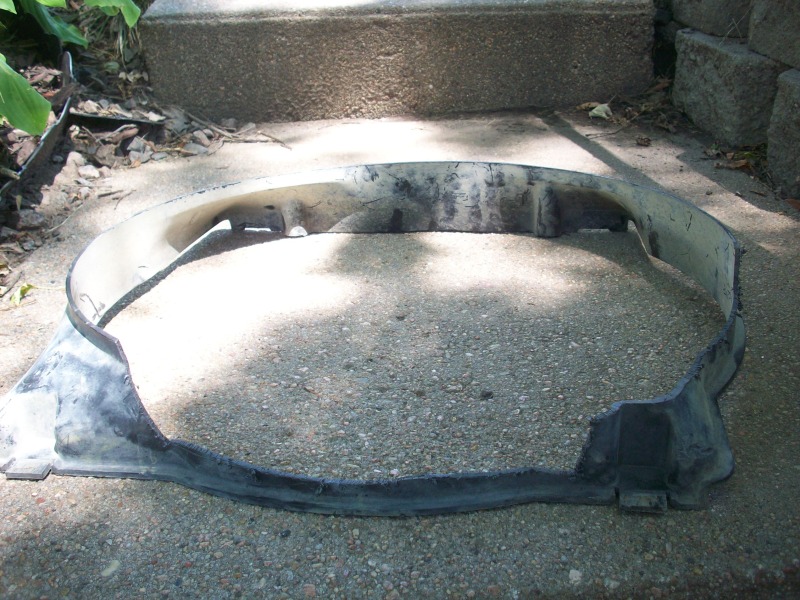
Step Three: Cooling system test fit If you are going to run a fan between the engine and radiator (mechanical or electric) now is the opportune time to figure out what you are going to run. I ran the 91-94 HD Explorer radiator in the stock location with a low profile flex fan with a conversion hub and a trimmed 91-94 shroud. I also have an electric pusher for a backup, it does run if I leave the truck idling for extended periods of time. Don’t install anything for good yet but it is a great time to check clearances. My fan shroud required a little trimming to clear my fan, and harmonic balancer. The lower shroud mounting tabs are spaced different between my 2.8 fan shroud and the Explorer fan shroud:
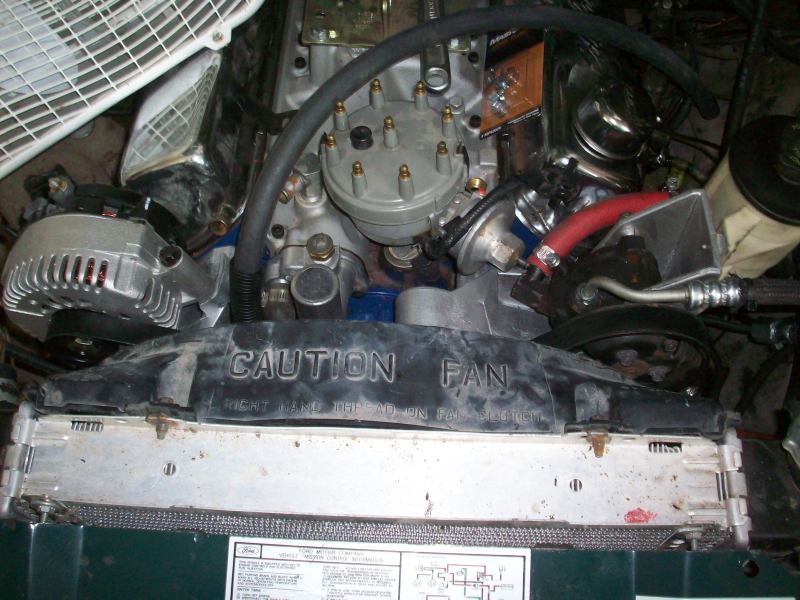
Step Four: Cooling system wet run Next time I would test the cooling system by just hooking the radiator to the bare long block and letting it sit for awhile to test for leaks. With the FEAD installed you can see very little of the timing cover and water pump. Drain the coolant and remove the radiator. Step Five: Passenger side bracket Now you can go ahead and mount the passenger side bracket with the tensioner/idler. Step Six: Oil filter lines I have my oil filter relocation adaptor mounted where the charcoal canister used to be, I found the best routing for the hoses with this FEAD was straight ahead and angling off to the adaptor. After the engine is in I could not remove it (it was rectangular shaped and would hit the engine cross member) so if you don’t get it right you may have to pull the engine.
Step Seven: Drivers side bracket clearancing Depending on what ignition system you run the drivers side bracket may need some clearancing for your distributor. I am running a Duraspark system and by timing the dizzy one tooth and rotating the plug wires one post off I got it timed by just trimming this nub. You can trim more of boss that the idler mounts to if you have to.
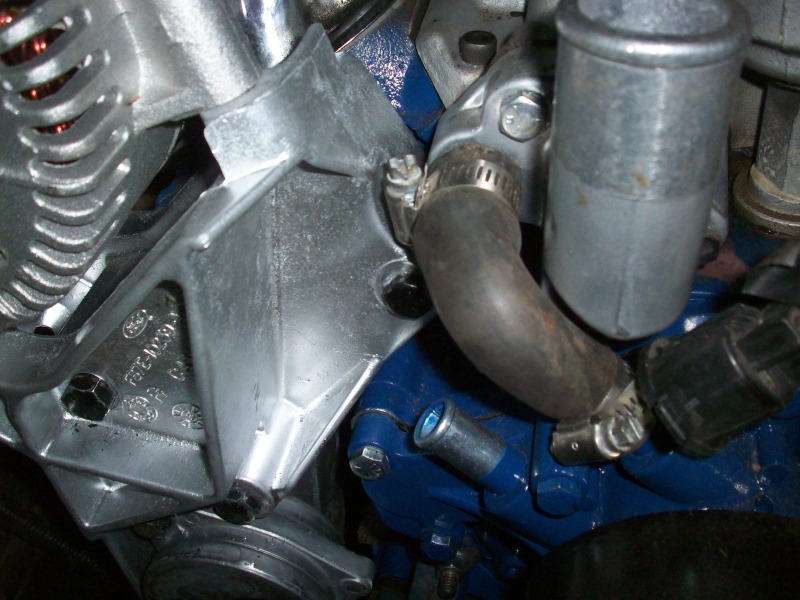
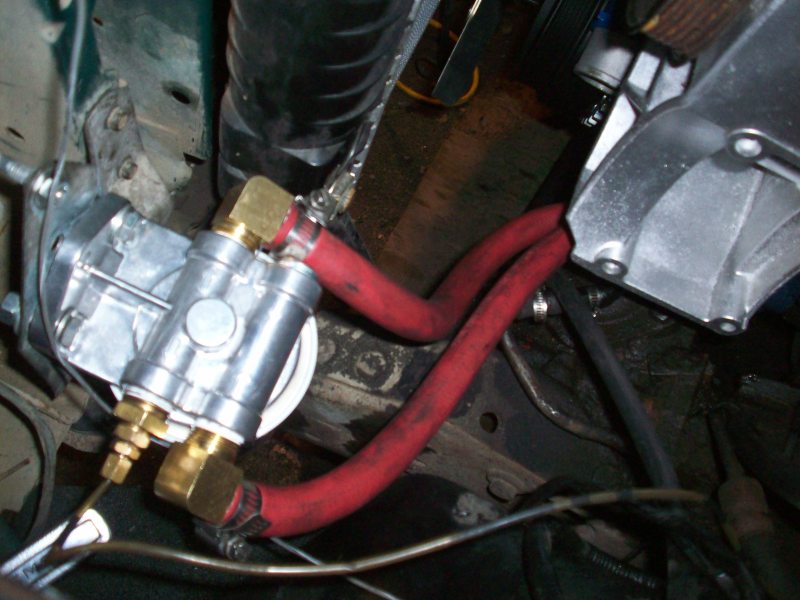
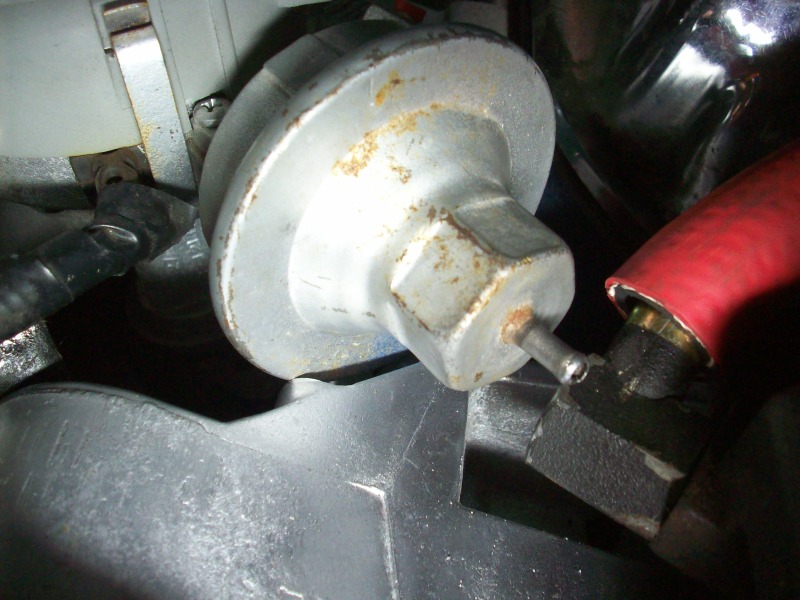
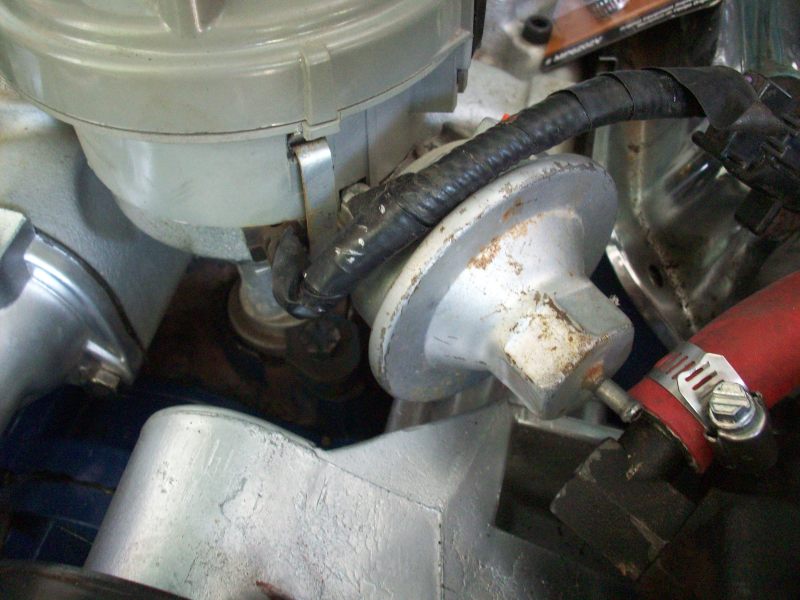
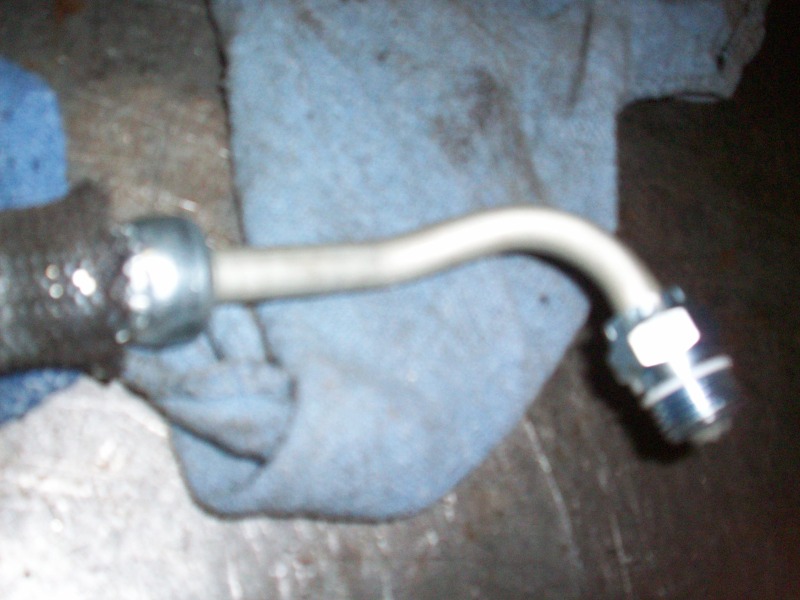
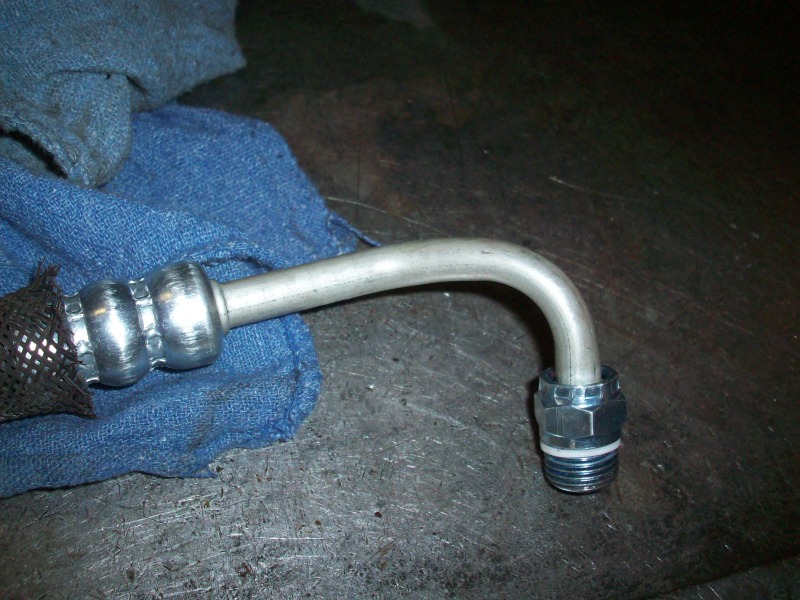
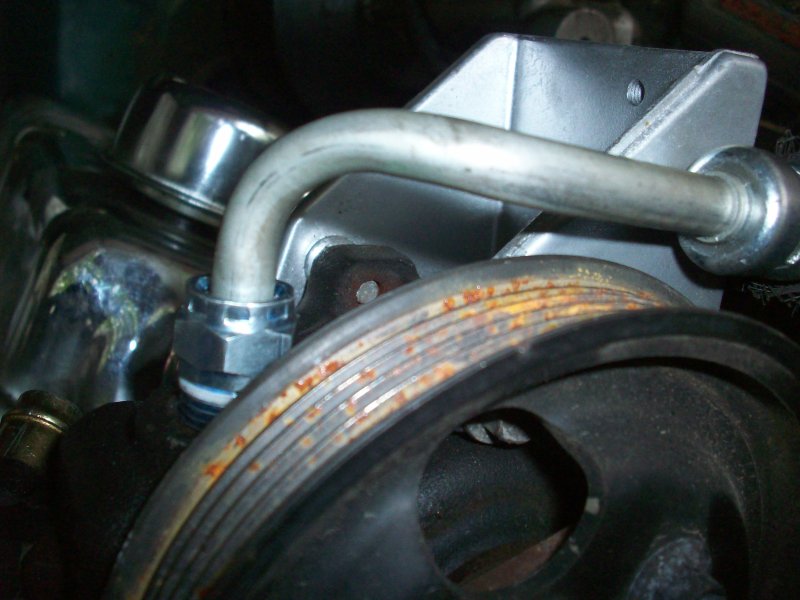
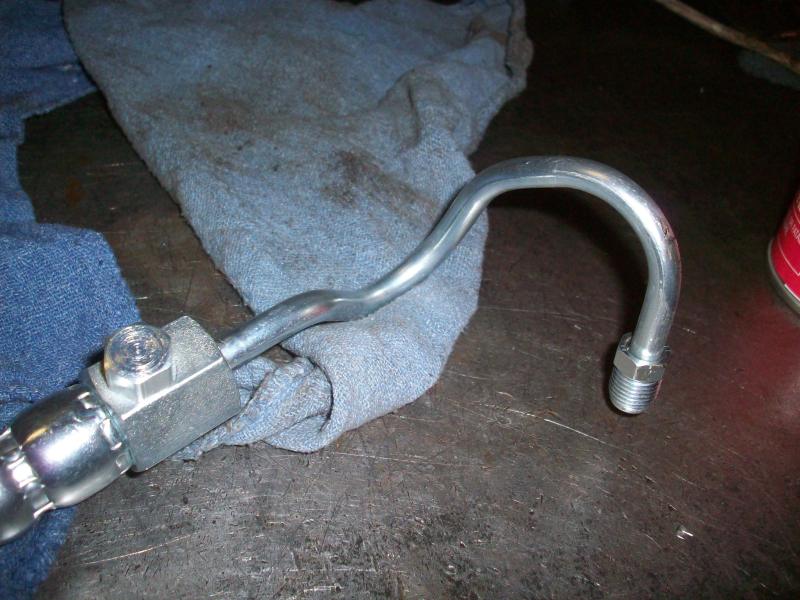
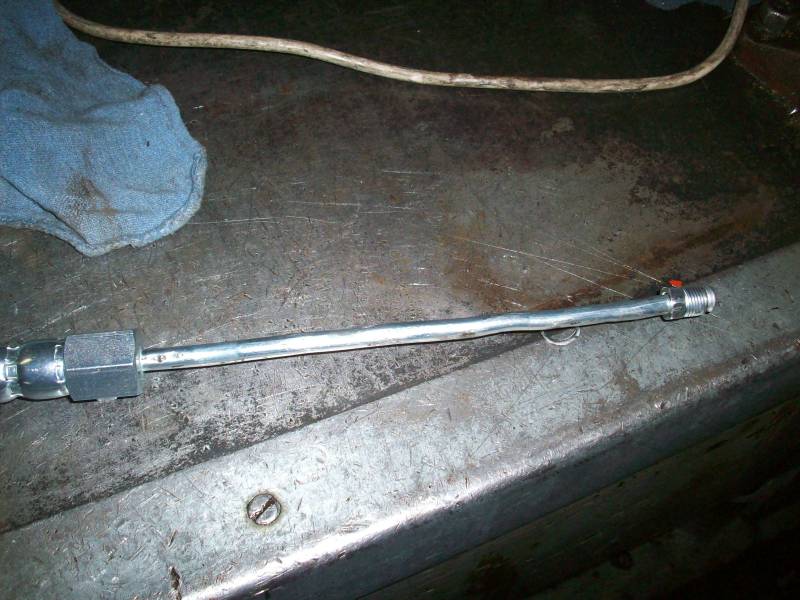
Step Eight: Mount drivers side bracket You will probably have to play with the remote hoses and ignition so there will probably be a couple dry runs before you can finally mount the drivers side bracket with its idlers. Go ahead and install the bracket and pump when you are comfortable with how everything sits. Step Nine : Power steering pressure line By the time they put 5.0’s in Explorers Ford had changed the fitting on both the PS pump and steering (which was also a rack and pinion in the Explorer and is way too long) This means that neither the older Ranger or Explorer pressure lines will work. However the early 4.0 Rangers have a line that has the right fitting on each end. I used one spec'd for a ‘92 Ranger with a 4.0. I carefully straightened the curly Q stuff in a vice so it would reach and it fit very nice. It will not come with the nylon sealing washer, they are cheap but nobody stocked them (or the line for that matter) so make sure to order that when you order the line. Mount the pump and install the line. The power steering line didn’t sit quite the same as it did in an Explorer, mine sits over the PS pulley. Pump side:
The gearbox side:
Don't forget to put the cap on the line unless you have to run the switch.
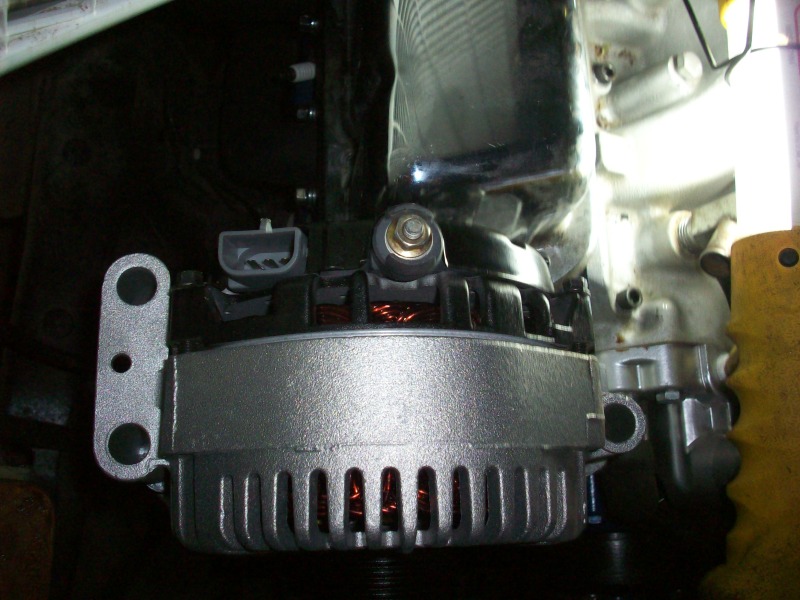
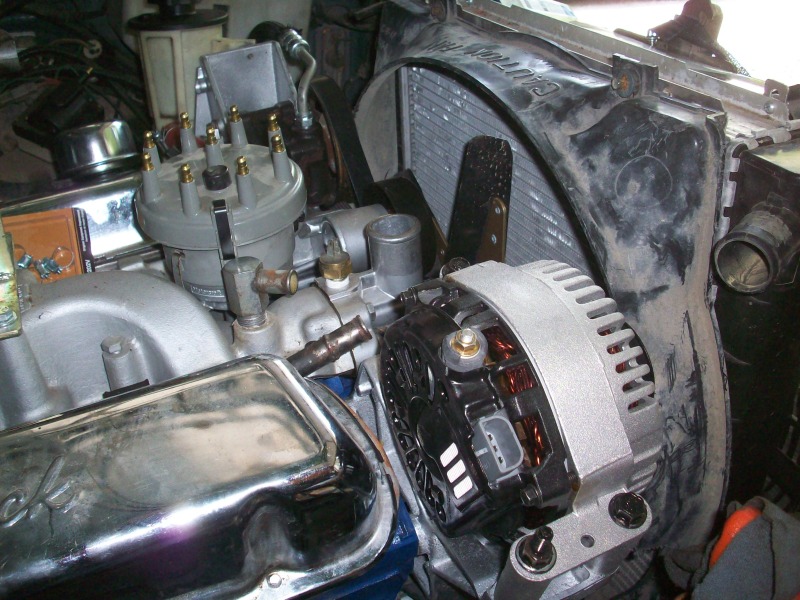
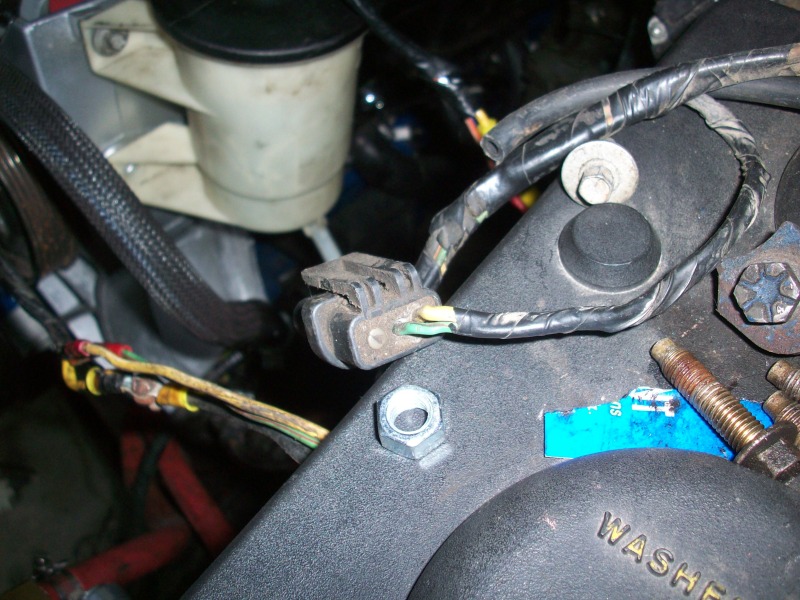
My truck has a 3" body lift, a standard height truck may have clearance issues between the PS reservoir and the hood. Keep an eye on that, you may have to lower the reservoir. Step Ten: Power steering pump to reservoir line The supply line between the reservoir and pump is very pricey, $30 and is sold by the 3’ piece. However generic oil rated 3/4" hose will fit fine, it only calls for 6" but you will probably have to buy a foot of it. It has to be oil rated, oil will eat heater hose very quickly. Install the reservoir with the hose. Step Eleven: Power steering return line Standard 3/8" oil rated hose with the appropriate clamps will work fine for the return line from the steering box. Step Twelve: Alternator For some reason somebody before me had upgraded my '85 to the later internally regulated alternator, when I went to buy replacements back in my 2.8 days I had to get one for a 2.9 truck. My Ranger’s alternator had the main power cable going directly into it where the Explorer has a stud with a post on it so that needs adapted. Both alternators used the same connector but they are pinned differently, out of the three positions there are only two wires and between them one wire is mixed around. Mine had questionable wiring so I just spliced in the Explorer connector and was done with it. With the all the front accessory pulleys and idlers on go ahead and put the belt on.
My Ranger connector:
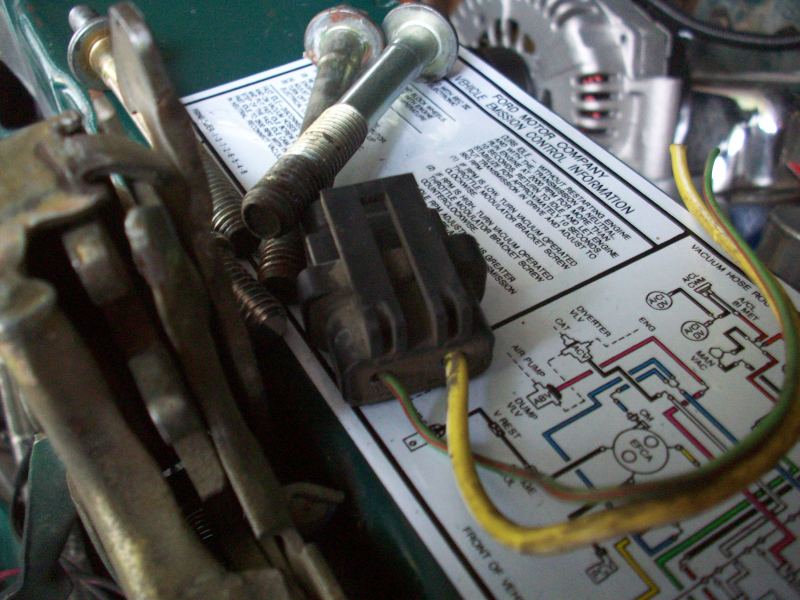
The Explorer connector:
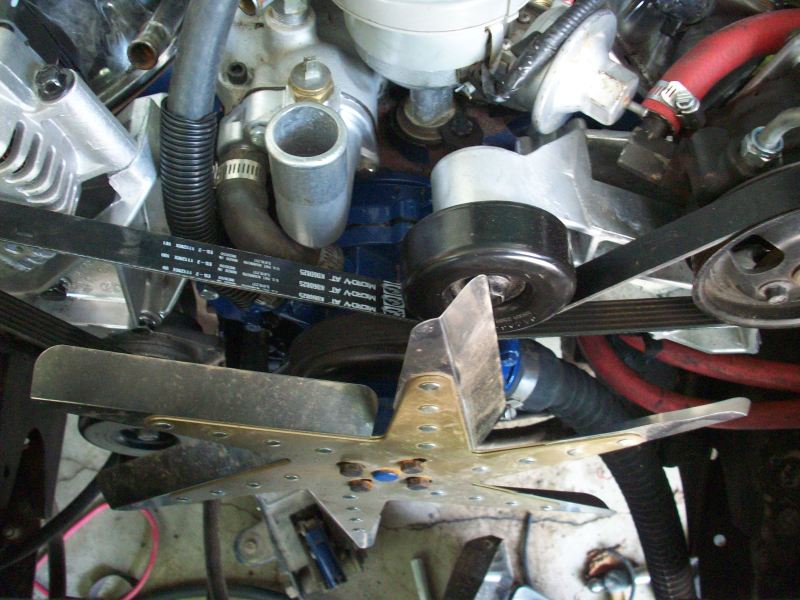
The belt installed.
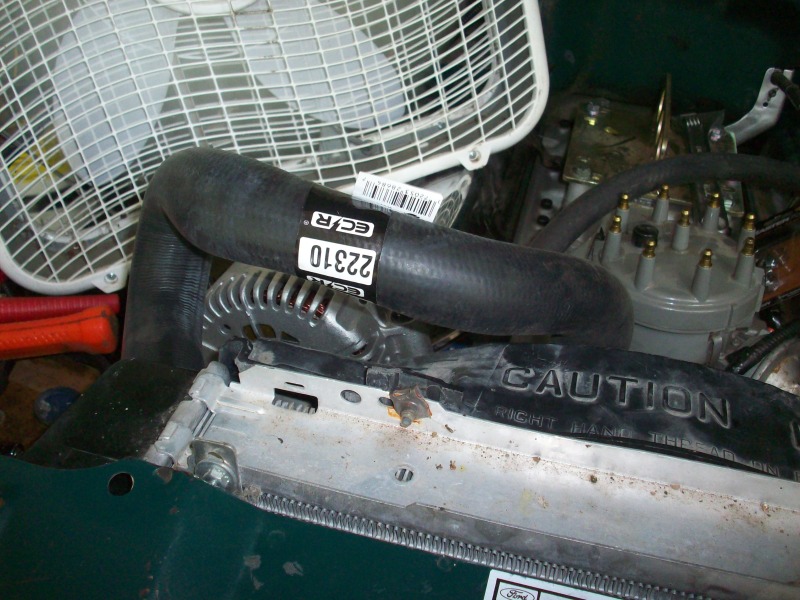
Step Thirteen: Cooling system Install your fan/shroud of choice and then set the radiator in. I used a flex hose for the bottom hose.
My trimmed Explorer upper hose:
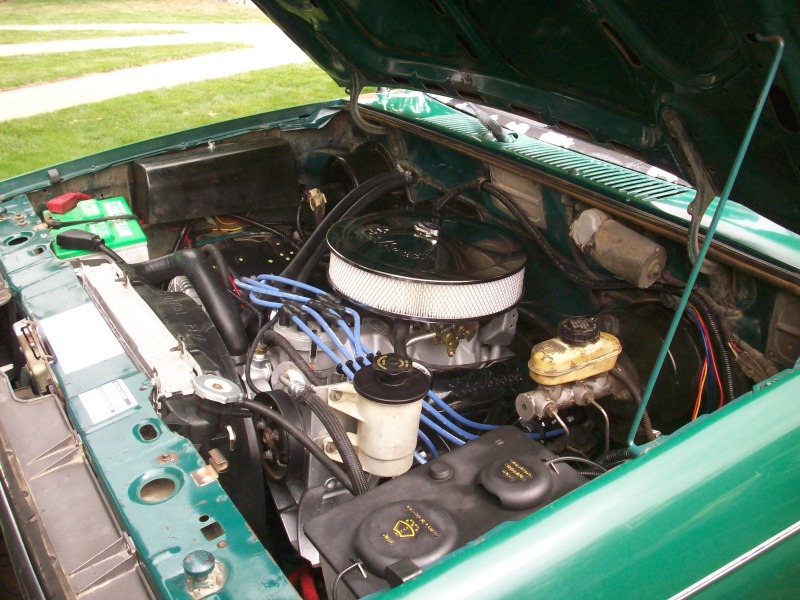
Note: If you have the valve covers off for whatever reason you may have to pull the alternator as well depending on engine placement. I could not get my valve covers on with both the heater box or alternator in place… since the heater box has to go on first I had to remove the belt and alternator to install the valve cover. Even with the fairly tight setup with the shroud it was simple to slip the belt off and remove the alternator. And when it is all said and done you have a more compact setup that looks great.
Links: View The Original Forum Post
|
|
|