|
|
||||||||||||||
|
|
||||||||||||||
|
|
|
Disclaimer: The Ranger Station.com, The Ranger Station.com Staff, nor the original poster are responsible for you doing this modification to your vehicle. By doing this modification and following this how-to you, the installer, take full responsibility if anything is damaged or messed up. If you have questions, feel free to PM the original poster or ask in the appropriate section of The Ranger Station.com forums. Just get all the hardware, tools and take your time. Its simpler than what it seems! Original Poster: mfernandes: Matias Fernandes, Paysandu, Uruguay (South America) Difficulty: 4 out of 10. Time to install: 2 hours approximately Brief Explanation: This is a guide on how to install, from scratch, the Cruise Control on a 1996 Ranger, XLT V6 3.0 liter engine. My truck came with no cruise control from factory, but the system was totally prewired. All the parts are original Ford or Motorcraft. I took the time and patience to get every component, screw and any hardware to make a nice, clean installation. Tools Needed:
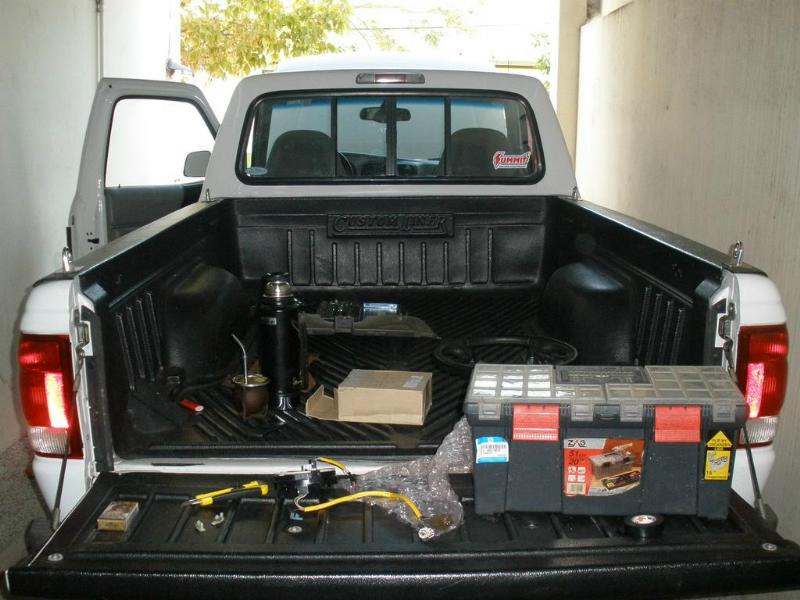
Parts Needed:
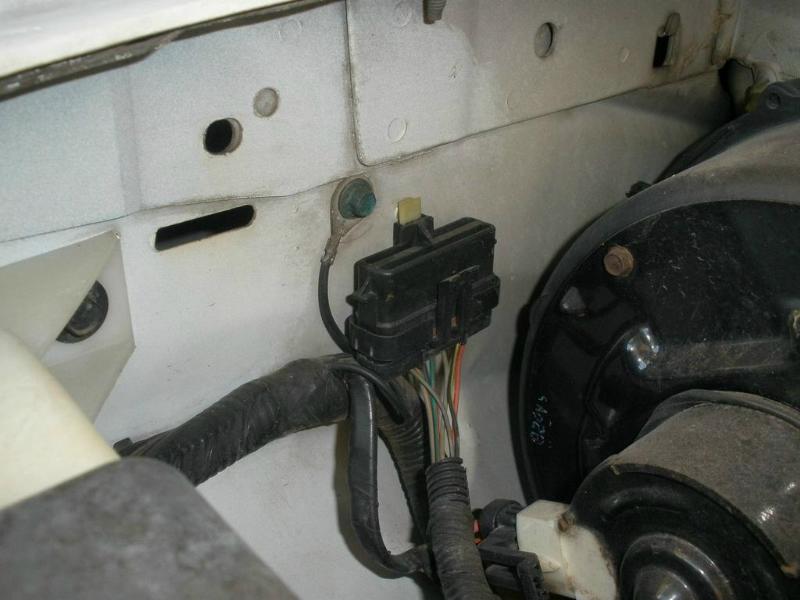
PART 1- IS MY TRUCK PREWIRED? To see if your Ranger came prewired from factory for the Cruise Control (C/C) you will have to check: 1.1- Under the hood: on front right fender, between the windshield washer reservoir tank and the cab fan; look for a large 10-pin black connector, attached to the fender and offcourse, unused. (see pic 1 below). 1.2- Under the dashboard: remove your kick panel and then she metal shield behind it. Check for a yellow plastic tube. This tube ends on 2 connectors, a brown one and a gray one. The gray is for the Air-Bag while the brown one is for the horn, ground and also, the C/C switches. You are prewired if this brown connector has 6 incoming wires. (See pic 2 below) 1.3- On the Master Brake Cylinder: check for an unused plug with 2 wires Pic 1: Connector on the RH fender:
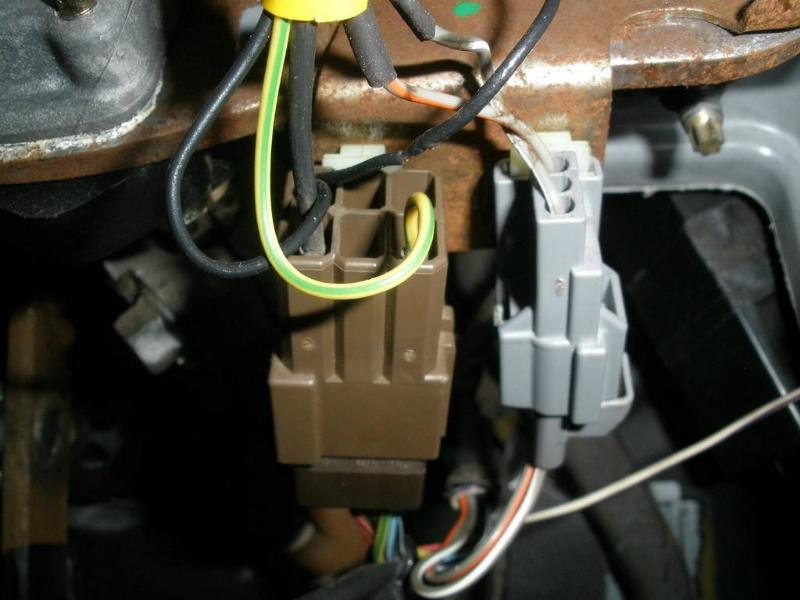
Pic 2: Connector under the dash: See the brown connector? It has 6 incoming wires and only 3 outgoing. This is that the truck is prewired on the steering column, as those extra wires are the wiring for the C/C switches on the steering wheel.
Now that we are sure our truck is prewired for the C/C, we can start mounting all the hardware on the truck.
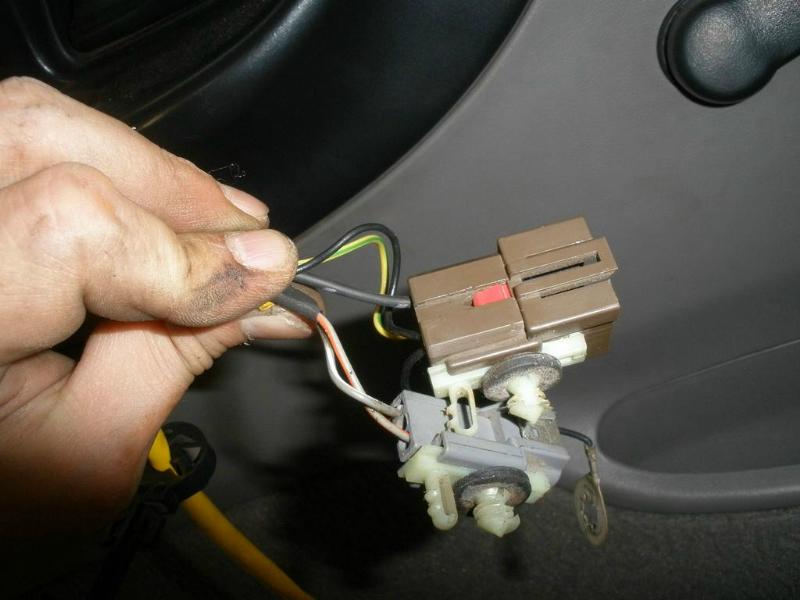
PART 2: MOUNTING ON THE STEERING COLUMN: 2.1- DISCONNECT BOTH POLES ON THE BATTERY AND WAIT FOR AT LEAST 15-20 MINUTES. We will be working with the Airbag system, so fully disconnect the battery and wait till the system gets discharged. 2.2- Remove the kick panel, metal shield underneath and the steering column trim. 2.3- Remove the bolt covers on each side of the steering wheel 2.4- Remove both 8mm nuts on each side of the steering wheel, then unplug and remove the airbag. Set it a side on a flat, non static surface facing UP. 2.5- Unplug the horn wires on the steering wheel. 2.6- Remove the steering wheel nut with an T-40 screwdriver 2.7- With the universal steering wheel extraction tool, remove the steering wheel. 2.8- Disconnect both gray and brown plugs under the steering wheel column (see pic 3). Pic 3: original brown and gray connectors:
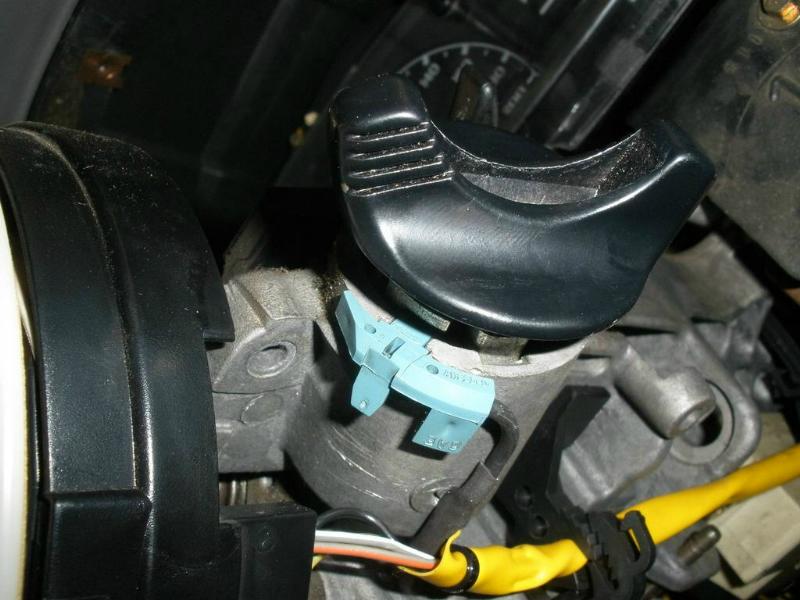
2.9- Disconnect the wire going to the ignition cylinder (light blue plug, see pic 4 below) Pic 4: wire on the ignition cylinder:
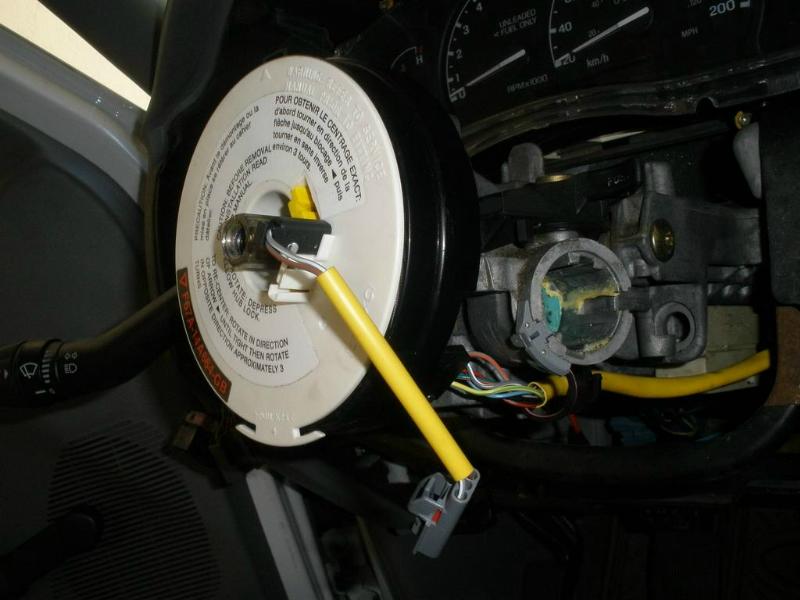
2.10- Remove all the mounting clips the the yellow tube 2.11- Remove the clockspring assy. There are 2 tabs on each side, pull them and remove the clockspring with the yellow tube assy. See pic 5 Pic 5: original clockspring and yellow tube on the steering column:
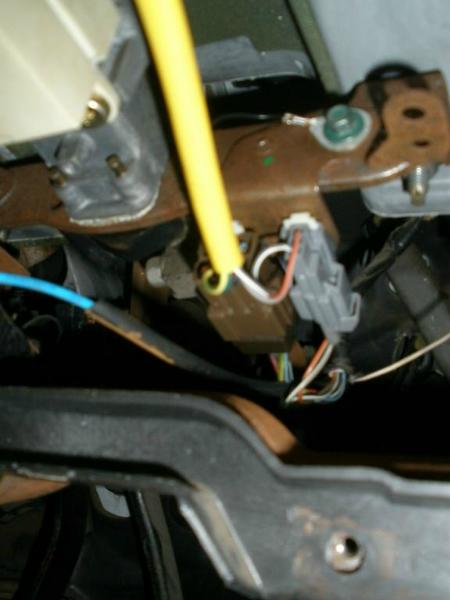
2.12- Once removed, put in place the new clockspring. Attach it firmly to both tabs. Route the yellow tube underneath the column, attaching all the mounting clips and also, the light blue connector on the ignition switch 2.13- Reconnect the brown and grey plug on the steering column. See pic 6. Pic 6: new plugs under the steering wheel column:
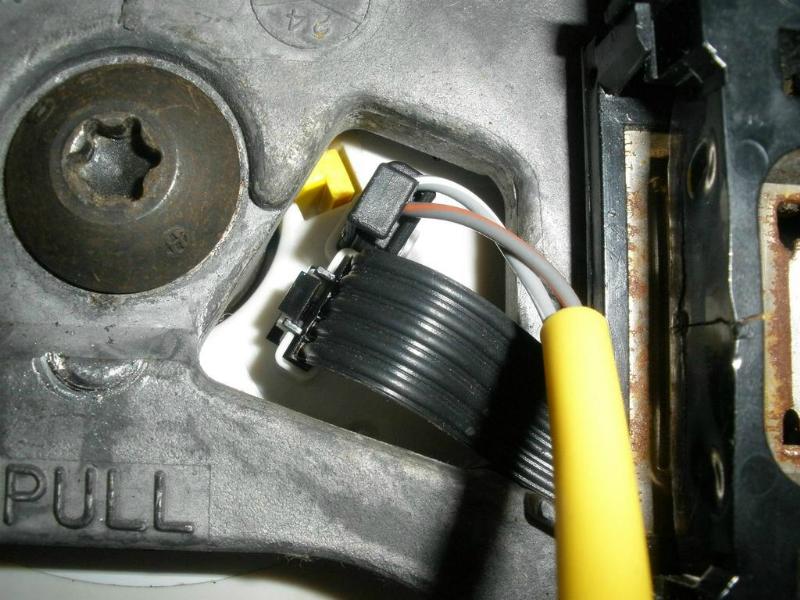
Before installing the new steering wheel with the C/C switches, we have to pull the yellow retainer on the clockspring. This retainer keeps the clockspring centered and in place, so: 2.14- Pull the yellow tab and try not to move the clockspring. See pic 7. Pic 7: yellow retaining clip on new clockspring:
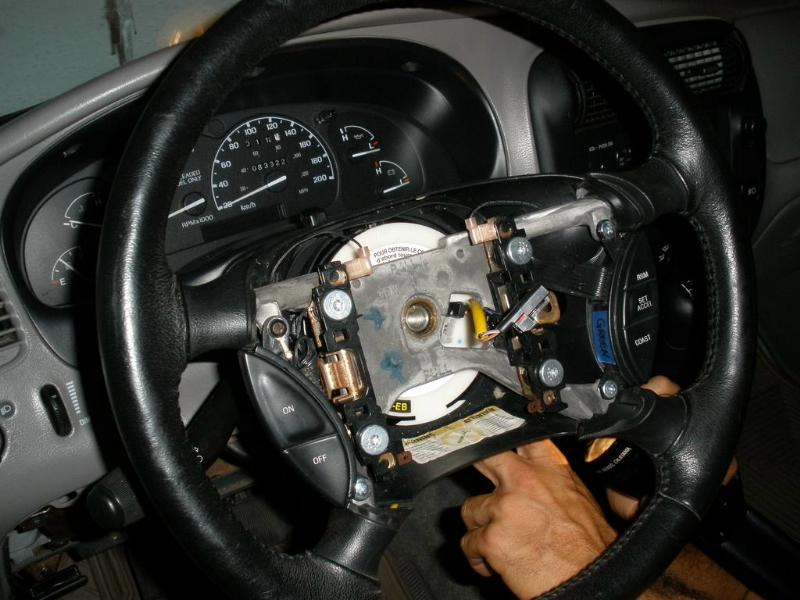
2.15- Reinstall the new steering wheel. There's a mark so you cant miss align it. Put the nut in place and tighten it. See pics 8 and 9. Pic 8:
Pic 9:
2.16- Connect the cruise control connector on the new clockspring. See pic 10 Pic 10: connections on the steering wheel to the new clockspring
2.17- Place and connect the airbag to the new clockspring. 2.18- Reassembly all the panels, we are done with the interior PART 3: MOUNTING UNDER THE HOOD: 3.1- Mount the Cruise Control servo (with its metal bracket) to the RH fender. Tighten the 10mm bolt. 3.2- Route the C/C cable over the engine and route it to the accelerator cable 3.3- On the accelerator cable bracket, you will be able to see an unused spot for the C/C cable. This fit in only one direction. Firmly attach the cable to its spot and double check it wont come out. Its very straight forward you can go wrong with this. 3.4- Place the C/C cable retaining clip and place the cable in place. 3.5- The most difficult part of this installation is replacing the master brake cylinder, as you will have to refill and purge of course with new fluid. 3.6- Remove the original brake master cylinder and place the new one. 3.7- Connect the Cruise Control deactivation switch and plug the black connector, which should have been there with the truck (step 1.3) 3.8- Fill with brake fluid and purge the system
Done with the installation. In my truck I have to modify absolutely nothing and the system works like it should. Also, and as important, it deactivates perfectly, whenever I press the brakes and /or clutch. This was one of the nicest modifications I made to my truck, worth every dollar and minute invested!!!!!! Links: The the original forum submission 'Complete OEM Cruise Control Installation'
|
|
|