- Joined
- Aug 6, 2007
- Messages
- 527
- Reaction score
- 0
- Points
- 0
- Age
- 36
- Location
- Caledonia, Ontario
- Vehicle Year
- 1990
- Make / Model
- Ford
- Engine Size
- 5.0L
- Transmission
- Automatic
This can be done with the seat in the vehicle or out. I would suggest take the seat out and make it easy on yourself as long as the bolts aren't seized in the floor.
Fisrt things first. Get yourself some power lumbar airbags, motor and switch out of something in the wreckers. Cut open the seat cover on each side and peel it up like a banana. bend the tabs holding the bag in and remove the bag and the rods supporting it. Follow the airhose to the motor, unbolt that, then remove the switch. Yes you will need that switch and not just a generic on off electrical switch.
Sorry dont have pictures of tearing them out of a seat. Didn't plan on doing a write up on this when i pulled them out over a year ago.
My car of choice was a 93 Crown Vic that my younger brother blew the engine in.
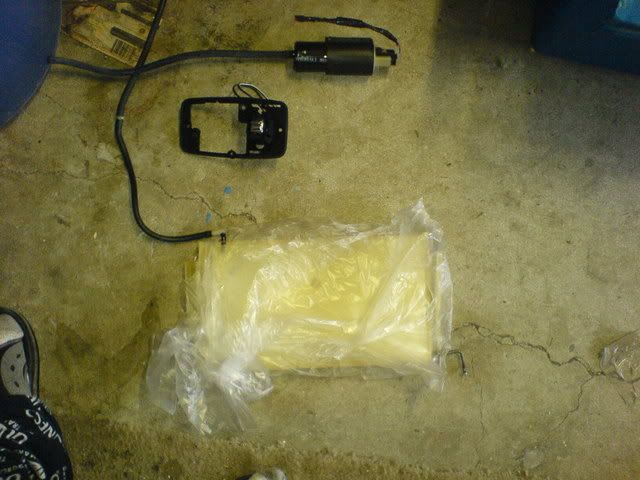
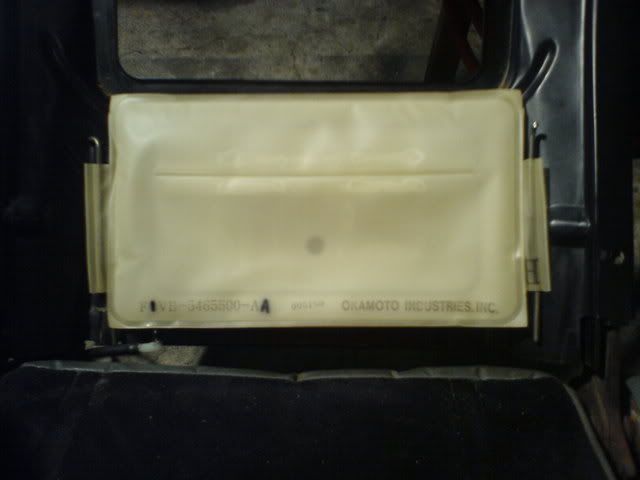
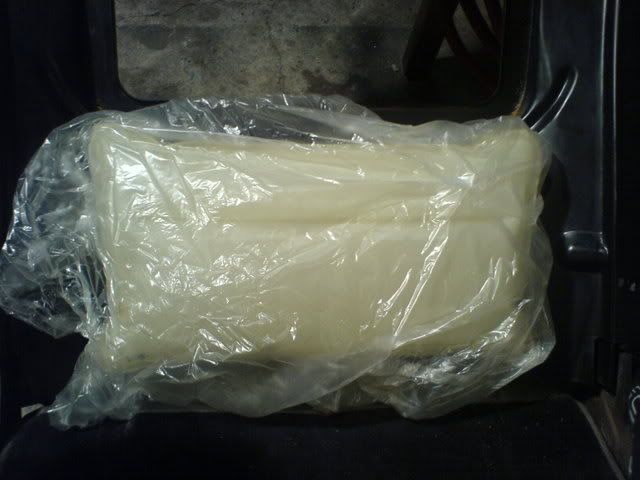
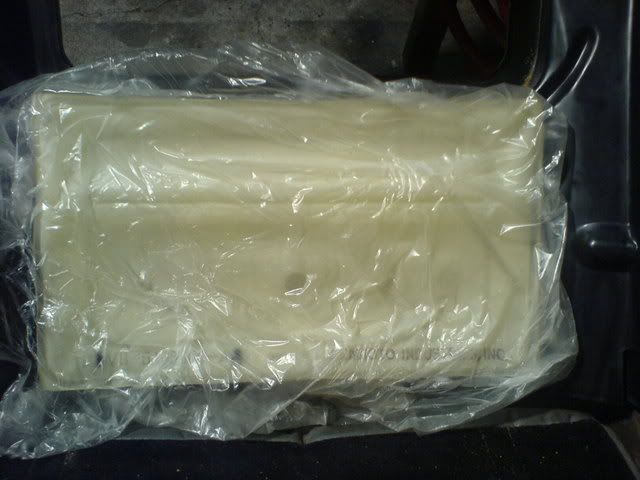
This is what you will remove from the donor.
Start by taking off the seat cover. Theres a plastic tab on the bottom of the back of the seat, unhook them. Then pull the front portion of the tab under the seat back to the front of the seat. Reach into the seat and peel the velcrow apart so that you can take the seat cover off.
Once the seat cover is off, remove the padding. Carefully pull up on the padding and remove the headrest portion. Then remove the clip for the bottom of the padding from the back of the seat frame, and carefully pull out the bottom of the padding.(these instructions are for bucket seats in RBV only, others may be different.)
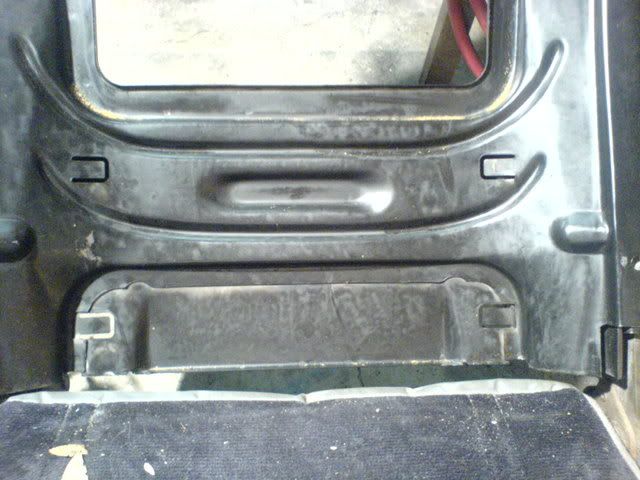
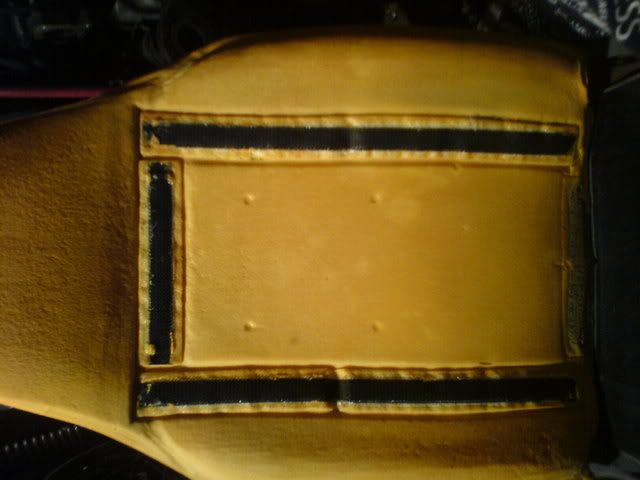
This is the seat frame with the cover and the padding off. Notice the 2 tabs on each side of the seat frame.
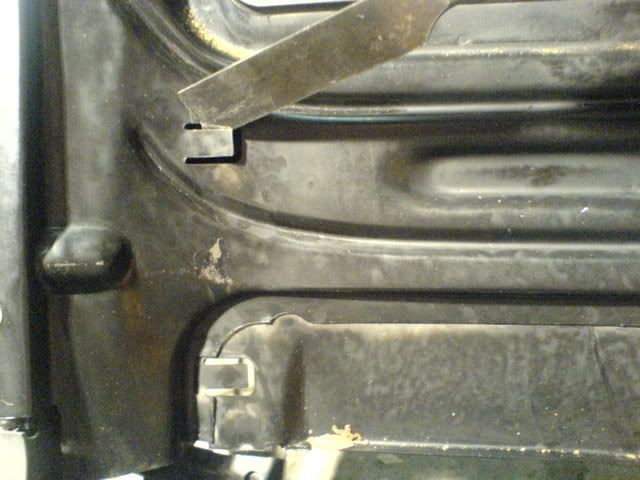
Pry the tabs back with a screwdriver or something similar... like an old chisel .
.
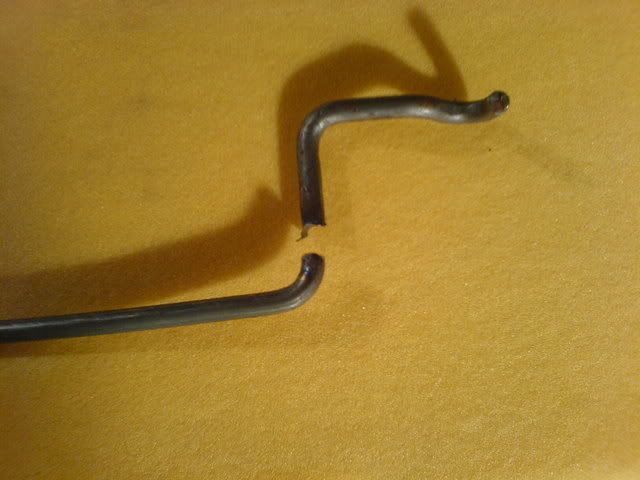
cut the weird piece off of the support rod but leave a small bit of the 90* bend in the rod so that it wont accedently slide out somehow.
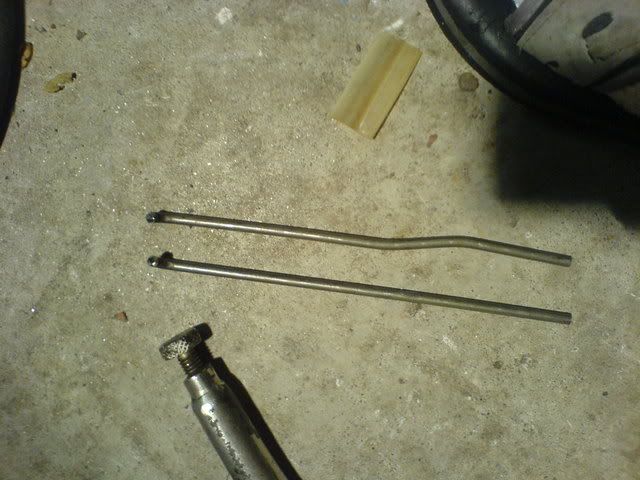
Then line up the rod to the seat frame and find out where it needs to be bent to conform to the shape of the seat frame so that it will fit properly into both tabs.
I suggest marking them left and right so that you dont mix them up, you may bend them slightly differently for each side and if you mix them up you will get annoyed and have to bed them again.
Once you have them bent to the proper shape put the rods into the tabs and bend the tabs around the support rods.
Take that handy chisel, or screw driver back out and pull the tabs back again to take the rods back out
Take the bag and line it up with the tabs. Make sure that the hose is at the bottom, and that the extendy side of the bag is facing away from the frame.
Note how much the bag overhangs from the tab where i am point at with the support rod. This is where you will trim the bag. There is a sleeve there that the rod sits in, DO NOT TRIM PAST THAT SLEEVE! or your bag will leak. use common sence here.
Now that you've trimmed what you need to off of the bag, put the support rods into their sleeves, remember dont mix them up. Then slide the slippy bag onto the airbag. This allows the seat padding to slide without wearing the air bag and making it weak causing it to pop or leak.
http://i168.photobucket.com/albums/u193/dude772/Build/Lumbar/DSC00527.jpg[/IMG
Fold the sleeve over behid the bag and slide the support rod into the tabs, then bend the tabs back down onto the rods. You need to fold the sleeve over because if your like me and using bags from a Crown vic, those seats are bigger and the bag is too this compensates for that.
[IMG]http://i168.photobucket.com/albums/u193/dude772/Build/Lumbar/DSC00528.jpg
Once you have both support rods in with the sleeve folded over take a piece of the hose and slide it over the cut you made in the rod. You dont want any sharp edges or burrs cutting into your lumbar air bag.
Also route the air hose to the back of the seat and underneith.
Now blow it up like a baloon and test it out, make sure it doesn't leak.
Deflate it
reinstall padding, reinstall seat cover. Find a suitible place on the bottom of the seat to mount the motor. Find a suitible place to mount the switch. Route the hose from the airbag to the switch, and the other hose from the switch to the motor. This switch controls 2 things at the same time. it controls the motor and allows air to flow threw. In 1 position it will open the air passage and turn on the motor to allow the bag to inflate. In the neutral position when its holding the air in the bag by restricting the hose going to the bag. And in the third position its just allowing air to flow and deflate the bag.
Reinstall the seat in the vehicle
On my motor theres a red and black wire, on the switch they are both black/white. wire one of the switch wires up to a suitible power source, the other to the red wire on the motor. and ground the black wire on the motor.
There all done. Enjoy your new lumbar comfort
Fisrt things first. Get yourself some power lumbar airbags, motor and switch out of something in the wreckers. Cut open the seat cover on each side and peel it up like a banana. bend the tabs holding the bag in and remove the bag and the rods supporting it. Follow the airhose to the motor, unbolt that, then remove the switch. Yes you will need that switch and not just a generic on off electrical switch.
Sorry dont have pictures of tearing them out of a seat. Didn't plan on doing a write up on this when i pulled them out over a year ago.
My car of choice was a 93 Crown Vic that my younger brother blew the engine in.
This is what you will remove from the donor.
Start by taking off the seat cover. Theres a plastic tab on the bottom of the back of the seat, unhook them. Then pull the front portion of the tab under the seat back to the front of the seat. Reach into the seat and peel the velcrow apart so that you can take the seat cover off.
Once the seat cover is off, remove the padding. Carefully pull up on the padding and remove the headrest portion. Then remove the clip for the bottom of the padding from the back of the seat frame, and carefully pull out the bottom of the padding.(these instructions are for bucket seats in RBV only, others may be different.)
This is the seat frame with the cover and the padding off. Notice the 2 tabs on each side of the seat frame.
Pry the tabs back with a screwdriver or something similar... like an old chisel
.
cut the weird piece off of the support rod but leave a small bit of the 90* bend in the rod so that it wont accedently slide out somehow.
Then line up the rod to the seat frame and find out where it needs to be bent to conform to the shape of the seat frame so that it will fit properly into both tabs.
I suggest marking them left and right so that you dont mix them up, you may bend them slightly differently for each side and if you mix them up you will get annoyed and have to bed them again.
Once you have them bent to the proper shape put the rods into the tabs and bend the tabs around the support rods.
Take that handy chisel, or screw driver back out and pull the tabs back again to take the rods back out
Take the bag and line it up with the tabs. Make sure that the hose is at the bottom, and that the extendy side of the bag is facing away from the frame.
Note how much the bag overhangs from the tab where i am point at with the support rod. This is where you will trim the bag. There is a sleeve there that the rod sits in, DO NOT TRIM PAST THAT SLEEVE! or your bag will leak. use common sence here.
Now that you've trimmed what you need to off of the bag, put the support rods into their sleeves, remember dont mix them up. Then slide the slippy bag onto the airbag. This allows the seat padding to slide without wearing the air bag and making it weak causing it to pop or leak.
http://i168.photobucket.com/albums/u193/dude772/Build/Lumbar/DSC00527.jpg[/IMG
Fold the sleeve over behid the bag and slide the support rod into the tabs, then bend the tabs back down onto the rods. You need to fold the sleeve over because if your like me and using bags from a Crown vic, those seats are bigger and the bag is too this compensates for that.
[IMG]http://i168.photobucket.com/albums/u193/dude772/Build/Lumbar/DSC00528.jpg
Once you have both support rods in with the sleeve folded over take a piece of the hose and slide it over the cut you made in the rod. You dont want any sharp edges or burrs cutting into your lumbar air bag.
Also route the air hose to the back of the seat and underneith.
Now blow it up like a baloon and test it out, make sure it doesn't leak.
Deflate it
reinstall padding, reinstall seat cover. Find a suitible place on the bottom of the seat to mount the motor. Find a suitible place to mount the switch. Route the hose from the airbag to the switch, and the other hose from the switch to the motor. This switch controls 2 things at the same time. it controls the motor and allows air to flow threw. In 1 position it will open the air passage and turn on the motor to allow the bag to inflate. In the neutral position when its holding the air in the bag by restricting the hose going to the bag. And in the third position its just allowing air to flow and deflate the bag.
Reinstall the seat in the vehicle
On my motor theres a red and black wire, on the switch they are both black/white. wire one of the switch wires up to a suitible power source, the other to the red wire on the motor. and ground the black wire on the motor.
There all done. Enjoy your new lumbar comfort
Last edited: