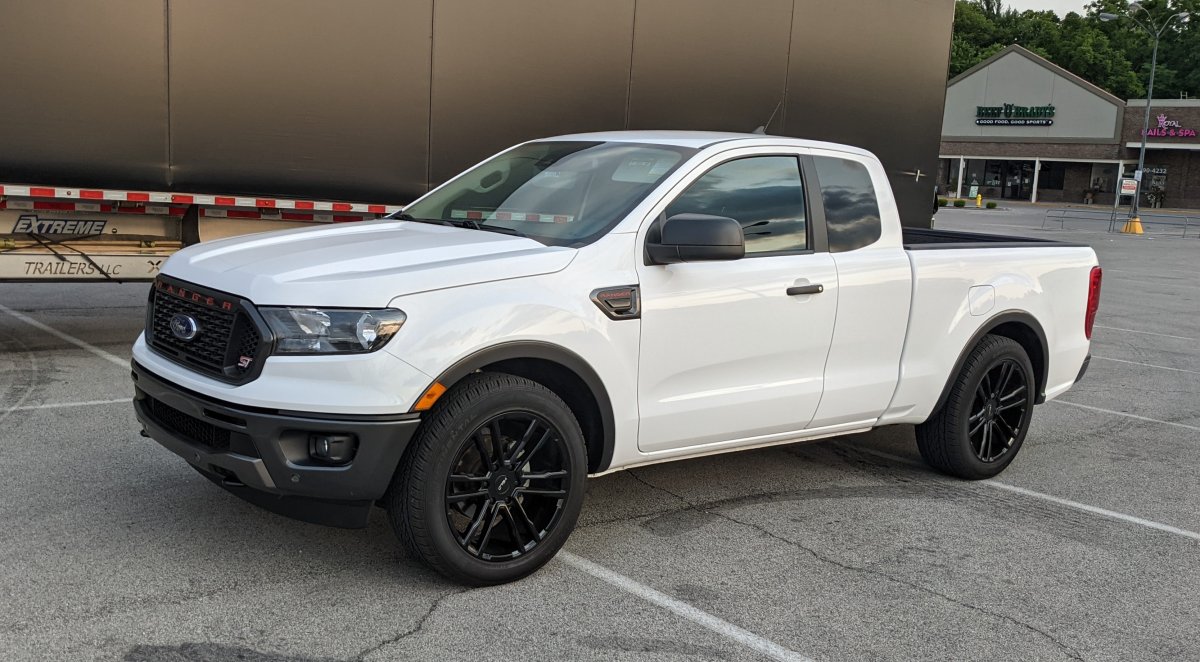
2019 FORD RANGER 2WD/4WD EXT CAB/CREW CAB 0” – 2.75” LOWERING STRUT
BELLTECH 25021 LOWERING STRUT
Download: Belltech 25021 Lowering Strut
Thank you for being selective enough to choose our high quality BELLTECH PRODUCT. We have spent many hours developing our line of products so that you will receive maximum performance with minimum difficulty during installation Note: Confirm that all of the hardware listed in the parts list is in the kit. Do not begin installation if any part is missing. Read the instructions thoroughly before beginning this installation.
Warning: DO NOT work under a vehicle supported by only a jack. Place support stands securely under the vehicle in the manufacturer’s specified locations unless otherwise instructed.
Warning: DO NOT drive vehicle until all work has been completed and checked. Torque all hardware to values specified.
Warning: There will be mild vibrations starting at 70 MPH for 4WD applications.
Warning: There will be an increase in wear and tear on the front drivetrain in 4WD applications; KW N.A. is not liable for increase in wear and tear on the drivetrain.
Warning: DO NOT use 4H AUTO/ 4H above 50 MPH / 80 KM/H
Reminder: Proper use of safety equipment and eye/face/hand protection is absolutely necessary when using these tools to perform procedures!
Note: It is very helpful to have an assistant available during installation. Some provided images my show addition holes / hardware, if instructions do not reference discrepancies please continue with the provided steps.
Recommended Tools:
• Properly rated floor jack and two (2) support stands
• Safety Glasses
• Wheel chocks
• 1/2” drive torque wrench
• Standard and Metric socket wrench set
• Standard and Metric wrench set
• Tape measure
• Marking pen
Difficulty: 2 out of 4 wrenches
Installation Time: 2-4 hours + alignment
Kit Installation
WE RECOMMEND that a qualified mechanic, at a properly equipped facility, perform this installation.
WE RECOMMEND that the installation be performed on a firm, flat and level surface such as seasoned asphalt or concrete. The use of safe and proper equipment is very important!
Kit Preparation
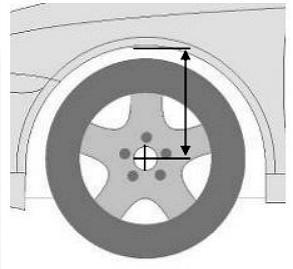
a) Before beginning the install process, measure the hub to fender heights for your vehicle so you can compare the resulting height to the original. Measure vertically from the center of the wheel to the inner edge of the fender. Record results here.
LF:____________ RF:____________
LR:____________ RR:____________
1) JACKING, SUPPORTING AND PREPARING THE VEHICLE
a) Block the rear wheels of the vehicle with appropriate wheel chocks. Make sure the vehicle’s transmission is in “PARK” (automatic) or 1st gear (manual). Activate the parking brake.
b) Loosen, but DO NOT REMOVE the front wheel lug nuts.
c) Lift the front of the vehicle off the ground using properly rated floor jack. Lift the vehicle so that the front tires are approximately 6-8 inches off the ground surface.
d) Place support stands rated for the vehicles weight. The stands should be positioned in the factory specified locations. (Refer to owners manual). Prior to lowering the vehicle onto stands, make sure the support stands will contact the chassis. It is very important that the vehicle is properly supported to prevent any harm to ones self or to the vehicle.
e) Lower the vehicle slowly onto the stands, checking that they properly and securely contacting the frame rails as described above before placing the vehicles weight completely on them.
f) Remove the front wheels.
!SAFTEY REMINDER!
Check for safe vehicle stability before proceeding under the vehicle to begin the following procedures. Never work under a vehicle supported by ONLY a jack. Always use properly rated support stands to support the vehicle.
2) REMOVING THE OEM STRUT
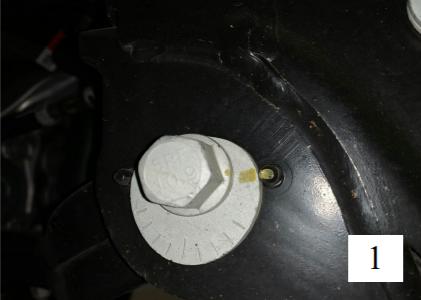
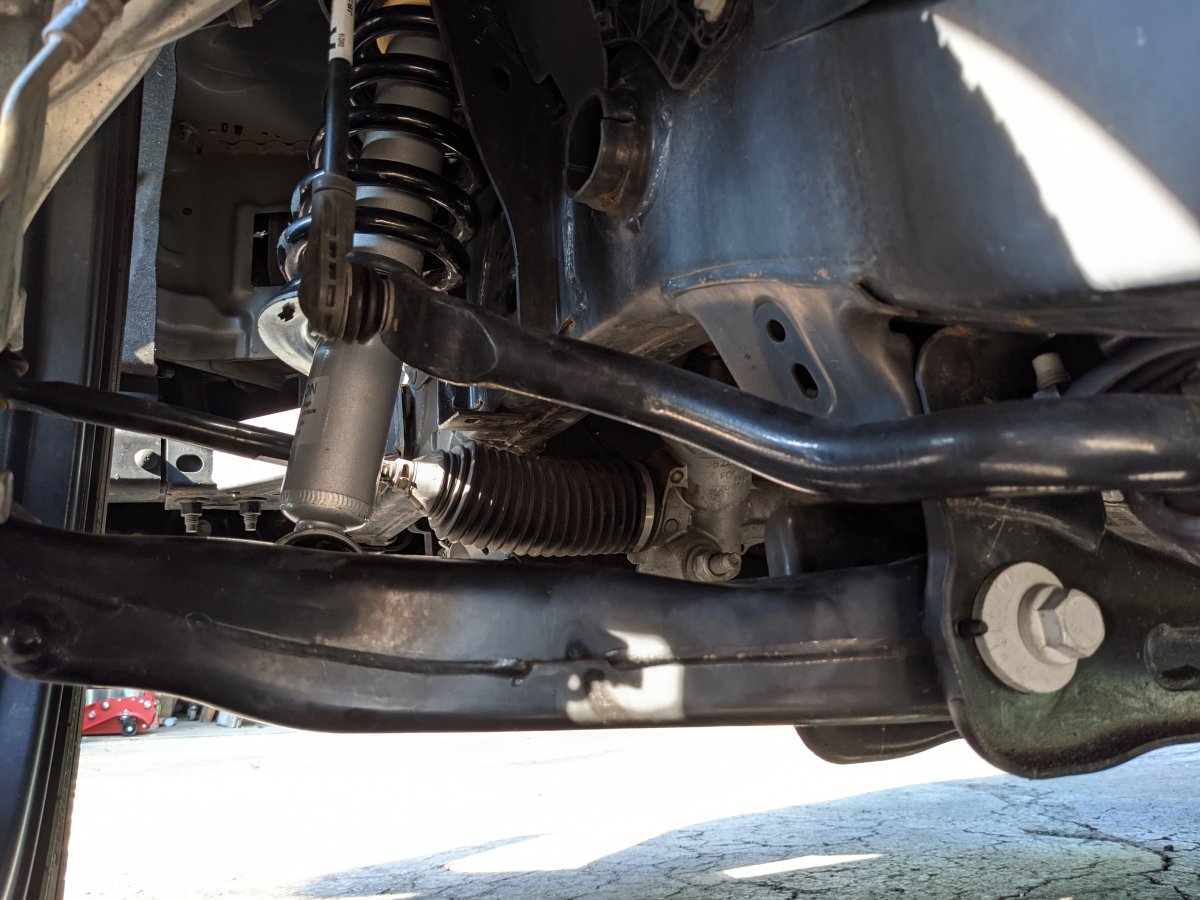
a) Before removing any component, mark your current alignment settings and the outboard of the spring and top mount. (PIC 1)
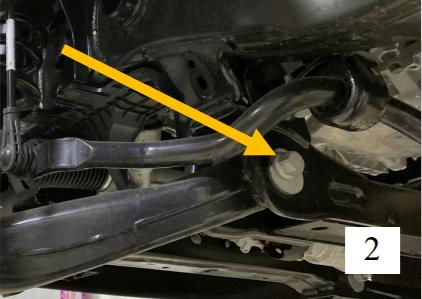
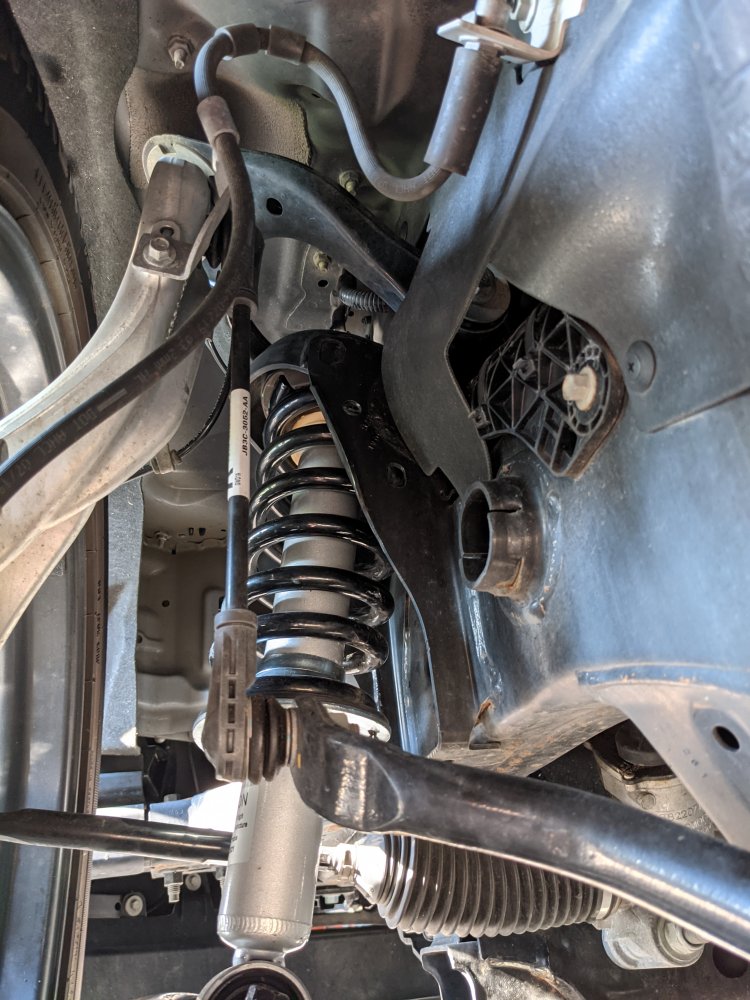
b) Working on one side at a time; loosen and remove the both OEM crossmember bolts that connect the lower control arm and frame. (PIC 2)
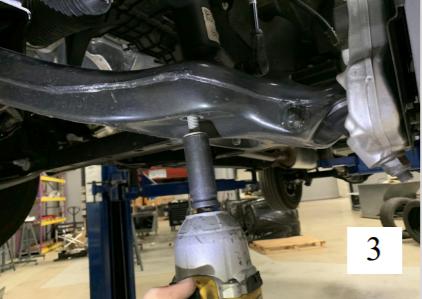
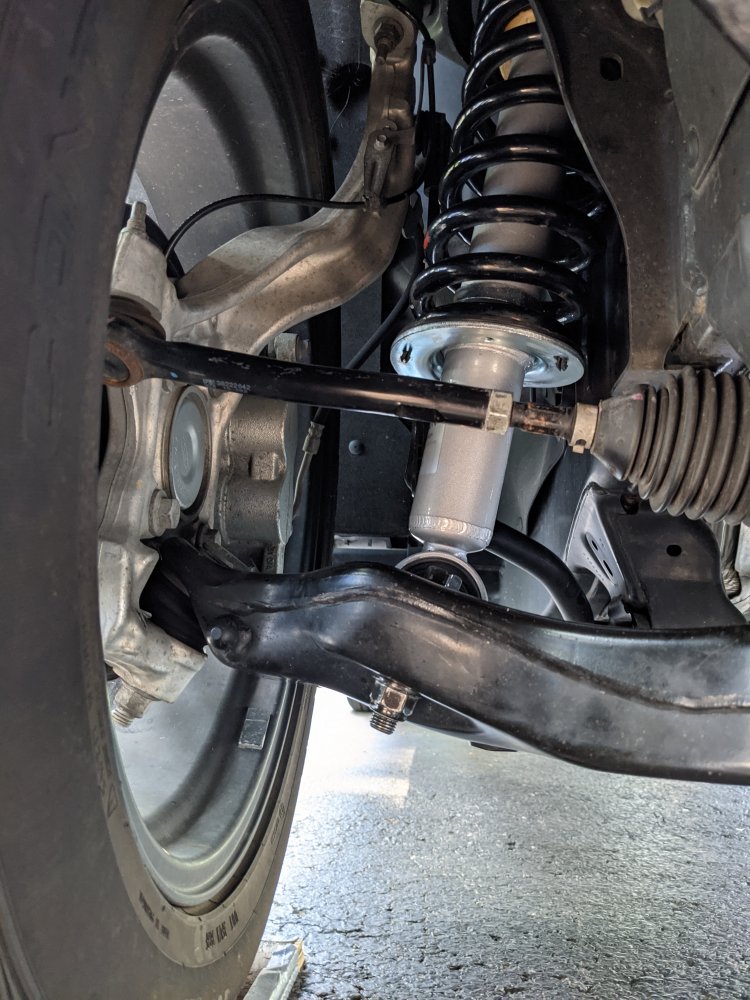
c) Loosen and remove the nuts securing the lower strut mount to the control arm. (PIC 3)
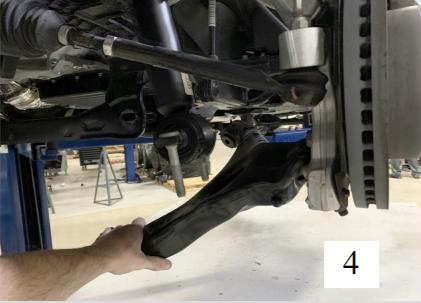
d) Push the steering knuckle and lower control down and back until the lower shock studs are clear from the control arm. (PIC 4)
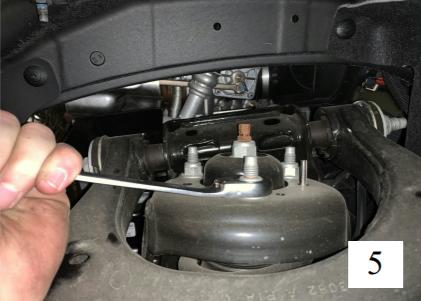
e) Remove the 3 nuts securing the top of the strut to the chassis. (PIC 5)
3) STRUT DISASSEMBLY
!CAUTION! The coil spring is held in place under extreme compression. BELLTECH recommends the use of a heavy-duty spring compressor suitable for truck
springs to perform the following steps. If unsure of your spring compressor capabilities, take this to a professional installer. Use caution during the following steps
to avoid personal injury and/or damage vehicle.
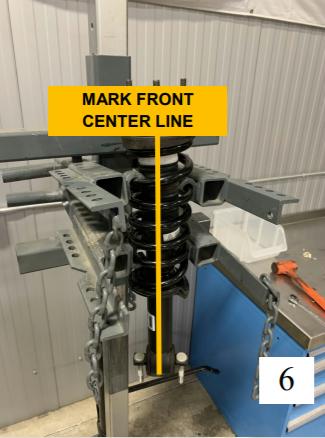
a) Mount the entire spring/strut assembly in a spring fixture. To ease the installation of the new strut, mark a white line down the center of each piece of the assembly for alignment purposes. Note the orientation of the upper mount relative to the bottom shock bar pin and studs. (PIC 6)
b) Compress the spring until the spring is no longer holding tension against the upper and lower spring perch.
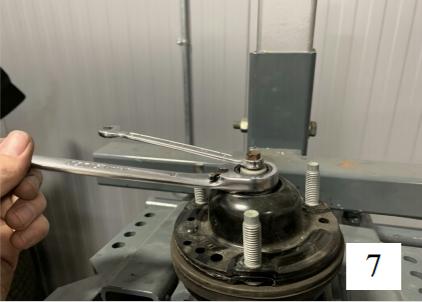
c) Hold the strut shaft from spinning and remove the top center nut from the strut. The shock will need to be supported as the nut is removed as it will fall if not supported. (PIC 7)
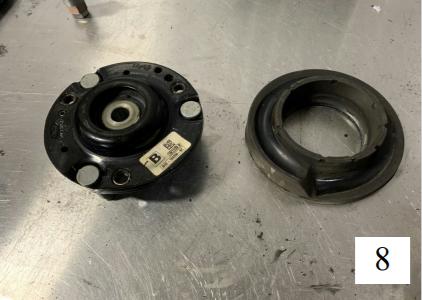
d) Remove the shock and bump stop from the assembly. You will use the OEM top mount, top rubber isolator, bottom spring plastic later (PIC 8)
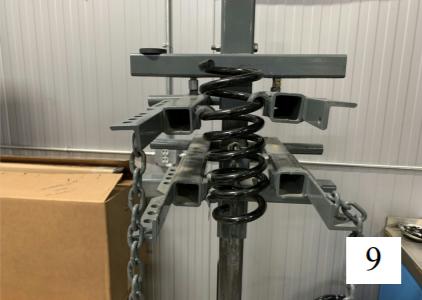
e) DO NOT decompress the OEM spring. (PIC 9)
4) STRUT ASSEMBLY
a) Refer to the chart below to determine the size and number rings and packers to install for the desired ride height.
!CAUTION! The chart below is designed to use the BELLTECH 25021 with the OEM vehicle spring.
BELLTECH does not recommend total lowering beyond the lowest specification on this chart, as the shock performance may be decreased and or damage the shock and/ or vehicle.
b) Assemble the desired number of rings on the BELLTECH 25021 shock body. Slide the supplied BELLTECH spring perch .
c) Install the OEM bottom spring plastic. (PIC 10)
d) Install the supplied black BELLTECH vent disk on the shock. This vent disk will sit around the rod and rest on top of the shock body.
e) **Depending on the desired drop; at this point you will install the BELLTECH packer , if no packer is needed then skip this step.**
f) Install the supplied BELLTECH bump stop on to the shock rod with the smaller end facing upward. (PIC 11)
| Number of Rings | ||||
| Item Description | 2.75″ Lowering | 2.00″ Lowering | 1.00″ Lowering | OEM Height |
| 15mm (0.59″) Ring | 0 | 1 | 2 | 3 |
| 7.5mm (0.29″) Ring | 0 | 0 | 1 | 2 |
| 15mm (0.59″) Packer | 0 | 0 | 1 | 1 |
b) Assemble the desired number of rings on the BELLTECH 25021 shock body. Slide the supplied BELLTECH spring perch.
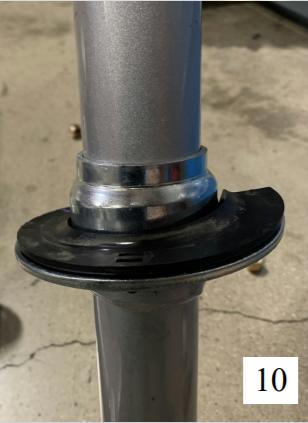
c) Install the OEM bottom spring plastic. (PIC 10)
d) Install the supplied black BELLTECH vent disk on the shock. This vent disk will sit around the rod and rest on top of the shock body.
e) ** Depending on the desired drop; at this point you will install the BELLTECH packer, if no packer is needed then skip this step. **
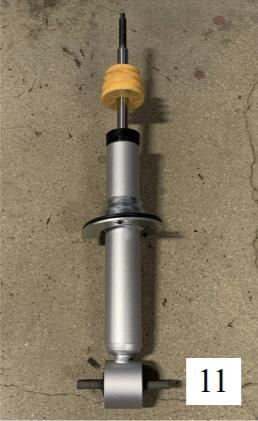
f) Install the supplied BELLTECH bump stop on to the shock rod with the smaller end facing upward. (PIC 11)
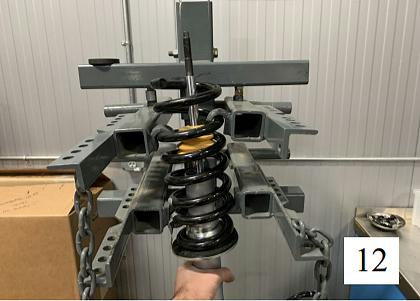
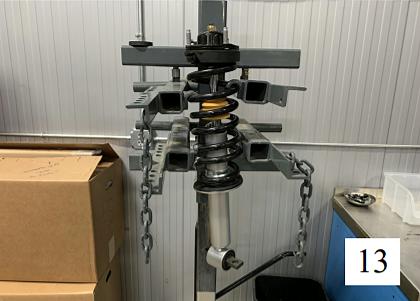
g) Insert the assembled shock in to the compressed spring and upper spring perch. Secure the shock in to the top mount using the supplied nylon lock nut. Tighten lock nut to 33 ft-lbs. (PIC 12 & 13)
h) Align the strut so the bar pin slopes downward to the outside of the vehicle. Use the marking made during disassembly to ensue proper alignment . Uncompressed the spring carefully ensuring proper seating in the upper and lower spring mounts.
5) INSTALLING BELLTECH STRUT
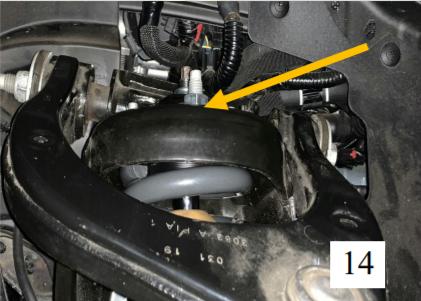
a) Install the top mount in to the chassis and secure with the original OEM nuts. Torque nuts to factory specifications. (PIC 14)
b) Attach the lower strut mount to the lower control arm using the supplied flanged bolt and flanged nylon nut. Torque the supplied nuts to 60 ft-lbs.
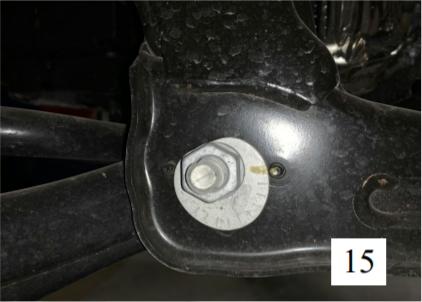
c) Attach the lower control arm back in to the frame using the original OEM alignment hardware. DO NOT tighten or torque until the vehicle is on the ground. (PIC 15)
d) Set alignment settings to the markings made before uninstall.
9) FINALIZING THE INSTALLATION
a) Re-install wheels and torque to the Manufacturer’s specifications.
b) Check that all components and fasteners have been properly installed and torqued.
c) Lift the vehicle and remove the support stands. Carefully lower vehicle to the ground.
d) TORQUE the lower control arms to Manufacturer’s specifications.
e) Check brake hoses, cables and other components for any possible interference.
f) Check for wheel/tire to chassis/body interference.
g) Test-drive the vehicle in a remote location so that you can become accustomed to the revised driving characteristics and handling. Be aware that the vehicle will handle substantially different now that it has been lowered.
h) Take the vehicle to a qualified shop for a 4-wheel alignment.
i) Check all of the hardware and re-torque at intervals for the first 10, 100, and 1000 miles.
The REAR of the vehicle MUST BE lowered accordingly for proper handling and performance and also to maintain warranty. We recommend using the BELLTECH 6530 flip kit.
NOTE: Front end alignment is required immediately following the installation. Due to the manufactures design, lowering past a certain drop the vehicle will maintain a negative camber setting that will not be capable of more adjustment. Maintaining proper TOE settings and responsible tire rotations will result in even tire wear.
| Parts List | ||
| Part # | Description | Quantity |
| 25021-200 | Lowering Strut | 1 |
| 25003-015 | 15mm Spacer Ring | 3 |
| 25003-075 | 7.5 mm Spacer Ring | 2 |
| 26021-003 | Spring Perch | 1 |
| 65210031 | Ventilation Disk | 1 |
| 4935-001 | 15mm Bump Stop Packer | 1 |
| 4926-001 | Bump Stop | 1 |
| 25007-777 | Lower Strut Hardware Kit | 1 |

