Original Poster: Nez’sRanger
Difficulty: 2 out of 10
Time to install: 40 mins to 1 Hr
Disclaimer: The Ranger Station.com, The Ranger Station.com Staff, nor the original poster are responsible for you doing this modification to your vehicle. By doing this modification and following this how-to you, the installer, take full responsibility if anything is damaged or messed up. If you have questions, feel free to PM the original poster or ask in the appropriate section of The Ranger Station.com forums.
Brief Explanation:
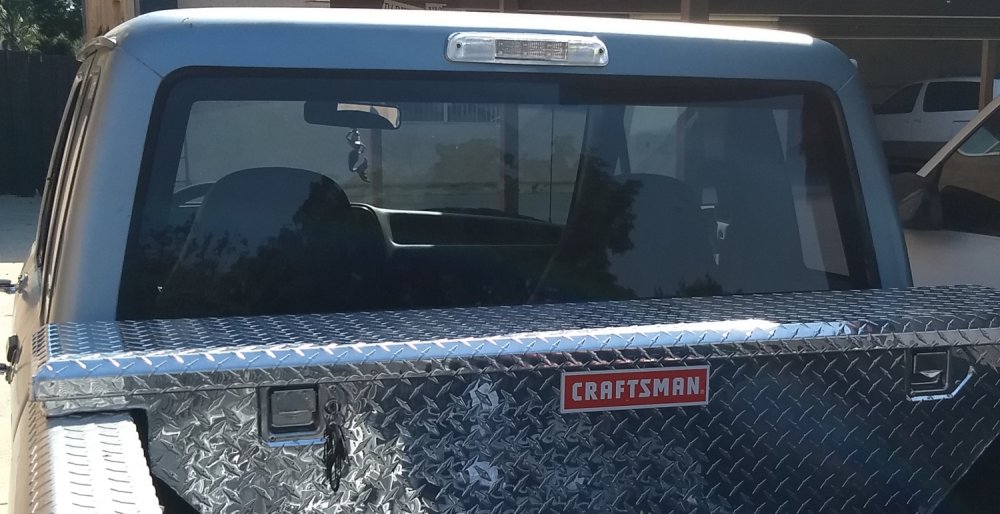
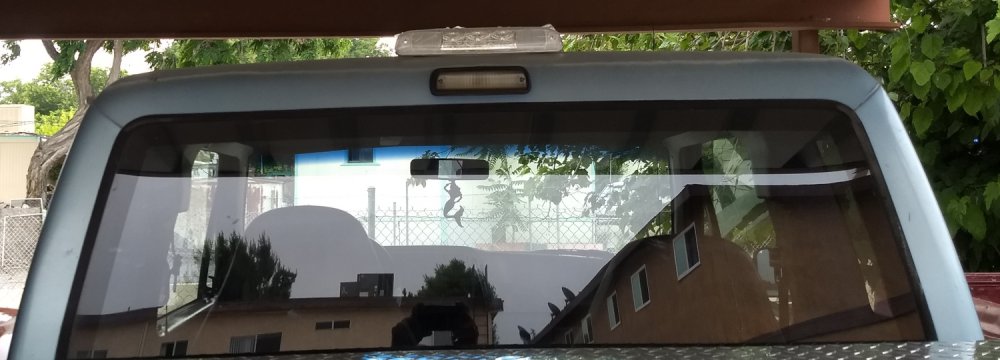
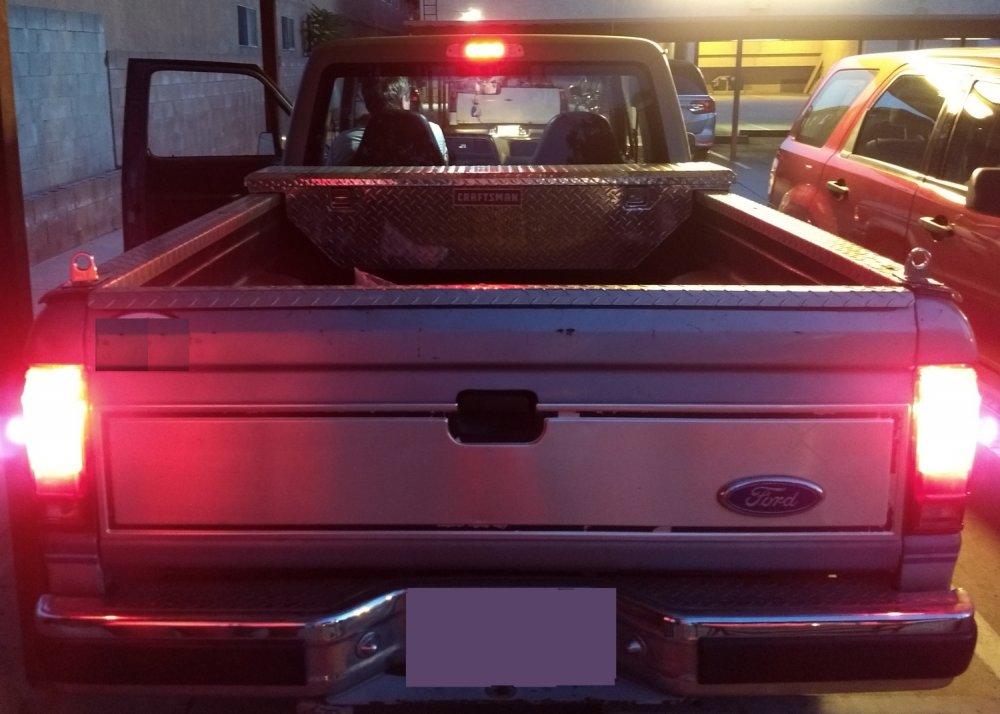
The high-mounted third brake light was not standard on a ranger until at least model year 93. For some of us, the added safety of having that third brake light to alert other drivers is important, even if it has a slight chance of averting a rear-end collision that totals our prized truck! Plus, it gives the back end of your truck a fresh, clean updated look without compromising the classic look of your 1st or 2nd generation Ranger!
Tools Needed:
- Phillips #2 screwdriver or a screw gun with a Phillips #2 tip
- Jigsaw with a 2″ metal blade
- Wire strippers
Parts Needed:
- At least 10′ of 14-18ga wire (I used 16)
- At least 3 male and female spade connectors
- 1 splice connector
- A third brake light assembly from a second-generation Ranger. Apparently, they’re the same from 1993-2011.
I bought an aftermarket LED unit, RazorMotor model 4855AC(JS-03616-0).
NOTE: The 1993-2011 Ford Ranger and 1999-2016 Ford F250/F350 Super Duty use the same third brake light.

Step 1: First, before doing any electrical work, always disconnect the negative terminal from the battery! Remove original cargo light and cut the wires just before the bulb socket. I can’t guarantee your truck has the same wire colors, so please consult your electrical diagram before cutting any wire. My 1989 has 3 wires: 1 Black ground, and 2 black w/ red stripe (which were connected, since it’s only a 2-terminal connector). Now attach spade connectors to the ends of the two wires (remembering that the two black w/ red stripe wires are together as one).
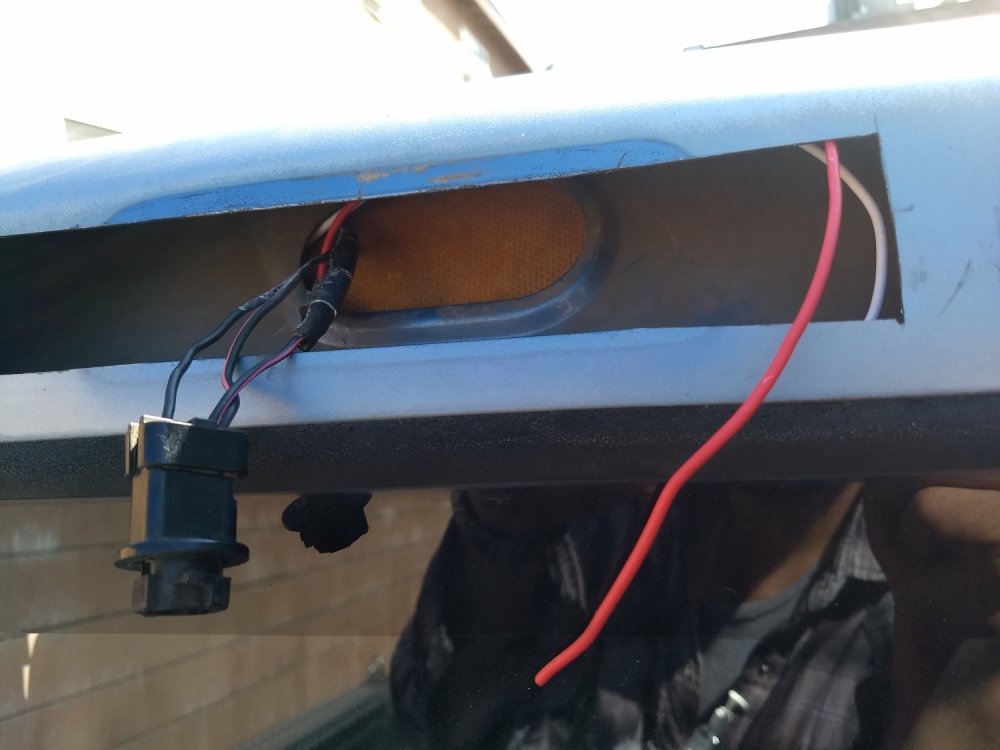
Step 2: The unit I used was 4.25″ wider than the original cargo lamp, so measure out 2.125″ from either side of the hole, and cut the sheet metal away with the jigsaw. Be careful not to hit the second layer of metal inside. I actually had to snap the jigsaw blade in half to clear the inner layer of metal.

(The red and white wires are not original, but are actually part of the next step)
Step 3: Remove the trim behind the driver’s door and feed the new wire between the two layers of sheet metal (as seen in the picture above). I fed two wires in there just for the heck of it, but only one is needed. I ran the wire under the carpet just left of the driver’s seat, and had it come out under the dashboard (of course, away from any pedals). Because the old 1st and 2nd gen trucks shared brake and turn signals on the same bulb, you can’t just splice into the brake wire under the truck. Instead, you have to splice into the brake light switch that is on the brake pedal. As per the electrical diagram for my 89, the switch gets power feed straight from the fuse that powers the brake lights and turn signals, and then the brake switch feeds into the multi-function switch, and is thus unaffected by the turn signal. I found out the hard way that the brake shares its circuit with the turn signals (I had my new light flashing with my left turn signal! Ha!) When splicing into the brake pedal switch, be sure it’s on the right side of the switch… on mine, the feed was light green with an orange stripe; however, the side we’re concerned about was light green.
Step 4: Now that you spliced the new wire, it’s time to crimp on a spade connector to its other side. Cut the wires on your new light assembly, and attach spade connectors to its individual wires (Note that there is no need to separate the two ground wires on the new light). Plug the light assembly into the wires, screw it into place, and reconnect the battery and test that the cargo light and brake lights work with their respective switches.


About The Author
Jim Oaks is the founder of The Ranger Station, one of the longest-running Ford Ranger enthusiast communities on the web. He has spent over three decades owning, modifying, repairing, and driving Ford Rangers on the street, trail, and cross-country routes.
Since launching TheRangerStation.com in 1999, Jim has documented thousands of real-world Ranger builds, technical repairs, drivetrain swaps, suspension modifications, and off-road tests contributed by owners worldwide. His work has been referenced by enthusiasts, mechanics, and off-road builders looking for practical, experience-based information rather than theoretical advice.
Jim’s hands-on experience includes long-distance overland travel, trail use, drivetrain and axle upgrades, suspension tuning, and platform comparisons across multiple Ranger generations. The content published on The Ranger Station is grounded in first-hand experience and community-verified data, not marketing claims or generic specifications.
