By Pat Campbell (Sparkz)
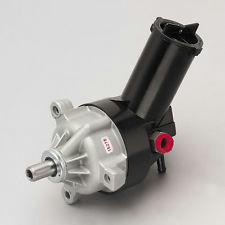
This pump is built for Ford 4x4s with a maximum pressure of 1500 psi. The pump is ported to provide better flow and performance. These pumps are great for when you need a bolt on replacement pump and also provide the optimum performance that can be achieved. The early steel type pump is only available without reservoir. The newer aluminum type pump comes with a new plastic reservoir.
My truck is a 1989 with air conditioning and I used AGR pump PN#8015HD
The install was just like OEM replacement {Yes it’s a bolt in thing}. The AGR is a reworked OEM pump, but has a black tank. All the hoses fit the same holes in the same place.
I did elect to install a small cooler though {as it does get hot!}. I used a Perma-Cool Mod#1010 Trans cooler {its like 4″x8″x3/4″}. I mounted it on a small piece of aluminum flat stock & drilled two (2) holes in the air dam next to the existing Auxiliary Trans lines. For my new Cooler lines to feed the hoses thru I then bought (1) 5’x3/8″ steel line from the auto parts store and bent (2) 3/8″ line leaving the nut on one tube to fit the steering box. I bent the tubes to parallel the frame rail to the front of the radiator and mounted them down with a 2-tube cleat in two places. Then using a 300Psi hose & Ty-Raps to manage the hoses under the core support connected the cooler to the lines And had to use a 4″ piece at the pump as needed {Otherwise as the motor torques it would rip the tank off} It really looks like OEM and works well.
Updated Part Numbers:
808156 AGR Steering Pump
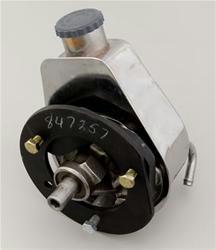
847257 AGR Super Pump
Bleeding An AGR Pump: (By Death Ranger)
AGR has found that the following method is the only proper way to bleed a system.
When to bleed:
- After any component replacement.
- If any part of the system is opened for any reason.
Why to bleed:
- To prevent pump damage.
- To ensure proper system operation.
- To stop steering noise.
Before bleeding:
Inspect steering system.
- Hoses must not touch any other part of vehicle. Steering system noise could be caused by hose touching frame, body, or engine.
- All hose connections must be tight. Loose connections might not leak, but could allow air into system. Do not over tighten o-ring hoses as the o-ring might be crushed. Check flare seat type connections for exact fit.
How to bleed:
- Engine off. Do not start engine until system is fully bled or pump could be damaged.
- Raise front wheels off the ground, or leave pitman arm or tie rod off.
- Turn steering wheel full left.
- Fill fluid reservoir to “full cold” level. Leave cap off. Use only power steering fluid. NO TRANSMISSION FLUID.
- With assistant checking fluid level and condition, turn steering wheel lock to lock at least 20 times.
- On systems with coolers, winches, Rock Ram assist, you may need to cycle 40 – 100 times.
- Trapped air may cause fluid to overflow. Thoroughly clean any spilled fluid to allow for leak check.
- While turning wheel, check fluid constantly.
- No bubbles are allowed.
- For any sign of bubbles, recheck connections. Repeat above.
- Fluid level should be steady (Rock Ram assist may vary slightly).
- No bubbles are allowed.
- Start Engine. With engine idling, maintain fluid level. Reinstall cap.
- Return wheels to center. Lower front wheels to ground or install pitman arm.
- Start and run engine for two minutes. Turn Steering wheel in both directions.
- Verify:
- Smooth power assist.
- Noiseless operation.
- Proper fluid level.
- No system leaks.
- Proper fluid condition.
- No bubbles, No foam, No discoloration.
- If all proper conditions apply, procedure is complete.
- If any problems remain, turn engine off, do not drive, and see Special Conditions.
Special Conditions:
- Foam or bubbles in fluid:
- Fluid must be completely free of bubbles.
- Fluid should not rise when engine is turned off. (trapped air)
- Be alert to periodic bubbles that could indicate a loose connection or leaky o-ring, or bad flare seat, in either the pressure or return hose.
- Discolored fluid. (milky, opaque, or light tan color)
- Switch engine off. Wait two (2) minutes. Recheck hose connections. Repeat start up procedures. If problem still exists, replace or check possible cause.
- Return hose clamps.
- Return hose o-ring or flare seat.
- Pressure hose o-ring or flare seat.
- Any other connections.
- Fill system and repeat bleed procedure for each possible cause.
- Switch engine off. Wait two (2) minutes. Recheck hose connections. Repeat start up procedures. If problem still exists, replace or check possible cause.
Noise:
- Pump whine or groan. (after all air is out of system, if air is not out, then see Special Conditions)
- Check belts for slippage.
- Mark pulley and make sure it is not slipping on shaft.
- With engine running, recheck hoses for possible contact with frame, body, or engine. If no contact is found, cool down fluid and repressurize system.
- After cooling fluid, start engine to come up to operating temperature. Recheck.


