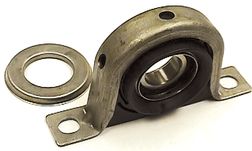
The extended Cab 4×4 Rangers used a two-piece rear driveshaft through 1997. In stock form, the only problem with the 2-piece shaft is that the rubber carrier bearing bushing can fall apart and need to be replaced. A failed carrier bearing can make a knocking sound in the driveline that is consistent with driveline rotation/wheel speed. If you’ve installed a suspension lift on your vehicle, the bearing tends to wear out much quicker. Many Ranger owners that install suspension lifts on pre-1998 extended cab Rangers either lower the carrier bearing (look HERE for more information) or replace the 2-piece driveshaft with a 1-piece driveshaft from a 1998 and newer model (look HERE for more information).

Photo of 1-piece driveshaft (top) and 2-piece driveshaft with carrier bearing (bottom)
Here is the instructions if you simply need to replace the carrier bearing:
1) Remove the driveshaft from the vehicle.
2) Separate the driveshaft from the coupling shaft maintaining proper orientation.
3) Remove the nut retaining the half round yoke to the coupling shaft and remove the yoke.
4) Check the center bearing support for wear by rotating the outer area while holding the coupling shaft. If any wear or roughness is evident, replace the bearing.
5) Inspect the rubber insulator for evidence of hardness, cracking or deterioration. Replace if damaged in any way.
6) Re-install the coupling shaft yoke.
NOTE: Be sure the yoke is re-installed on the coupling shaft in the same orientation as it was originally installed. The orientation is critical so that proper driveshaft balance and U-joint phasing is maintained. Tighten the retaining nut to 100–120 ft. lbs. (135–162Nm).
7) Re-assemble the driveshaft to the coupling shaft, maintaining proper orientation.
