If you’re looking for information on wheel travel, suspension travel, ‘flex’, etc., this page is for you.
Index:
Front Beams/Brackets
Beware Of Drop Brackets
Equal Length Beams
Camber
Coil Springs
Shocks/Mounts
Coil-Overs
Radius Arms
1983-1997 Ford Ranger Bolt On Kits
Ranger A-Arm
Rear Suspension
64-Inch Chevy Leaf Swap
Bed Cages
Web Links
Wheel Travel – Is the distance of vertical suspension movement measured at the hub centerline.
Why is it important?
Wheel travel can be an important factor depending on what type of off-roading you are doing;
Desert Racing & Pre-Running – In high speed offroading such as desert racing, a lot of wheel travel combined with the proper shock valving will allow the suspension to cycle and absorb the bumps creating a more stable ride. If you’ve ever watched a SCORE desert truck racing across the desert, the truck looks like it’s running smooth across the desert and the suspension is doing all the work. The truck isn’t bouncing all over the place.
General Off-Road & Rock Crawling – In this situation you’ll hear people talking more in the terms of ‘flex’, but it’s basically the same thing. As your vehicle is crawling over rocks or other trail obstacles, you want the tires to be able to drop far enough down from the vehicle to allow the tires to make contact with the surface. If the axle can’t droop and the tire is hanging in the air, it’s not going to be able to offer you any traction to help you continue forward. Of course, if you don’t have lockers to send power to all four wheels, then it’s not much good to you.
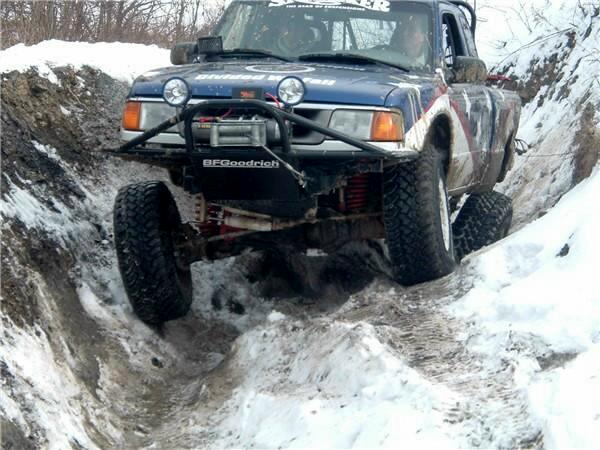
Above is a photo of my 1996 Ford Ranger 4×4 with a Skyjacker 6-Inch Class II suspension kit with extended radius arms. Notice how even though the truck looks fairly level, the axles at at some extreme angles, and the tires are making contact with the ground. It’s important for all (4) tires to have contact with the ground for the vehicle to continue forward. This was actually a steep snow covered climb. If I had not been able to keep all (4) tires on the ground, I might not have made it.
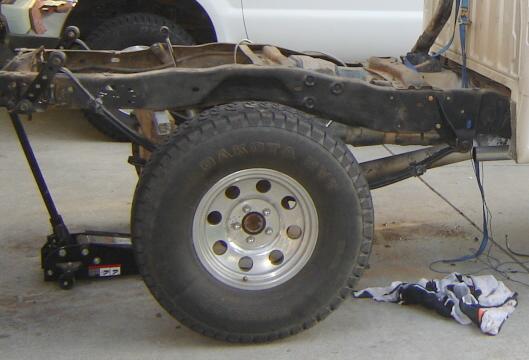
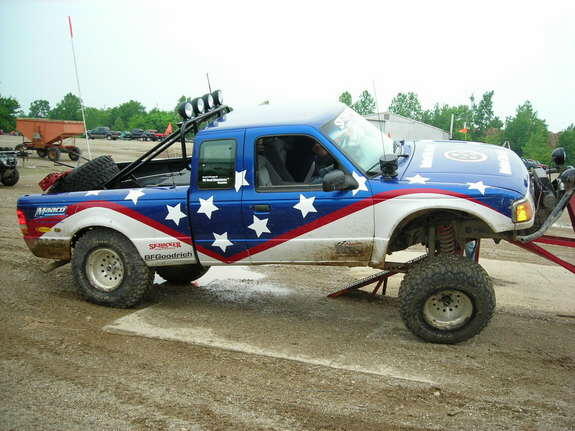
If you look at the photos below, you’ll see that it doesn’t take much to lift a tire off of the ground with a vehicle that has limited wheel travel.
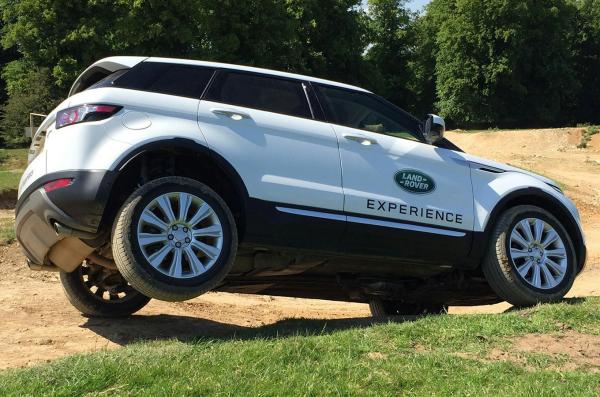
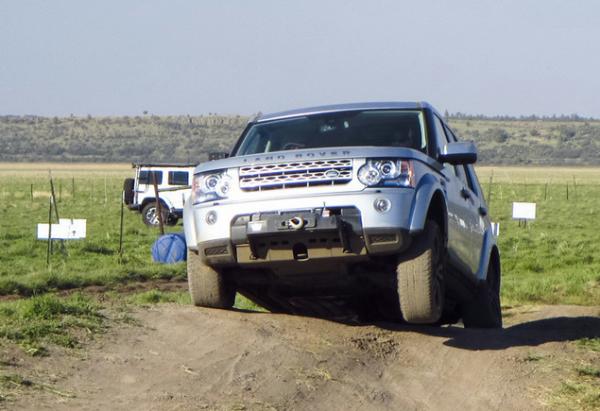
The Ford Twin Traction Beam (TTB) and Twin I-Beam (TIB) Suspensions:
Many people refer to the front suspensions in 1983-1997 Ford Rangers as a TTB suspension. The fact is, that TTB refers to the 4×4 version and TIB refers to the 2WD version.
TTB/TIB suspensions can be built to provide a lot of wheel travel. Soft coil springs and the lever action provided by the beam make for a great off-road design. From the early 1980s to the mid 1990s, I-beam suspensions could be found on just about every successful race truck. Even today, most serious prerunners use some form of I-beam suspension for its durability, simplicity, and long wheel travel potential. I-beams do have their Achilles heel, though. With the long travel comes excessive amounts of camber and caster change throughout the suspension cycle. This can cause erratic handling if the steering linkages are not considered.
From 1966 to 1979 Ford used the longest equal-length I-beams of any year on its 2WD F-series trucks. These arms stretched all the way to the opposite framerails. The longer the beams are, the more travel that can be obtained. From 1980 to 1996 Ford used unequal-length I-beams, the driver side being longer. This allows the driver side to provide more travel than the passenger side with less camber change. Needless to say, this can cause some unique handling situations.
Rangers (and Bronco IIs) from 1983 to 1997 also enjoy the long travel benefits of I-beam suspension. Much like the 1980-1996 fullsizes, the Rangers have a longer beam on the driver side.
Modifying The Ford Ranger TTB/TIB Front Suspension:
When you look at the front suspension of a Ford Ranger, you have:
- Front Axle Beams/Mounting Brackets
- Coil Springs
- Shocks
- Radius Arms
These are the components that are going to influence how much wheel travel you achieve. Lets break it down part by part;
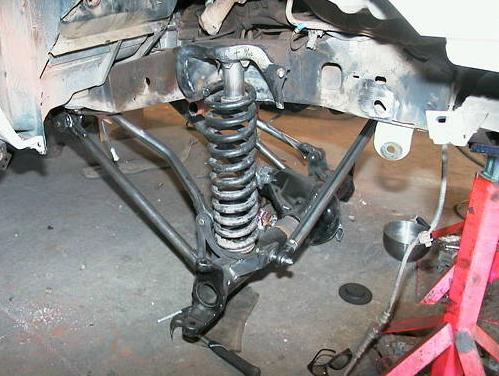
Front Beams/Brackets – When lifting the suspension and looking for more wheel travel, you have the option of:
- Lowering the beams with suspension drop brackets to allow room for taller springs
- Having the beams bent to allow the mounting end of the beam to bend up towards the frame and bolt in to the factory mounts. This is stronger than using drop brackets, but bending the beam can also shorten it.
- Get specially manufactured beams that are bent and still maintain the correct widths.
- Get specially manufactured equal-length beams.
The method you choose will depend on your budget and intended use of the truck. While drop brackets may work fine on a trail truck, you’ll have a stronger setup using bent beams and the factory mounts blasting across the terrain at high speeds.
Bending the beams should be done by someone who has experience. An incorrect procedure can cause the beams to fail or make the vehicle impossible to align. One drawback of bending the beams is that the track width of the front end becomes narrower than stock. The radius arms need to be modified for proper caster or, better yet, replaced with longer pieces. This method of lifting affords more wheel travel and strength than the bracket kits.
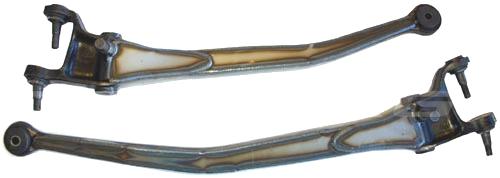
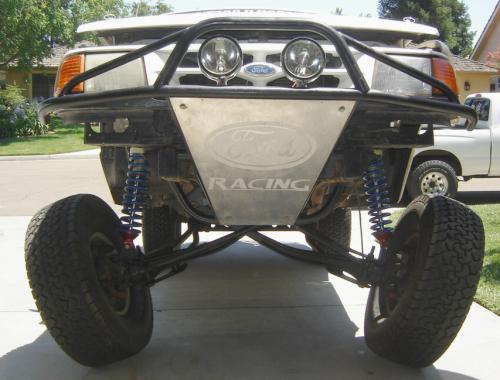
The next option is production-built beams. The beams are usually made from chromemoly tubing or plate. Their design allows them to accommodate up to an 8-inch lift coil. Longer radius arms are required for these beams but all the components are bolt-on. Huge amounts of travel up to and beyond 15-inches is possible depending on the shock towers. The static track width that these beams provide is usually a few inches more than stock. When the suspension compresses, the track width will be several inches wider than stock. Fiberglass or trimmed fenders may be necessary to provide full use of the travel.
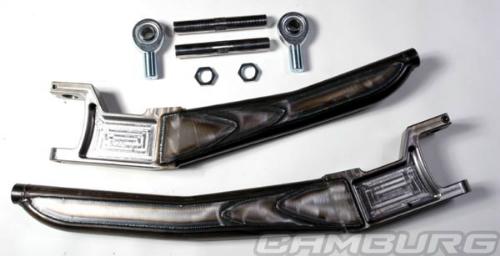
These Camburg 1983-1988 2WD Ford Ranger beams are 4-inches wider per side and are a coil-over application only.
These Camburg 1989-1997 2WD beams are 4.5-inches wider per side, have Heim Joint pivots, Billet CNC end pieces, and also come with billet steering extenders.
Bent beams aren’t just limited to 2WD’s.
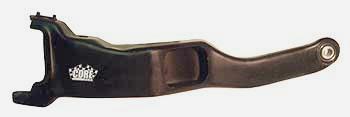
These Camburg 4×4 beams are modified for off-road use. They are cut and turned for proper camber alignment. They will require porting for the axles to clear in use with long travel trucks. Designed to work with stock axles. Shown with optional uni-ball pivot.

These Solo Motorsports Dana 35 beam are 4-inches wider, trussed, cut and turned, and have uniball cups. 4×4 beams are also offered by Autofab.
If you establish long wheel travel with your TTB, the pass-through window for the axleshaft may need enlarged so it will clear the shaft in all positions of bump and droop travel.
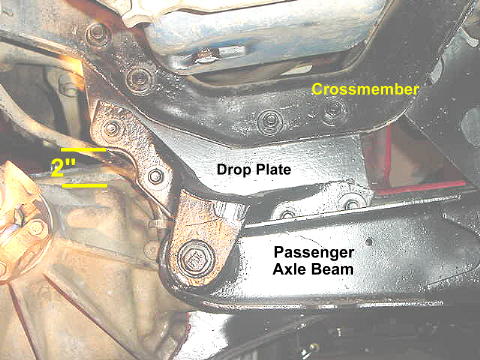
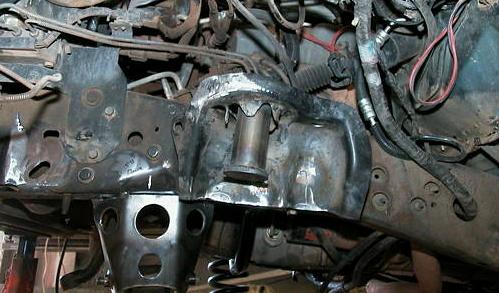
This is one of those topics that I think is overlooked and needs mentioning. People will buy a cheap lift kit to save money, or piece together their own lift with used parts. I strongly suggest you stay away from lift kits or suspension brackets that use a drop plate for the passenger beam pivot bracket.
Here’s why:
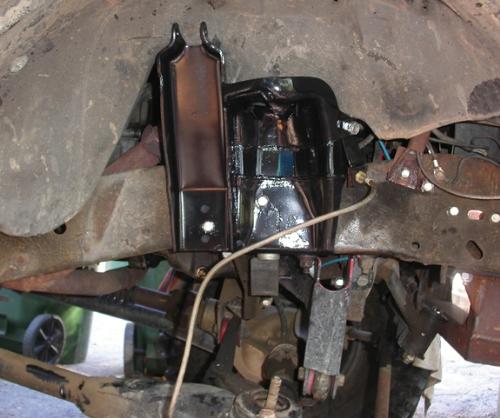
Looking at the back side of this lift, you can see where the pivot bracket for the passenger side beam has been lowered by using a drop plate. If you look to the left, you can see where there is only 2-inches of space between the bracket and the front differential. There is a risk that upward suspension travel could cause the differential to strike the plate and bracket and break the differential housing.
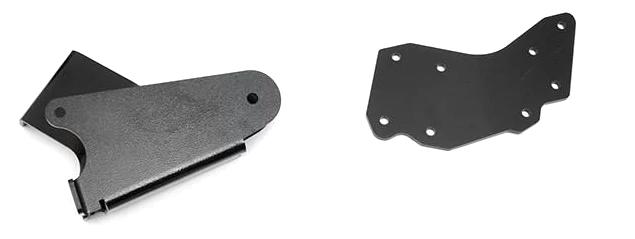
The photo above shows lift kit brackets that use the drop plate method. The photo below shows heavy duty brackets that includes a complete replacement passenger beam pivot bracket.
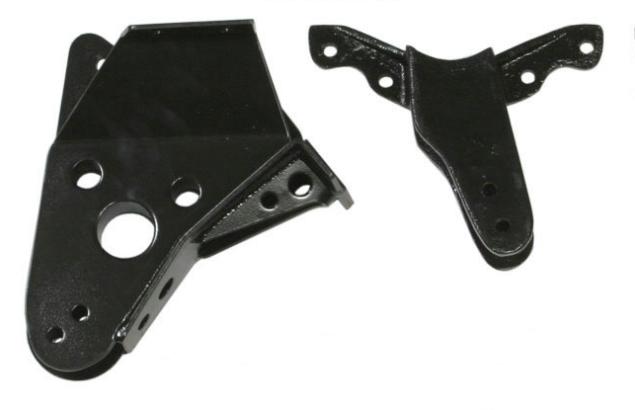
Equal Length Beams – We need to talk about equal length beams. What are equal length beams? If you remembered when we mentioned the 1966-1979 2WD Ford F-150 beams, we said that the longer the beams are, the more travel that can be obtained. With equal length beams, you don’t have to deal with one side (the driver side) being longer and providing more travel than the passenger side, causing the driver and passenger side beams to have different camber changes and causing unique handling situations.
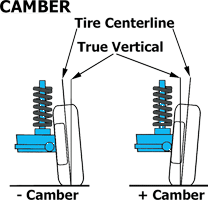
Camber – is the inward or outward tilt of the front tires as viewed from the front. Inward tilt is negative, outward tilt is positive. Camber is used to distribute load across the entire tread. Improper camber makes the tire wear on one edge, and causes the vehicle to pull to the side.
Above is a picture of what a lot of positive camber can look like with a lot of wheel travel. This photo is for example only before any adjustments were made.
It’s important to remember that your Ranger has unequal length drivers and passenger beams. That means that if you’re switching to equal length beams, you’re going to need new mounts (pivots) to mount the beams to the frame. You’ll also need a good crossover steering kit. It is highly recommended that you buy a complete system (beams, pivots, cross-over steering and radius arms) from a company such as Camburg or Giant Motorsports to ensure that it all works together.
These equal beams (above) are from Solo Motorsports.
Above are Camburg’s equal Length beams. Their kit comes with equal length beams, radius arms, beam pivot brackets, radius arm brackets with tranny X-Member, full steering kit with swings, all heims and hardware, billet aluminum hubs with hub centric dust cap, custom hollow snout spindles, Wilwood brake rotors, calipers, and pads, 9 degrees of camber adjustment, Pro-Am pinch bolt bungs, low un-sprung weight compared to other setups. No need for an outdated king pin setup with old junkyard parts and no ability to change you camber.
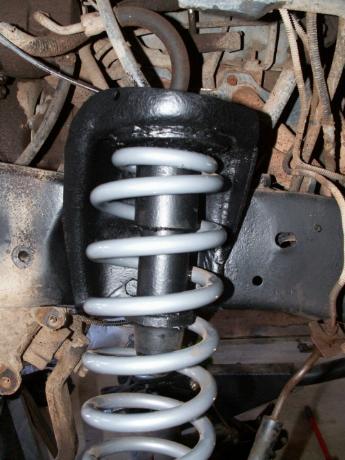
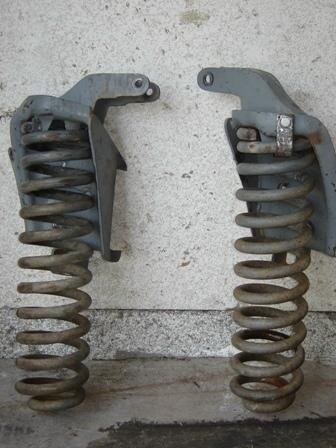
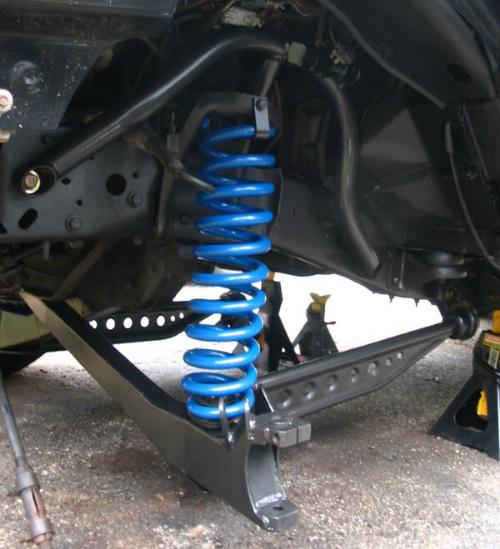
Coil Springs – The coil springs will determine the ride height and it’s spring ratio will effect how it rides and handles. To much wheel travel can cause the spring to pop out of the upper spring mount (bucket). This is generally controlled by the use of a retainer, limiting strap and we’ve even seen the use of a tube in the middle of the upper mount to allow the spring to slide down so it can’t pop out.
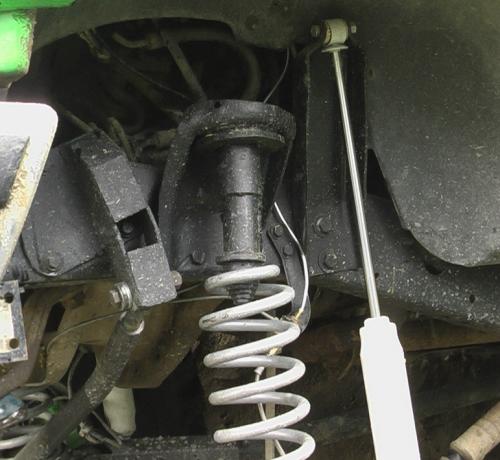
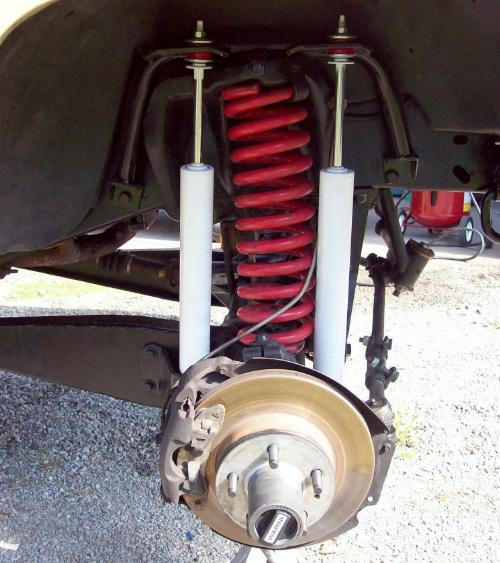
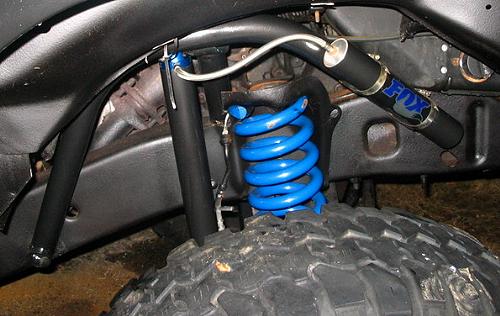
Shocks/Mounts – Shocks can be one of the biggest restrictors when it comes to wheel travel. Often a suspension can’t achieve its full droop because the shock has reached the end of its travel. Ranger owners have found ways to change the mounting locations of the shocks.
The shock mount above was available for a while from Skyjacker and allowed dual front shocks. If you look to the left of the coil you’ll see a pocket where the shock would have normally been mounted. This new mount bolted on and added a couple more inches of shock length.
From there, enthusiasts found that they could use an F-250 shock mount (above) buy cutting the original upper shock mount off of the coil bucket and mounting the F-250 shock mount next to it.
This has (2) advantages;
1) it allows room for a longer shock,
2) it allows for the use of a traditional upper EB1 bushing style shock instead of the Rangers stud type shock mount.
The Ford part number is E5TZ18183A.
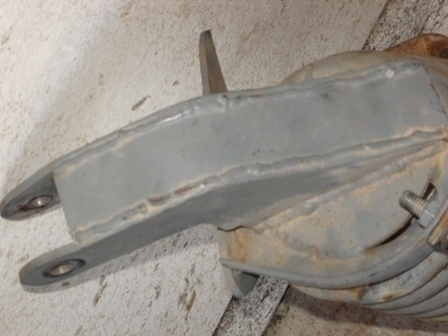
Here is another custom configuration. The owner cut off the factory shock mount part of the coil bucket and reinforced it with a piece of metal plate. Then they created a new mount and welded it to the top of the coil bucket. The shock should mount to the rear of the spring, not the front. The farther along the radius arm the shock is mounted, the farther the shock will have to travel up and down.
This shock mount is an old Fabtech unit. Unfortunately, Fabtech stopped making products for the 1983-1997 Rangers. Again, this raised the shock mount to allow for a longer shock and did away with the stud style upper shock mount.
Above is a Autofab wheel travel kit. The custom made coil buckets are much stronger than stock. It has a tall hoop structure so the front shock can be a 14-inch travel shock. Here is the secret of the wheel travel. Get a long enough of a shock in there to stroke for all that travel. The rear shock mount is different because that shock is further back on the radius arm and does not stroke the same amount. Remember, the farther out from the radius arm mount (at the frame) you mount the shock, the farther it is going to have to travel (shock stroke).
If you have followed along in the progression of these photos, you’ll see that as the desire for wheel travel increases, the upper shock mount heights increase as well.
Coil-Overs – Yes, we didn’t have coil-overs in the list above, but if you’re pretty off-road savvy, by now your thinking to yourself, “what about coil-overs?”
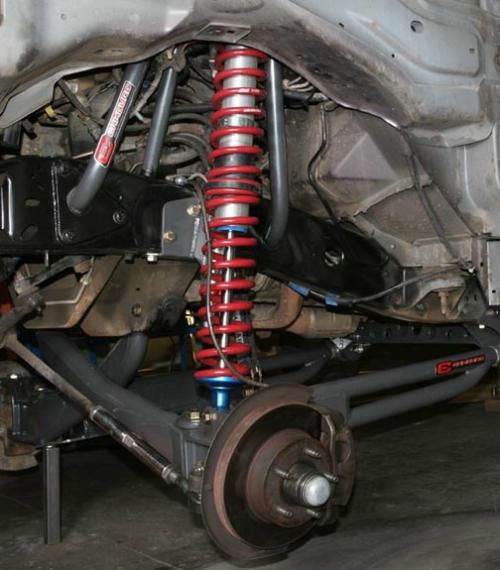
This setup is made by Camburg and replaces your coil spring with a coil-over. Coil-overs have always been considered pricey, but are becoming more and more popular in serious off-road vehicles.
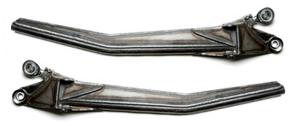
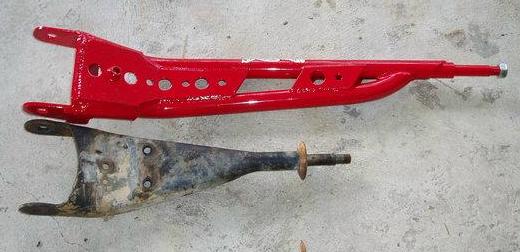
Longer Radius Arms – Almost any serious off-road Ranger you see now a days has a set of extended (longer) radius arms. The longer radius arms increase wheel travel (up to 30%) and help keep caster change to a minimum during suspension cycling. They also help triangulate and strengthen the suspension assembly.
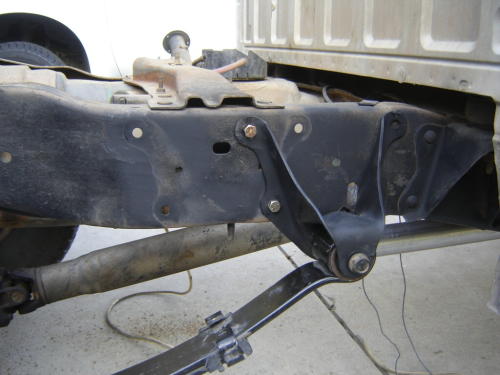
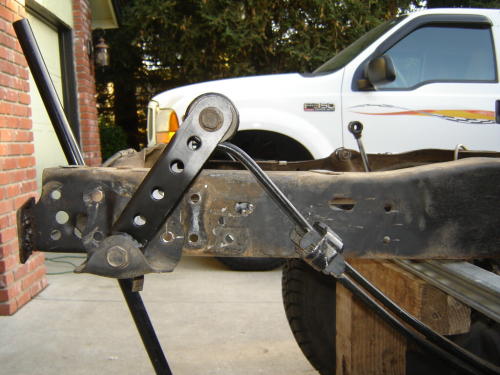
Above is a Skyjacker extended radius arm compared to a stock radius arm. Both arms use a bushing mount at the rear of the arm to mount it to a bracket on the frame rail.
These Radius arms are from Camburg (above) and Autofab (below) and use Heim Joints instead of a bushing mount at the frame rail.
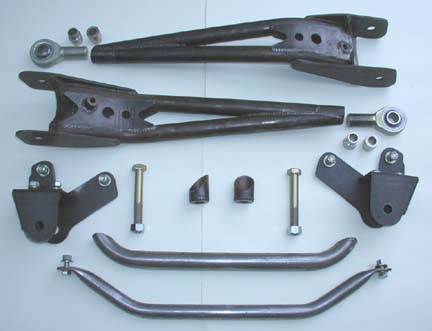
The advantages to Heims over bushings is that the bushings can bind and wear out and the Heims offer freer movement.
1983-1997 Ford Ranger 4×4 Bolt On Kits:
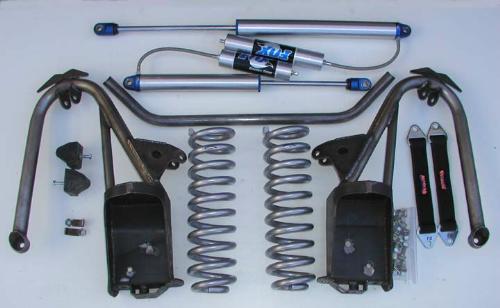
If you’re looking for a bolt on suspension kit to provide you with more lift and suspension travel, you’ll want one with longer radius arms.
I would recommend:
James Duff 5-6 Inch Stage 3 Suspension Kit
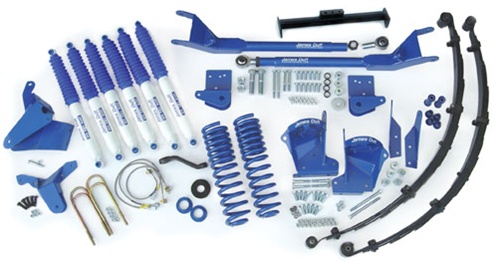
This kit includes:
- 5-6” Progressive Rate Coil Springs*
- New Coil Tower Dual Shock mounts
- Rod Ended Extended Radius Arms
- HD Tranny Crossmember
- Extended Stainless Brake lines
- Drop pitman arm (fits PS only)
- Axle pivot drop brackets
- 4 front shocks, 2 rear shocks, 6 shock boots
- Urethane coil pads, leveling spacer
- U-bolt kit
- Complete Replacement Leaf Spring Packs
- Spring Eye Bushings
Skyjacker Class II 6-Inch Suspension Kit
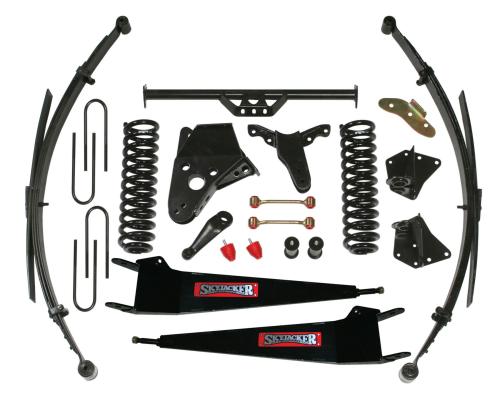
This kit includes:
- Heavy duty suspension brackets
- Transmission mount crossmember
- Replacement rear leaf springs & u-bolts
- 6-inch lift front coil springs
- Extended radius arms and brackets
- Dropped pitman arm
- Bump stops
- Longer sway bar links
Autofab Model 35 Wheel Travel Kit
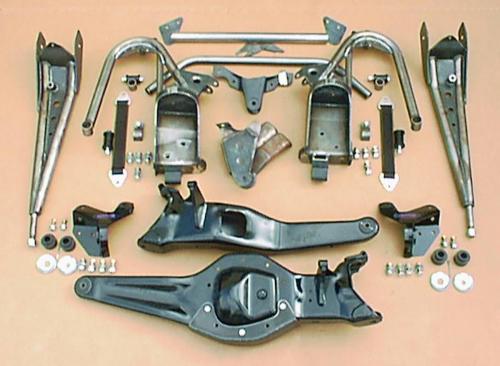
This kit provides 16-inches of wheel travel. Features custom coil spring buckets and shock hoop structures. Specialty Pivot brackets duplicating Ford Factory 2-inch lift on Ranger STX Hirider trucks. This allows the middle U-joint to operate to achieve 16″ wheel travel. A drop pitman arm is required. Beams are cut and turned for alignment correction of 4-inch lift. Special Autofab radius arms correct the castor alignment and allow for more droop and wheel travel.
For more information about ‘cut and turn‘, click HERE
Giant Motorsports Dana 44 TTB Conversion Kit
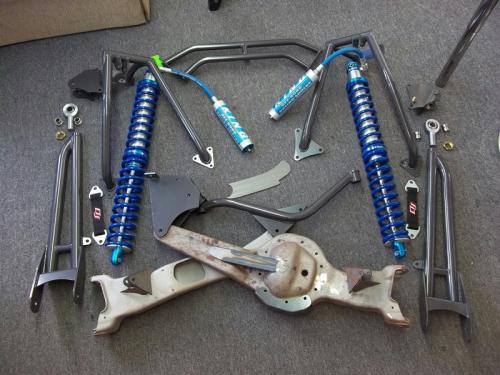
Want to go all out and upgrade to a Dana 44? Get the Giant Motorsports Dana 44 TTB conversion kit. This easy to bolt on kit allows for added strength, a 5-inch lift, up to 18-inches of controlled wheel travel, and widens the track width to 80 inches (depending on wheel off set). The passenger side beam pivot is designed stronger then most, that spans across to grab both frame rails so you will need the trim the lip on back parts of the cross member to bolt up the new mount.
1998-2009 Ford Ranger Short Arm / Long Arm (SLA) Suspensions:
The 1998 and newer Ford Rangers have two different types of SLA front suspension;
- The 1998-2009 Ford Ranger 2WD uses a coil spring SLA front suspension.
- The 1998-2009 Ford Ranger 4×4 has a torsion bar SLA front suspension.
- The 2001-2005 Ford Ranger 2WD Edge has a torsion bar SLA front suspension.
- The 2006-2009 Ford Ranger 2WD Sport has a torsion bar SLA front suspension.
Note – The Edge appeared in 2001 and offered a 2WD Ranger that had the ride height of a 4×4 Ranger. In 2006, Ford switched from using the Edge name to using ‘Sport’. In 2007, ‘Edge’ became a vehicle all in itself as a Ford midsize crossover SUV.
What are Torsion bars? Torsion bars use the twisting properties of a steel bar to provide coil-spring-like performance.
This is how they work: One end of a bar is anchored to the vehicle frame. The other end is attached to a wishbone, which acts like a lever that moves perpendicular to the torsion bar. When the wheel hits a bump, vertical motion is transferred to the wishbone and then, through the levering action, to the torsion bar. The torsion bar then twists along its axis to provide the spring force.
The coil spring SLA suspension right height is effected by:
- Upper Control Arm / Lower control Arm
- Coil Spring
- Spindle
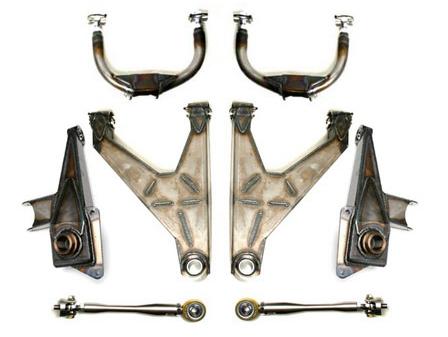
Company’s making long travel kits for SLA Rangers do so by replacing the upper and lower arms, coil spring or torsion bar, spindle, upper shock mount and adding steering tie-rod extensions.
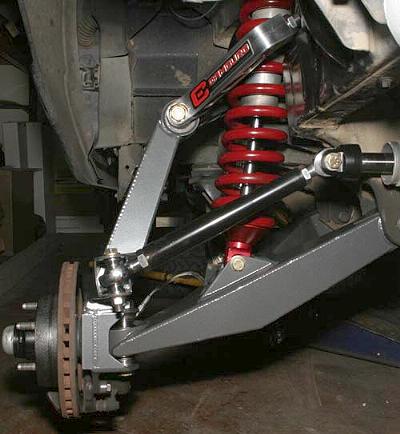
This Camburg 2WD kit uses tubular Heim pivot upper arms, lower boxed arms, CNC and boxed spindle, all heims and uni-balls with spacers and steering extensions.
Most long-travel A-arm kits widen the front suspension 4-5 inches at each side and replace the 2WD coil springs or 4×4 torsion bars with a coilover shock. There are some middle of the road kits that use a new coil spring for the 2WD trucks.
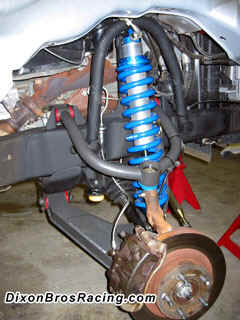
It is possible to get a long wheel travel kit for a 1998 and newer 4×4 Ranger. Dixon Bros. offers a kit for the A-arm suspension that also includes complete front axles with custom length heat treated shafts and high angle 930 CVs.
Increasing Wheel Travel In The Rear Suspension – 1983-2009:
There are (2) ways that enthusiast use to create a lot of wheel travel in the rear end.
1) 64-Inch Chevy Leaf Swap – The first is the Chevy 64-inch leaf spring and flipped shackle conversion. Flipping the shackles is when you remove the rivets on the stock shackle hanger of the rear leaf springs and re-installing it upside-down. This allows a better spring progression, and lowers the center of gravity. Replacement springs such as Deaver, are designed to work with a flipped shackle.
Here’s a general idea of how you add the longer 64-inch spring:
The front mount is move forward so the bottom left hole of the bracket is relocated into the bottom right hole in the frame.
The rear hanger was flipped over and in this case a 7-inch shackle was used. Flipping the rear shackles lets the rear suspension dive deeper into bump travel without going into a negative arc. In addition to using 64-inch leaf springs from a Chevy, Deaver Spring offers several different leaf-spring options for the Ranger.
Above is a photo of a Camburg shackle with a Deaver spring.
Note – Whenever you do a conversion like this, you’re going to run in to clearance issues with the bed. Desert trucks and most prerunners remove the bed and use fiberglass bedsides. If you’re using your bed, you’ll likely need to cut a section of the bed out for clearance.
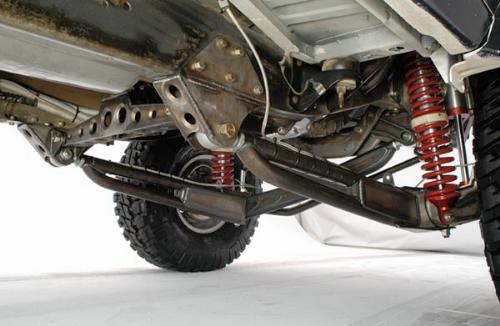
2) The second option for a long travel rear suspension is a 3-link or 4-link rear.
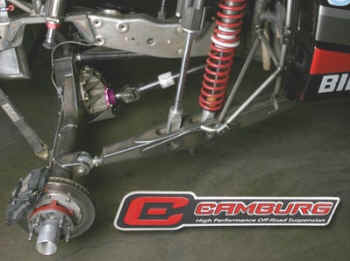
This Camburg 3-link system is a must if you want to really haul through the desert! This system is bolt on and comes complete with all Heims, stainless spacers, and hardware. This system utilizes full boxed lower links where the shocks mount as low as possible to gain around 4-inches of ground clearance over other boxed links on the market today.
Bedcages:
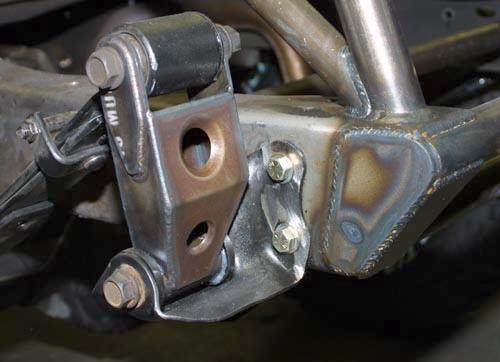
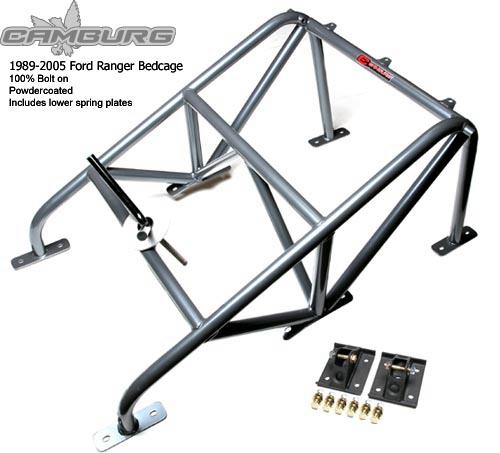
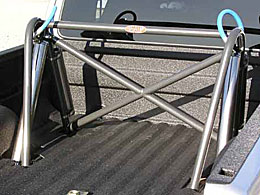
Good long travel rear suspensions use a bed cage that mounts to the frame rails and offers a mounting point for shocks. This allows you to mount shocks that are long enough to let you get all the wheel travel available.
The cage above is from Camburg. The one below is from Dixon Bros.
Rear Link Kits:
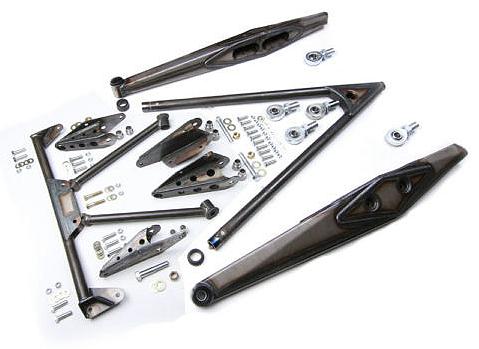
For maximum rear wheeltravel, Camburg also offers a rear 3-link kit.
This kit includes:
- 48-inch Lower Trailing Arms
- Upper 3-link Wishbone
- Upper & Lower Link Mounts
- Carrier Bearing X-member
- Strut Bars
- FK 1.00 inch Uniballs
- Stainless Steel Mis-alignment Spacers
- Grade 9 Hardware
Giant Motorsports offers a rear link kit as well.
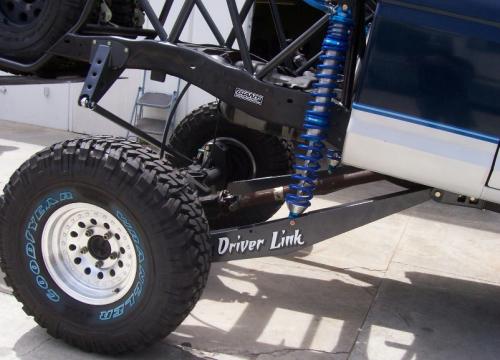
This new link design dramatically cuts the cost of linking your truck by eliminating the upper link arm – allowing you to keep the stock frame, axle, bed, and gas tank. This kit allows up to 26-inches of travel.
Miscellaneous:
Sway Bars – Sway bars when disconnected will add another inch of travel on basic suspensions and need to be removed for long wheel travel suspensions.
Brake Lines – You will need to lengthen brake lines when increasing suspension travel. Some people have ran hard lines down the radius arms to a rubber line connecting it to a hard line on the frame. This places the brake lines in a position with the least amount of travel.
Limiting Straps & Bump Stops – Consider using limiting straps to prevent your suspension from pulling your shocks apart and bump stops to keep your tires from coming through your fenders. Finally, check your axles and drive-shafts to ensure they aren’t going to pull apart.
Web Links:

