By korey89
Here is how to replace the rubber floor with a new carpet in a 2002 extended cab Ranger:

First thing you are going to want to do is throw the new carpet out in the sun to help some of the folds go away from being in the box it was shipped to you in. The amount of time it takes to pull out the old interior will be enough time for the carpet to get warm enough.

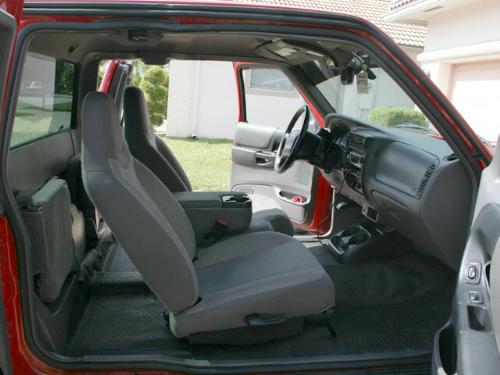
Here is the interior, the front seats as well as most of the trim will have to be removed.

The seats require a T55 Torx to remove.

Slide the seat all the way back and remove the front two bolts.

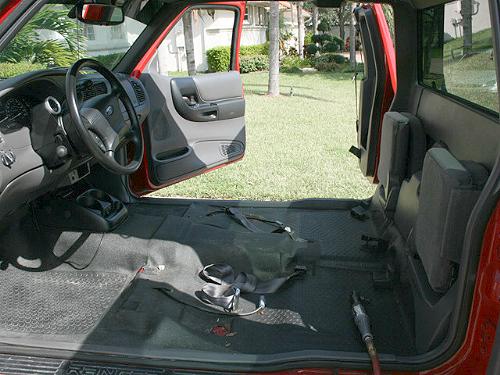
Slide the seat all the way forward, then pull off the two plastic trim pieces from the tracks and remove the rear two bolts. They are not very tight, but are somewhat long and the threads are pretty fine so they will take a little while to remove by hand. After I removed the first two it took longer then I wanted so as you can see traded the hand wrench for an air tool.

There is a small plug under the seat that will have to be unplugged. After you do this you can pull the seat out.

Repeat with drivers side seat.

These will also have to come out, they are the seatbelts for the center seat.

Pop off the covers to reveal another Torx head bolt. These will require a T50.

Remove them.

Start taking off the trim, take your time and don’t just rip it all out since you will have to install it again. The base underneath the cupholder must also be unscrewed.

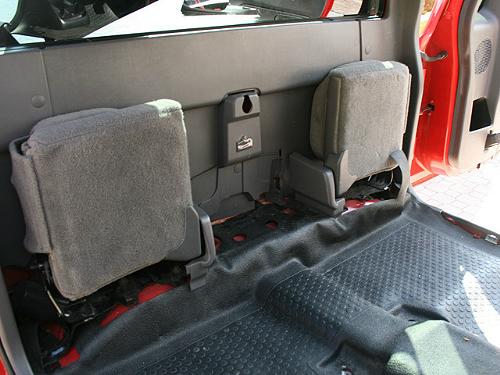
The bottle jack and other tools will have to be taken out and the piece of metal they are mounted on must be unscrewed.

Pull out the old carpet and set it aside, do not cut it up or throw it away just yet.

Now is a good time to vacuum out the floor.

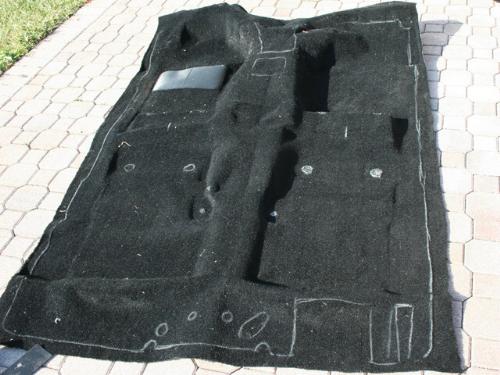
Here is the old flooring, as you can see it has plenty of cutouts unlike the new carpet.

You will need to take the old flooring and place it on top of the new carpet and then trace the edges and holes after lining it all up. Use regular white chalk to trace with. You can see I did not trace the cutouts for the drivers side rear seat, that is because I am removing it from the truck. DO NOT CUT ANYTHING YET!

Put the new carpet in and start cutting from the front to the back of the cab. You can see the new carpet is both wider and longer then it needs to be.

The sides need to be cut also.

You will have to do a lot of trimming on the rear, take you time and remember you can always remove carpet if it is still too long.

Cut your holes as well as slits for the wires now. Double check that the markings you have line up with the holes before you make any cuts. You can see I am also test fitting the trim in this picture.

Bolt the seats back in and put all the time back on. I noticed that there was blue Loctite on the bolts for the seats when I removed them, so it would be a good idea to put some new blue Loctite on when you are putting the seats back in.

You can see I also chose not to cut the holes for the center seat belt. No one sits there and I plan on putting a center console in the truck anyway.

I was very happy that the carpet is not precut, this allowed me to delete a rear jump seat and not have any paint showing like you would if the carpet was cut like the factory carpet.

Here is how it looks all put back together. OEM quality without a doubt.
This carpet came from stockinteriors.com and is available in many different colors as well as two different plushness’s, neon colors, and will two different backing options.
CLICK HERE FOR REGULAR CAB CARPETS
CLICK HERE FOR EXTENDED CAB CARPETS
Editors Note: I used a Nifty Pro-Line replacement carpet in my 1996 Extended-Cab Ranger. It was pretty much a direct replacement with no real work to install it. The can be found at Summit Racing. Check HERE for Ranger carpets.
