By Norm Lenhart
One of the best mods you can make on a prerunner, bar none, is the installation of fiberglass fenders. “Why? What’s wrong with steel?” you ask? Well, to begin with, stock fenders were designed to house stock rubber, and on a mini truck like a Ford Ranger that means “small”. About P 215’s on a 2wd, and 30 x 9.5’s on an ST/X 4×4.
Besides the physical size of the wheel well, it’s shape can be a limiting factor. For example, whereas a late model Ranger has generous rounded openings (especially when the stock bumper is removed), an early model has “square” openings that can cause contact with the tire on both flat and “full lock turn” bumps. And that’s with just slightly larger than stock rubber. Go big and, well…..
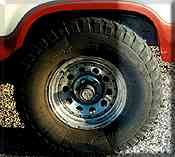
Stock fenders leave less than 1 in. of clearance on level ground!
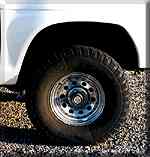
Flared fiberglass fenders open up a wealth of room and sizing possibilities.
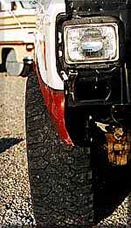 Even on 7 in. rims, tires extend well beyond the fender.
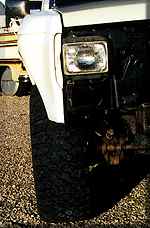
Considerable flare extends well beyond the tire’s edge, providing both body protection and dirt / dust / mud control.
Then of course there’s the matter of weight. Steel weighs more than fiberglass, and that extra weight takes more power and fuel to push around. A lighter front end also means less work for the springs and shocks to do, which becomes increasingly important as the vehicle’s performance continues to climb.
When considering the swap, there are 2 types of fiberglass fenders to choose from -“Race” and “Bolt on”. The race fenders are considerably lighter than bolt on fenders, and are designed to be mounted with Dzus fasteners, but are prone to stress cracking. The bolt on fenders are only slightly lighter than steel due to their greater thickness, and are quite roubust.
Lastly remember that steel bends whereas fiberglass flexes. Bump a rock or a tree with a steel fender and you have some serious bodywork or R&R ahead of you. Do it with fiberglass and you may get away with a little scratched paint and no real damage to speak of. Traditionally, the way around the fender well clearance problem has been a stratospheric lift kit, or a body / suspension lift combo. While that approach might impress the guys on cruise night, it’s totally out of place on a desert truck. Big lifts mean one thing – a high center of gravity – and that’s the last thing a prerunner needs.
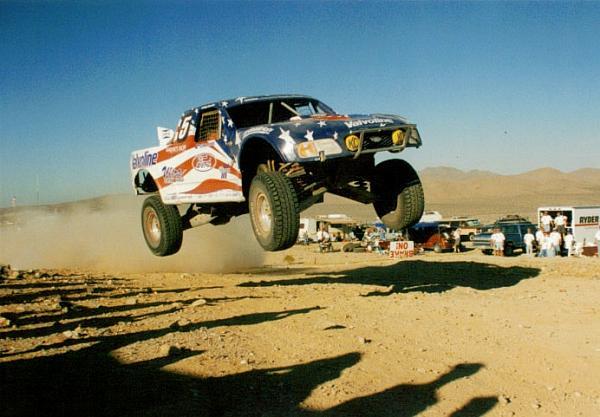
If you look at the desert racers of today; trucks like Ed Herbst’ F-150 or Robby Gordon’s Toyota, you’ll notice that despite running 37 in. rubber, they sit relatively low in comparison to a normal 4×4 that’s similarly shod. These dirt demons can also corner in the “1G” range. Try that on a sky high 4×4 and you’ll be changing at least one fender anyway (along with several other body panels). The key is in having “useable wheel travel” not “lift” alone. Big wheel wells and flared fenders are one of the best ways to accommodate that big rubber while avoiding unnecessary lift, and maintaining a low center of gravity.
Before you lay the cash down on the road to composite heaven, there are several factors to consider…
The Good:
Lightweight
More room for big rubber
Lower CG
Appearance
Inexpensive (good cost to performance ratio)
Bolt on (in most cases)
The Bad:
Relocation of factory fender well mounted parts
Minor fitting problems (not a “factory” fit)
Side marker lights may need removal or replacement
Repainting to match vehicle
Increased width
Oh, and they look cool as hell 😉 The question now becomes “how much bigger a tire can you use?” To answer that question, we were able to switch from a puny 30×9.5 street tread to a fairly massive 33×12.5 Without Adding A Lift Kit. Let me repeat that in case you didn’t believe it the first time…Without Adding A Lift Kit.. And to top it off, there are no fender related clearance issues to report in over a year of off-road driving. With a 15×7 rim, there is a clearance problem on the currently stock radius arm, but that is not related to the fenders, and we’ll be covering that in a separate article.
Doing the Impossible So how did we do it? To tell the truth, it’s really not that hard, and one person armed with basic shop tools will be able to complete the swap in about 4-5 hours – no captured alien technology involved! As can be expected. step one involves removing the stock bumper, grille, fenders, inner fender wells, and any attached factory pieces or wiring. It’s all pretty basic, and the only major under hood components that we had to temporarily remove were the ignition coil and air box. This is also an excellent time to remove any “excess” factory pieces, mounts etc., and “blackout” the inner fender panels for appearance purposes.
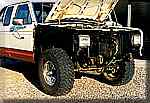
Once you’ve denuded your Ranger’s nose, the fun really begins (OH JOY!!) There are several areas which can stand to receive some attention with a hand grinder and a hand sledge to guarantee maximum clearance, regardless of the tire size you’ll ultimately be running.
First are the body seams on the cab’s firewall. You have 2 options here, flatten the seam upwards (remember the direction of the tire’s rotation) or grind and re-weld the seam flush. Either method will yield acceptable results, though most would opt for the hammer. Second is the radiator support panel, in the area directly behind the signal lights. This area could present a problem on full lock / full compression turns. Some quick work with a hand grinder will leave you with room to spare, and ditch a few unneeded ounces in the process. Hey, every little bit helps.
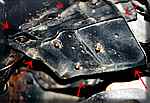
Third, you’ll have noticed that there’s no easy way to remount the stock air box – wrong. With a little elbow grease you can cut the original plastic mount out of the stock inner fender well. trim it to size and shape, and bolt it back on in it’s original location. Fourth is the relocation of the ignition coil. There are a variety of ways and locations that you could remount it, but we chose the simple, direct method. By notching the drivers side “steel well” and drilling a couple new holes, we had a solid and convenient mount where none was before.
We can rebuild it – We have the technology Although you likely intend to repaint the fenders to match your body (they come in any color, as long as it’s white), avoid the temptation of having them painted first. Get them aligned, drilled and fitted during a trial run, THEN remove them for a trip to the prep / paint booth. You’ll thank me later.
Lastly, we began fitting the fenders themselves. As we had no intention of reinstalling the factory bumper, we trimmed the front of the fenders to align with the bottom of the signal light panel. This gave us additional clearance at the truck’s forward corners, and resulted in a more astheticly pleasing appearance. As the fenders come “holeless”, we then aligned them into their approximate location, marked the holes, and drilled them to accept the factory bolts.
You may encounter some difficulty in aligning the fenders properly, but don’t panic. This is pretty normal and to be expected even when fitting factory fenders. Standard “fender” or “body” washers available at most good auto part stores will help ease the troubles. It pays to have an assortment on hand before your installation begins. Once the fenders are in place, it’s time to remount the grille. In all likelihood, it will be a straight bolt in, but be prepared to drill a hole or two “just in case”. In the case of PreRocker, the truck had been hit in a previous life, and things weren’t quite square. This is not an indication of a problem with Fabtech’s fenders. Far from it, as they are truly quality pieces.
With the truck back together, we found plenty of room in front to mount the 33 in rubber with a stock suspension. There have been no incidents of rubbing whether in higher speed desert work, or crawling through boulders. To clear the tires in the rear, a small amount of metal was removed from the box wheel wells, both front and rear. As above, with close but proper trimming, there are no clearance issues, even at full articulation.
Conclusion Several dealers in So Cal carry flared fiberglass fenders to fit a variety of the more popular vehicles. Fenders for Toyota pick ups, 4 Runners, Ranger / BII, F-1-350, full-size Bronco, Chevy S-10 and Full size trucks are all available in a variety of years and widths. Donahoe Racing and Fabtech Motorsports (where we got ours) are 2 of the primary dealers for these and other fiberglass parts, offering a quality product at a reasonable price. Overall, at a cost of less than $200 each, the benefits are enormous. The larger rubber that can now be accommodated rolls much easier over rough terrain, traction is greatly improved across the board, and truck has taken on a more “desert ready” profile. For the money, this is a hard modification to top. As we have major suspension mods in store, we will also be removing the box and installing flared fiberglass bedsides in the near future. This will result in a tremendous weight savings, easier access to components, and a more balanced appearance for the truck. Looking forward to the installation article? So are we!
