|
|
|
|
|
Note: I found this article at Fourwheeler, and while these modifications have already been published here in the past, I thought I would preserve the article and share it.
The downsized Dana 35 TTB first appeared under the 1990 Ranger with the 4.0L engine option and ran through the 1997 model. It was also used under 1991-1994 Explorers. Yes, this is the same differential that has such a bad reputation in the rear of Jeeps. While the ring gear size and differential are the same (that is to say tiny), the TTB Dana 35 uses a high-pinion design in this application and does not suffer from the bent tubes that plague Jeep owners. Still, many TTB owners choose to scrap the axle altogether in favor of a solid-axle swap, but that requires a big investment in parts and time. What if you have already invested in gears and lockers for the Dana 35 TTB under your Explorer or Ranger? This was the case with our 1991 Explorer, which was built for general trail duty on 36-inch tires. We were looking for ways to increase reliability without having to reinvent the wheel. Strength can be improved in several areas to the Dana 35 TTB using some fabrication and junkyard Dana 44 TTB parts. Stronger knuckles, spindles, stub axles, U-joints (The Dana 35 and Dana 44 use the same u-joint ~TRS), and larger brakes from a 44 TTB make a great way to add extra beef to the Dana 35 beams. This isn’t a bolt-on conversion though; some machine work is required. It will also result in the front wheel pattern changing from 5-on-4 1/2 to 5-on-5 1/2, so it’s important to budget for a new set of wheels and rear wheel adapters. That did not deter us. After a productive trip to the wrecking yard we came home with the front end components from an early 1990s Bronco. That is when the real fun began, as we created a beefier Dana 35 TTB worth keeping.
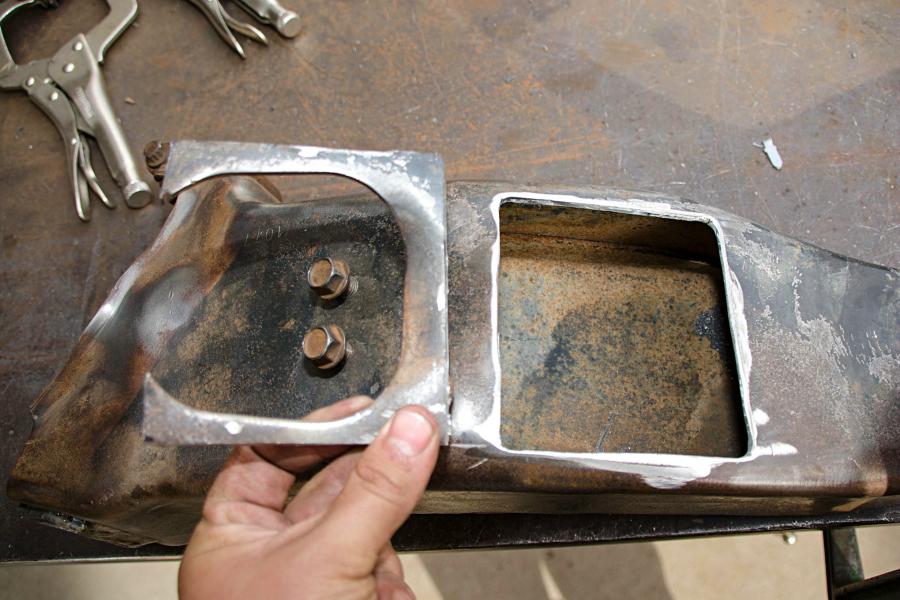
A major weakness in the beams themselves is where Ford left them unboxed. We took some measurements and then cut some plates out of 3/16- and 1/8-inch steel to box in the passenger-side beam. We also finished welding any seams that were left unwelded from the factory.
The axleshaft window on the passenger-side beam can rub on the axleshaft as the beam drops away from the frame. We removed some material around the window to give the axleshaft more room to pass through during articulation of the beams. Be sure to round the corners to reduce the risk of cracks developing.
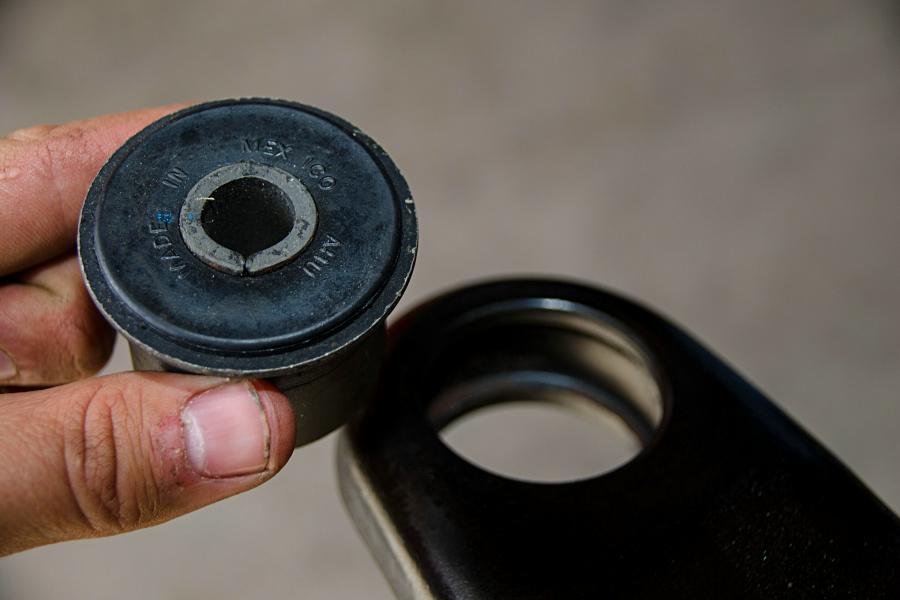
The pivot bushings looked like the original 25-year-old bushings, so we ordered some new, standard replacement rubber bushings. The bushings need to allow some flexibility because the beams twist while they droop. A spherical bearing would be the best choice, but the rubber replacements are much more budget friendly.
Another area that needs attention for maximizing flex is the passenger-side slip yoke. The large yoke can bottom out on the other axleshaft ear, causing it to bind and potentially break. There is enough meat in the yoke for you to grind some away to obtain a greater operating angle. We used a die grinder and checked clearances often to avoid removing too much.
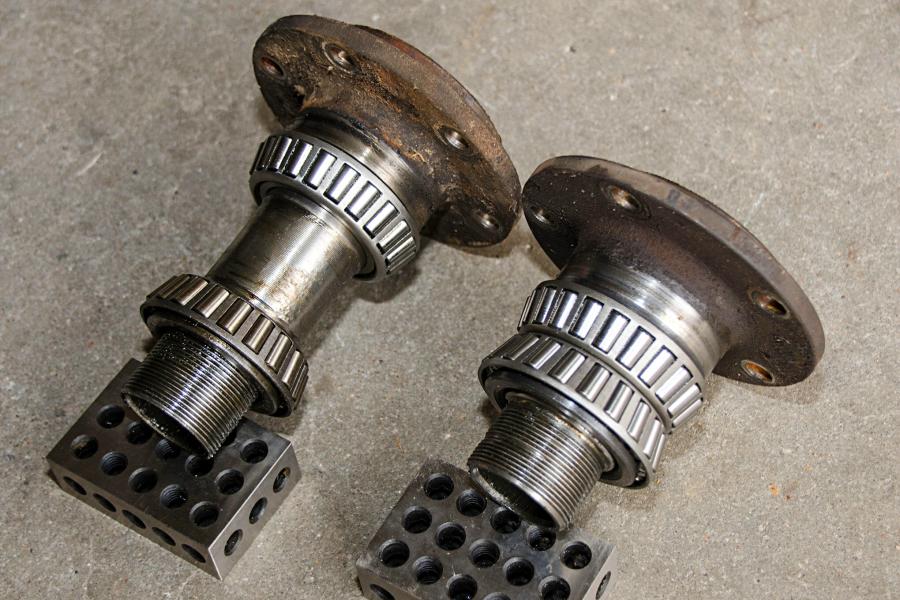
The difference between the spindles is massive and is what makes this conversion worth the effort. The wheel bearing spacing of the Dana 44 spindle (left) is much wider than the Dana 35 (right). The additional separation increases strength and offsets the stress of running larger tires and higher offset wheels.
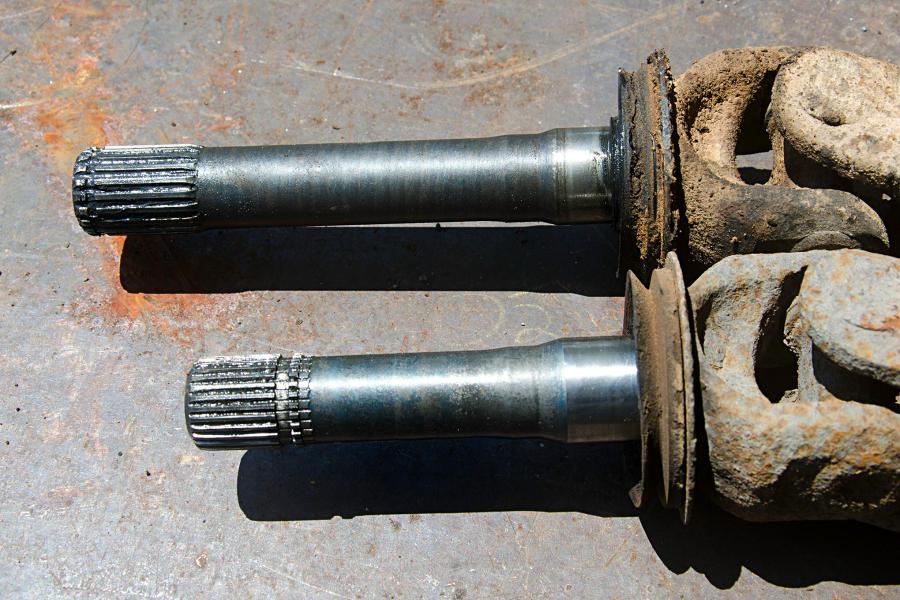
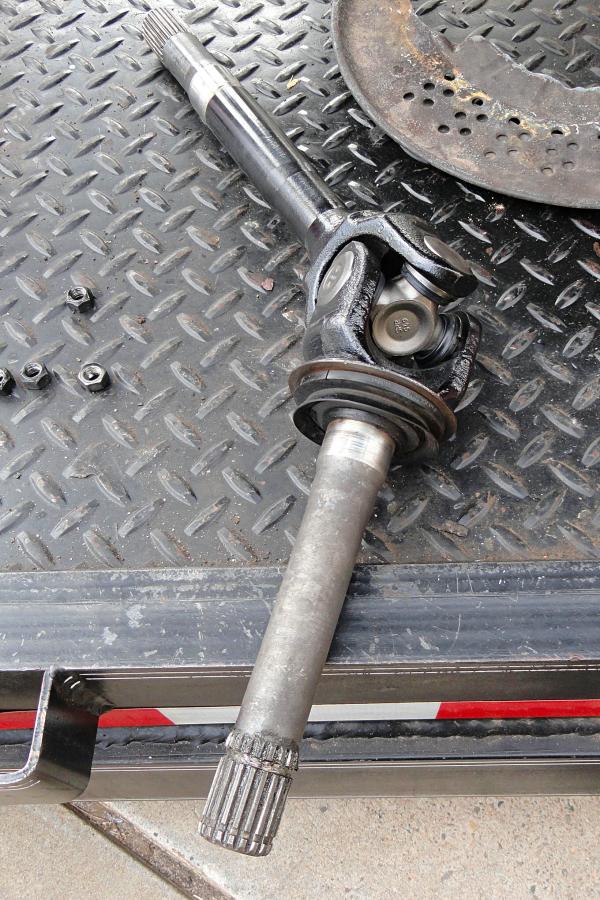
The Dana 44 axleshaft (top) is bigger in every way (except spline count) when compared to the stock Dana 35 shaft (bottom). The outer diameter of the splines is larger, as is the diameter of the axleshaft itself by nearly 1/16 inch, adding strength over the stock stub shaft.
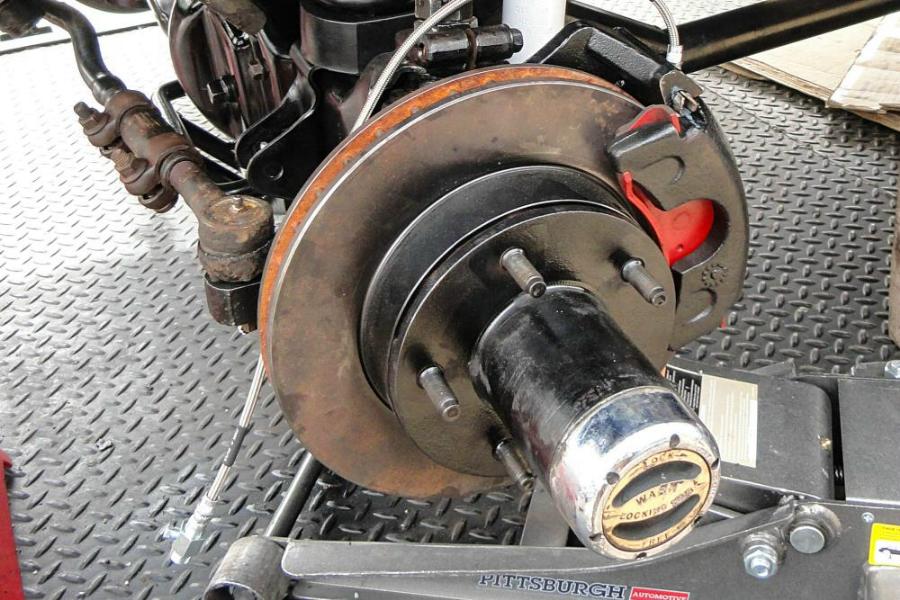
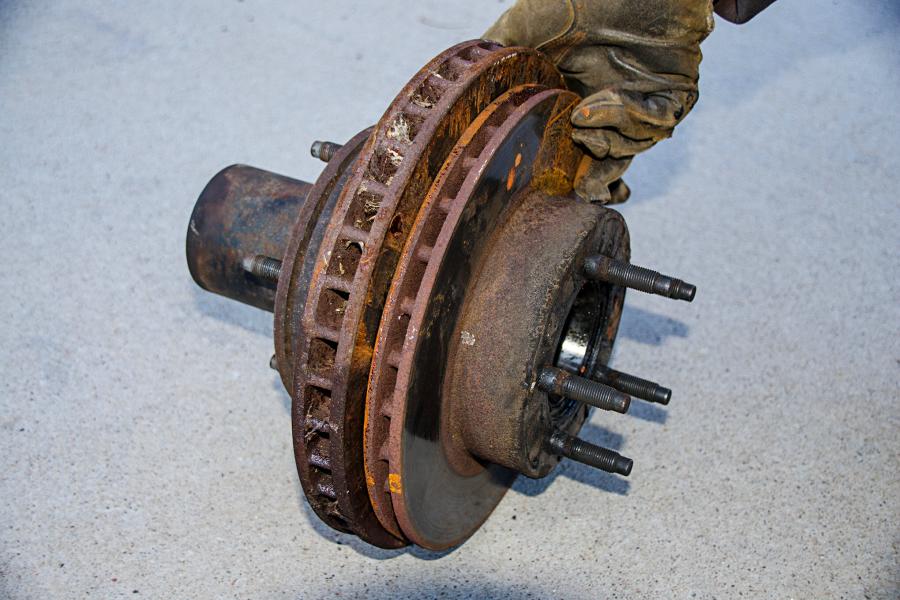
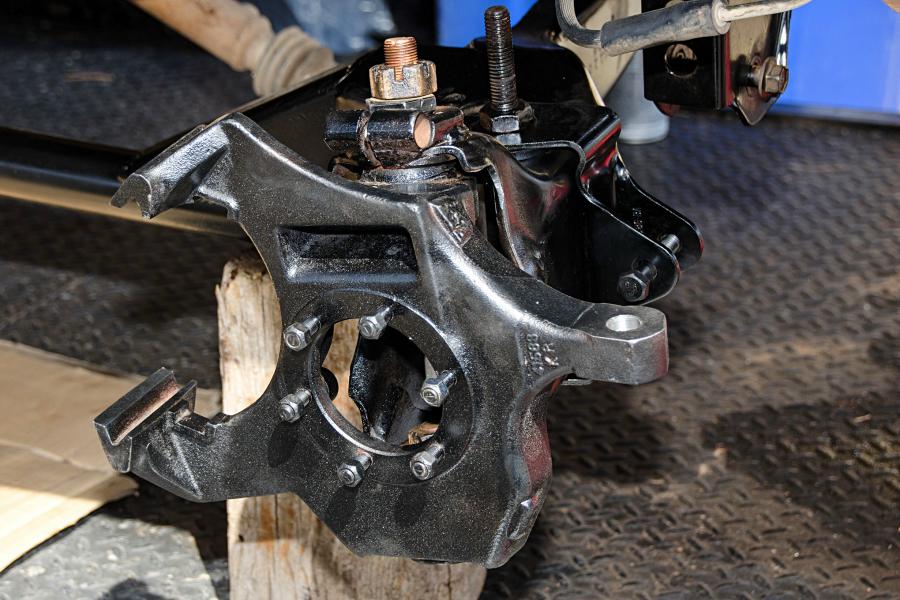
The Dana 44 brake rotor and hub is also larger than the Dana 35. The rotor measures 11 3/4 inches, which is 1 inch larger than the Dana 35 rotor. The Dana 44 hub also includes splines for an internal locking hub while the Dana 35 uses an external top-hat-style locking hub. While the rotor is larger, we were still able to easily fit 15-inch wheels.
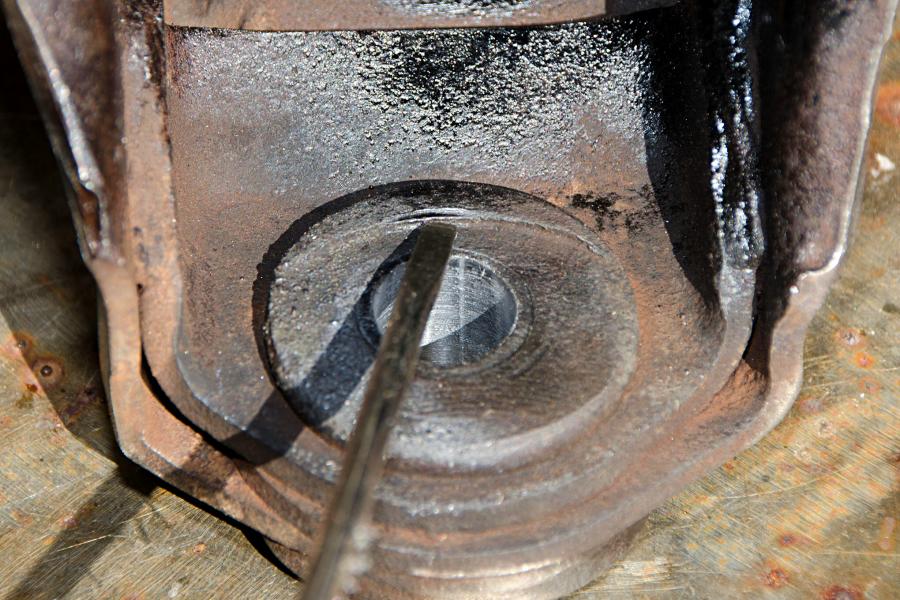
The lower ball joint hole in the Dana 35 beam needs to be enlarged for the Dana 44 ball joint. We inserted a 1 1/2-inch-per-foot tapered reamer in a Dana 44 beam to mark the depth with a piece of tape before beginning. The difference in depth can be seen here with the reamer bottomed out in the Dana 35 beam and the tape marking how far we need to go. The key is to go slow and keep the reamer straight. Go too far and you will have to start over with another beam.
This small lip must be ground flat on the lower ball joint area inside the Dana 35 beam. The larger ball joint nut needs a flat surface to properly seat the joint in the bore and retain the torque. We used a die grinder inside the beam to accomplish this step.
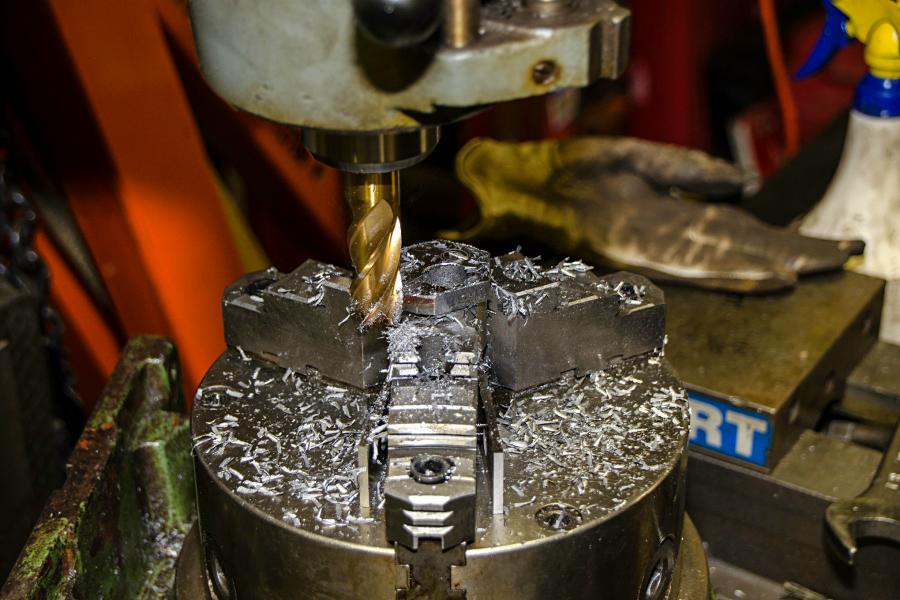
It pays to have good friends with the right equipment. We were able to spend some time on a milling machine to whittle out two custom camber adjusters after a search for a readily available conversion part turned up empty. After comparing the Dana 44 adjuster to the Dana 35 with a caliper, we had enough measurements to go on. We drilled the hole first and then used the same tapered reamer to make the proper seat for the ball joint. Next, we milled the outside diameter to size and cut a hex for adjusting the camber with a wrench. While this may seem like more work than modifying the original Dana 35 adjusters by welding in a sleeve and then adding a taper, the end result was a no-compromises part that fit perfectly.
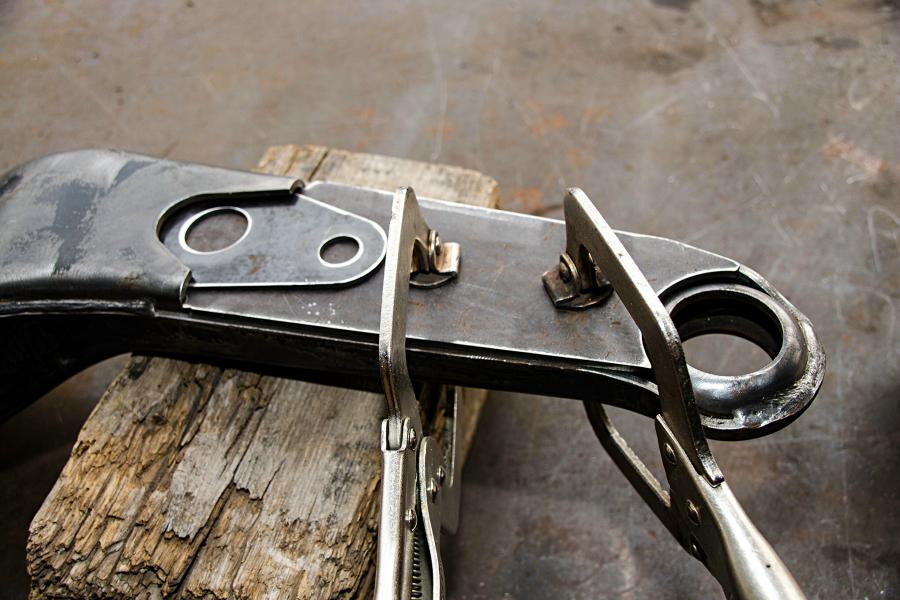
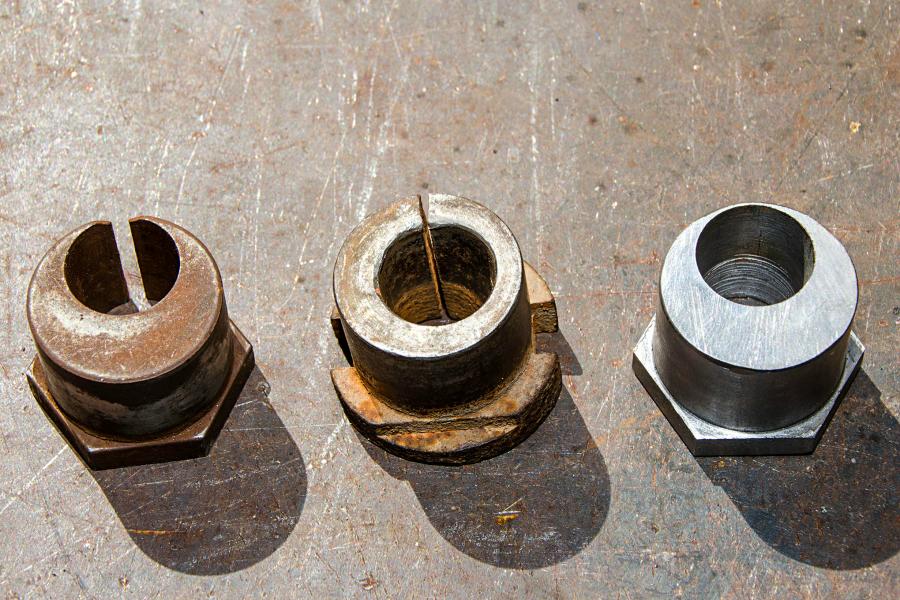
Here are the three camber adjusters we used to make our conversion. The Dana 35 adjuster (left) uses a straight hole for the ball joint while the Dana 44 adjuster (center) has a tapered hole. The outer diameters are slightly different as well as the difference between the hex of the Dana 35 and the rounded, notched top of the Dana 44. Our custom machined adapter (right) is a hybrid of the two. We sliced our adjuster open with a cutoff wheel to allow the pinch bolt to clamp down on it just before we installed it in our beams.
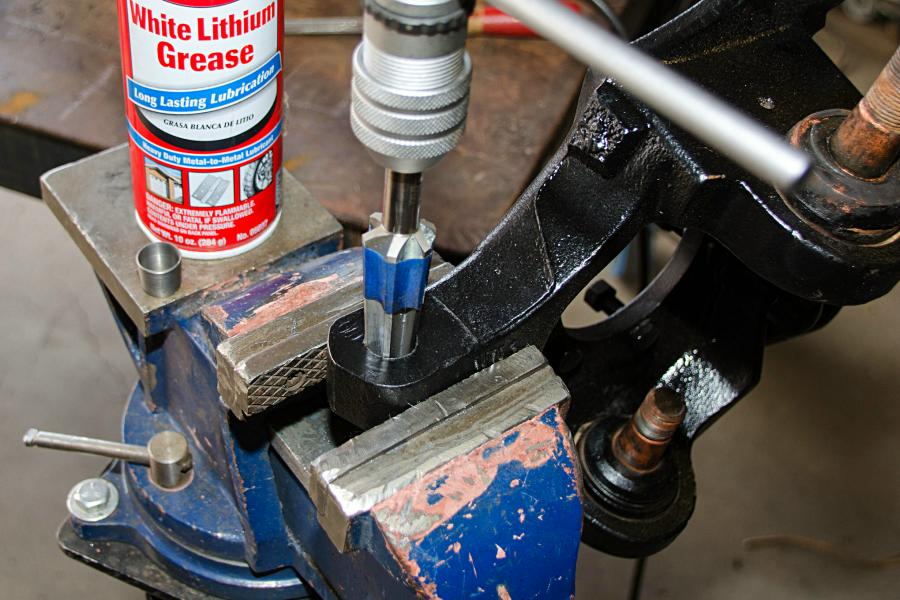
Our Explorer’s tie rod mounted above the knuckle arm while the Dana 44 knuckle mounts it below. To maintain our steering geometry, we ordered a pair of knuckle sleeve inserts from Jeff’s Bronco Graveyard that flip the tie rod to the top. To install the sleeves, we used the 1 1/2-inch-per-foot reamer to enlarge the hole from the top until the sleeves fit flush in the steering arm.
The moment of truth arrived as we installed the Dana 44 knuckle onto our Dana 35 beams. We torqued the lower ball joint and rotated our custom camber sleeve to the proper orientation before tightening the upper ball joint and pinch bolt. We did have to grind away a small amount from the beams for knuckle clearance at full steering lock in both directions and weld on a small piece of 3/8-inch steel to the beams for the steering stops to hit.
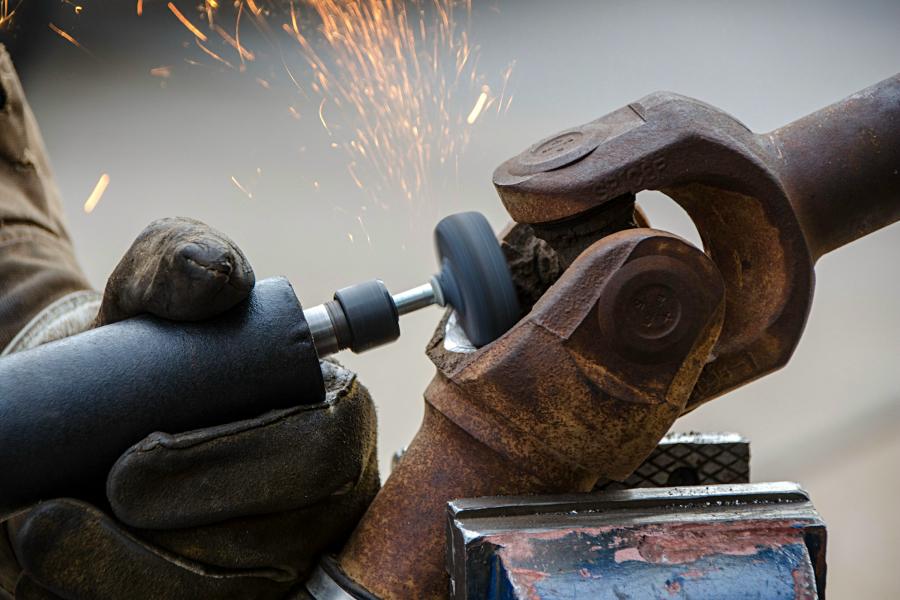
We ordered three Spicer 5-760X U-joints to replace all of our worn-out joints in the TTB. The forged and nongreasable cross is a strong combination that pairs well with OEM axleshafts. The outer Dana 44 stub shafts mated to the inner Dana 35 shafts flawlessly.
We capped off our knuckle swap with the pair of Warn locking hubs we also pulled from the parts donor Bronco. The internal splined hub is another strength upgrade over the top-hat -style locking hub previously on our Explorer. The Explorer’s brake lines bolted right up to the Dana 44 calipers without modification. The swap resulted in our wheel pattern changing from 5-on-4 1/2 to 5-on-5 1/2, so we added a matching wheel adapter to our rear axle. Resource:
|
|
|