|
|
|
|
Narrowing A Dana 44 Axle Assembly |
|
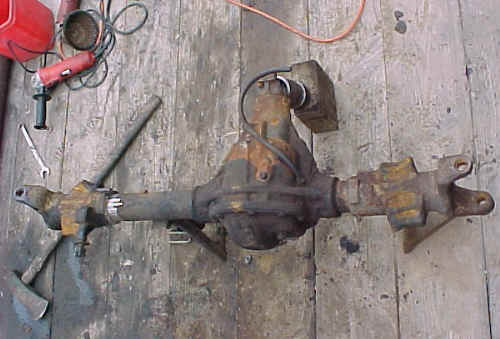
This page is not an exact step by step procedure for narrowing a Ford Dana 44. However, it will give you some good information if you're determined to try and do it yourself. All welding should be done by a professional welder. Axle Jig: Although some people narrow their axles with the axle sitting on jack stands, it's a good idea to create a jig to hold the assembly in place. This will keep the axle from moving while you're working on it. In the case of the inner knuckle caster, it's imperative that the axle doesn't move once you take your initial caster measurements, otherwise, the knuckle's caster will be off reinstalling the knuckle using your initial measurements.
Here are some photos of a jig. Not seen is a mount to hold the axle in place. Measure Your Caster:
Caster is the fore or aft slope of the steering axis. The steering axis is a line drawn through the upper and lower ball joints of the knuckle. Positive caster in the front-wheel assembly is created when the ball joints are offset, from a side view, so that the upper ball joint is farther to the rear of the vehicle than the bottom ball joint. The degree of caster is related to the angle in degrees that a line through the ball joints forms from a vertical line. Positive (shown) caster ensures good stability, helps maintain straight-ahead direction (less wandering) and promotes steering wheel self-centering. Too much positive caster causes hard steering, excessive road shock and shimmy.
In the photo above, you'll see a method used to measure caster. It doesn't matter what you put through the ball joint holes of the inner knuckle as long as it's centered in the holes. If not, you can be way off in your measured angle. You may want to try a piece of pipe/tubing. If you can't find anything to fit the diameter of the hole, align it by placing it against the rear inside of the hole in the top of the knuckle AND the rear inside of the hole in the bottom of the knuckle.
Use this method to measure caster with the axle out of the vehicle to get your starting and final measurement. DO NOT measure the caster in the vehicle and use the measurements to work from on an axle jig, jack stands, etc. Use this method and take the measurement once you have the axle fixed in place where you're going to be working on it. Once you have your initial caster angle measurement YOU MUST make sure the axle doesn't move. If you set it on jack stands, measure the caster and then have the miss fortune of having the axle move on the stands, you won't have your baseline to work from anymore. The pinion yoke will not be at the proper angle when it's put back on. As far as the pinion angle goes, measure it (see below) along with the knuckle caster. It can be used along with your caster measurements to make sure everything is at the right angles before welding everything back up. If You Don't Have A Jig: One suggestion when taking your caster measurement for the inner knuckle is to measure both the driver and passenger side caster. Ideally you'll only be shortening the passenger side and if not, you should only do one side at a time. With the axle on stands, measure the driver and passenger side caster with the method shown above. It's best if you can leave whatever you placed in the knuckles in place to eliminate any possible changes reinstalling them later to check your measurements. The driver side is going to be your baseline that you check your measurements against. After removing the passenger side, you can ensure the passenger side knuckle is correct before welding it in place by checking the driver side again. If the driver side measurement changed then the axle moved. Rotate it back until the driver side is at the proper angle again. When the driver side and passenger side knuckles match the angles you recorded before starting, then you'll know it's safe to weld the passenger side knuckle in place.
Pinion Angle: Normal, or stock pinion angle, is somewhere around 1 to 1-1/2 degrees. As the pinion angle increases past 3-4 degrees, the u-joint will experience increased wear and possible premature failure. The Ford Dana 44's with radius arms use C-bushings to correct caster. Leaf sprung suspensions use shims. As lifts increase there is a limit to how much angle difference can be between the axle yoke, drive shaft and transfer case. With a large lift you could find yourself with caster angle and pinion angles out of whack. When attaching the inner knuckles and radius arm wedgies / spring perches you can compensate for these problems by allowing the pinion to point up toward the transfer case more while mounting the inner knuckles to limit the caster to an angle closer to stock. For more information on driveline / pinion angles, click HERE. You can use an angle finder to find your pinion angle.
If for some reason you were going to remove both driver and passenger inner knuckles at the same time, you'll have to also be concerned about pinion angle. You could use the pinion angle as a comparison for your caster angle measurements. With the axle on the stands, you can measure your pinion and caster angles before starting. When reattaching the inner knuckles you can check the caster measurements to the pinion angle. Ensure the pinion angle is the same that you measured when you started and then set the inner knuckles and make sure the caster and pinion angles are the same that you had when you started. The 1978-1979 Ford F-150 / Bronco Dana 44's: Strip the axle down and set it on a pair of jack stands or in a jig and get all your initial measurements:
Starting on the differential side of the passenger radius arm 'wedgie', grind the weld off from around the outer edge:
Grind until you get this look:
Turn your grinder so that you can grind a little into the cast wedge so that you crack the weld:
Look close (below) and you can see the crack in the weld. This will need to go all the way around before it will come off:
Use a sledge hammer to knock the cast wedge off. You can see the dark ring (below) where the axle tube was inside the cast wedge:
The Dana 44 cast wedge end:
Cut the axle tube to length. A chop saw would be an idea way to cut the axle tube for a straight even cut:
(We know the picture still has the knuckle in place)
If you don't have a chop saw a Sawzall could be used Use a sledge to tap the cast wedge back on. Use your initial measurements and set it at the angle it was before you removed it. Remember to check your other angles (drivers side caster and/or pinion) to make sure all your angles are the same they were before you started.
Now weld the casting back on. If you aren't sure about your welding skills or your welder doesn't have a high enough amp rating, it would be best to leave it to a professional welder. One important note is that the weld doesn't actually carry the weight of the vehicle because the tubing sticks into the casting about an inch. The weld is important though to ensure the passenger wheel doesn't fall off! Finish the job by sending your axle shaft to a machine shop to have it cut down and resplined. Dutchman Motorsports can cut your shafts and respline them. If you cut the passenger side exactly 6-inches shorter, you can use an early Bronco Dana 44 shaft in it. An aftermarket shaft is advisable though, as the stock Bronco shaft has the tiny 260x u-joint. Some companies offer stronger replacement axle shafts for the early Bronco that uses a 297x or 760x u-joint.
Narrowing Other Ford Dana 44's: Strip the axle down and set it on a pair of jack stands or in a jig and get all your initial measurements:
Instead of removing the casting as in the 1978-1979 procedure, you're going to have to remove the steering knuckle and radius arm 'wedgies' separately. You'll need to know the placements for your radius arm wedgies if retaining the radius arms. Once the axle is in it's fixed position for you to work on, you could measure down to a surface / floor for a distance from the front and rear wedgies to put them back on at the proper angles. If you look at the second jig photo above (and the photo below under 'Reinstalling The Radius Arm Wedgies'), the vertical plates on the jig are for wedgie placement so you don't have to measure the angle putting them back on. If your wedgies are on at the wrong angle it's going to effect your caster and pinion angles. If using spring perches, you'll need to determine the location and angle they need to be placed at. This is where the pinion angle comes in to play. If you used a leaf sprung Dana 44 and you're just cutting down the passenger side, you can re-attach the leaf spring perch at the same angle as the drivers side. If putting both driver and passenger side spring perches on, you'll need to know what the pinion angle needs to be before welding on the perches. For example, If you wanted a 5-degree pinion, you would have to set the spring perches at 0-degrees with the pinion at 5-degrees. Carefully cut off the old wedgies from the side you're shortening. Use a hand grinder to grind out the welds from the knuckle. Grind slowly to try and not penetrate too deep into the tube or the knuckle. The goal is to grind until you can see a ‘crack’ all the way around the weld. After grinding enough that it looks like it should come off, strike it with a small sledge and 8 lb hammer, then grind some more. Use the grind and hammer technique to get the knuckle off.
Cut the axle tube to the desired length using a chop saw:
Again, If you don't have a chop saw a Sawzall could be used Clean up axle tubes and steering knuckle. Grind off any remaining weld from the steering knuckle and bevel the edge a little to help in reinstalling it. Clean up the cut end of the axle tube and wire wheel the tube to provide a clean surface for reinstalling the knuckle and welding. Install the knuckle on the tube. Using a sledge, slowly pound the knuckle back on the tube, trying to keep the caster about where you think it should end up. Be sure and check your measurements, you don’t want to pound everything off and start over. Use the same sledge to tap the knuckle back on. Use your initial measurements and set it at the angle it was before you removed it. Remember to check your other angles (drivers side caster and/or pinion) to make sure all your angles are the same they were before you started. Now weld the knuckle back on. If you aren't sure about your welding skills or your welder doesn't have a high enough amp rating, it would be best to leave it to a professional welder. One important note is that the weld doesn't actually carry the weight of the vehicle because the tubing sticks into the knuckle. The weld is important though to ensure the passenger wheel doesn't fall off! WARNING: We've heard of people butt welding the knuckle to the tube (they didn't remove the old tube from the knuckle, just cut it flush and rewelded it) but this is weak and dangerous because the weight is now riding on the weld, not to mention the difficulty of lining up the pieces. Cutting The Tube With The Knuckle On: Some people cut the tube at the knuckle, shorten the tube to the needed length, and then try to remove the piece of tubing that was left in the knuckle. If you've done this and find it difficult getting the piece of tubing out of the knuckle, you can cut the tube with a saw blade in two places 180 degrees apart from one another. This could be as simple as taking the blade off a hacksaw, sticking the blade through the knuckle, reattaching the saw handle and cutting the tube. When the tube is cut in to two even pieces in the knuckle, you can knock them out one at a time. Torching Your Knuckle: Some people use the same practice of apply heat and cold as they do in installing bearings on pinions. You could ice down the axle tube and heat the knuckle with a torch (with bearings you use a hot plate). The idea is that the heat causes the knuckle to expand and the cold causes the tube to shrink. This would allow the knuckle to slide on easier.
WARNING: NOT RECOMMENDED. If you're not careful, torching the knuckle can change the properties of the metal weakening it. Also, striking the knuckle with a sledge hammer after heating it with a torch could cause the knuckle to bend. ALTERNATIVE: If you really want to heat the knuckle up you can heat it up in an oven at 500° to expand it. You still need to be careful striking it with a hammer though. Reinstalling the Radius Arm Wedgies: Using the measurements you took earlier to find the angle of the wedgies and using your measurements to determine their distance between the knuckle and differential, weld your wedgies in place. If you made an axle jig like the one below the work will be a lot easier.
Shorter Axleshafts: Finish the job by sending your axleshaft to a machine shop to have it cut down and resplined. Dutchman Motorsports can cut your shafts and respline them. If you cut the passenger side exactly 6-inches shorter, you can use an early Bronco Dana 44 shaft in it. An aftermarket shaft is advisable though, as the stock Bronco shaft has the tiny 260x u-joint. Some companies offer stronger replacement axle shafts for the early Bronco that uses a 297x or 760x u-joint.
|
|
|