|
|
|
|
Skyjacker RA135 Extended Radius Arms For the Ford Ranger |
|
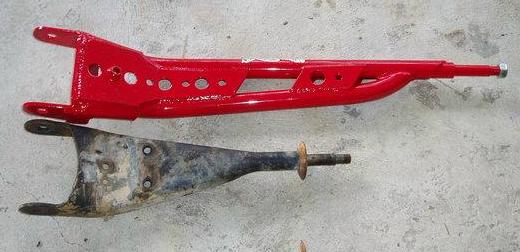
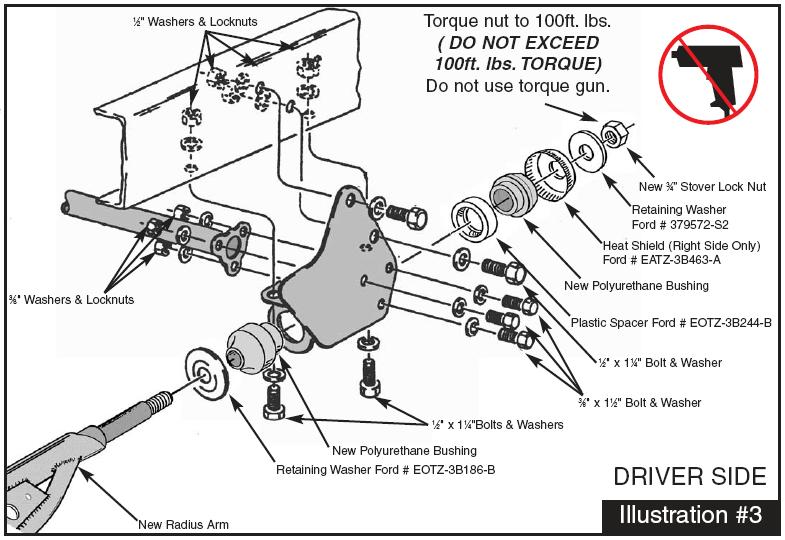
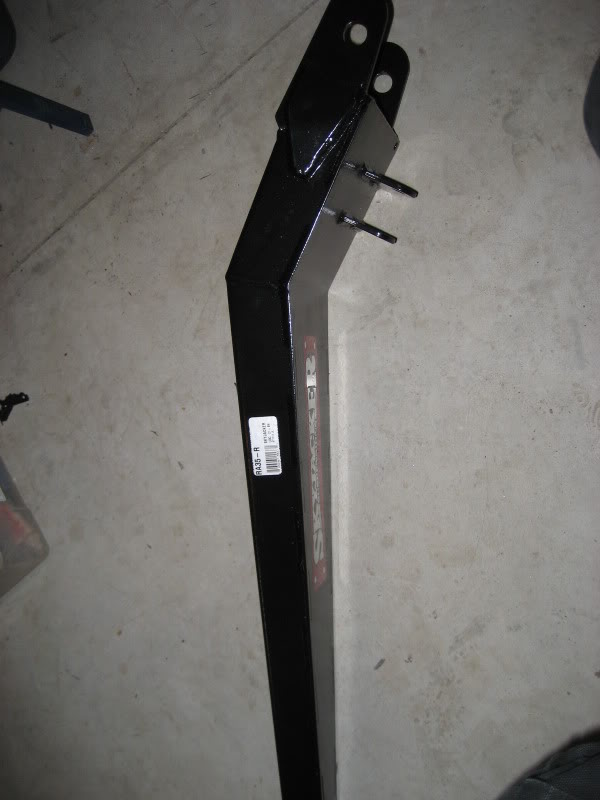
The photo above is a comparison between the Skyjacker extended radius arm (top) and stock radius arm (bottom). The longer radius arms increase wheel travel (up to 30%) and help keep caster change to a minimum during suspension cycling. They also help triangulate and strengthen the suspension assembly. Installation: 1) Remove the stock coil springs from both the driver and passenger side of vehicle. Unbolt the stock radius arms, remove the original radius arm frame brackets and remove from front axle housings. 2) Place a jack under the Transmission and raise until it is touching transmission, but do not put a load on it. Remove the rivets and bolts that attach the existing Transmission Crossmember to the frame. If a torch is used to remove the rivets, be careful not to damage the rubber Body Mounts, wiring and hoses located inside the frame. 3) Referring to illustration #3, align the driver side radius arm mounting bracket with two of the original holes on side of frame rail, and install 1⁄2 x 1-1⁄4" supplied bolts. Torque these two bolts to specifications. Repeat on passenger side. On the underside hole locations, use the holes in new bracket as a guide and drill a 1⁄2" hole through frame rail (there are 2 holes on each side to drill). Install 1⁄2 x 1-1⁄4" supplied bolts in these 4 locations, and tighten.
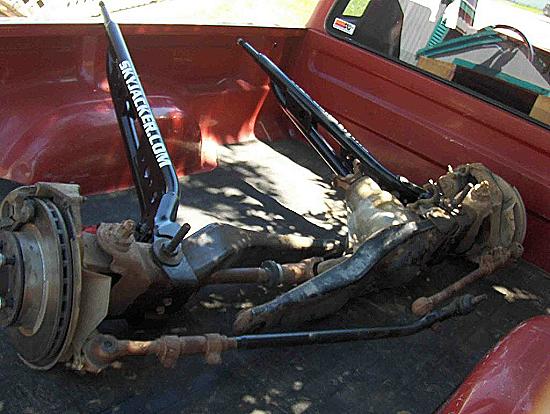
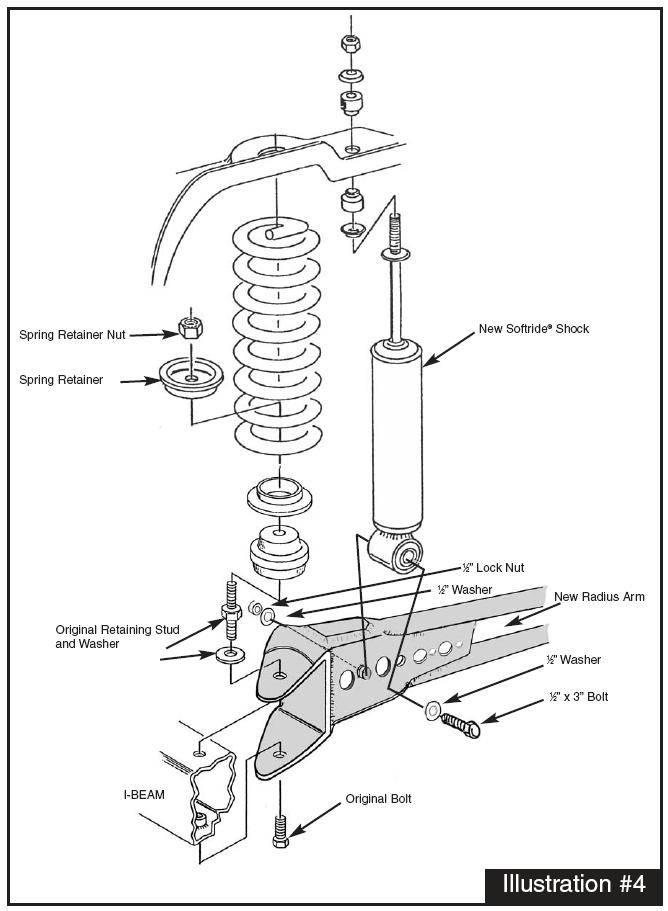
4) Install the new radius arms to the front axles using existing hardware (see illustration #4). NOTE: Be sure to install the correct arm on the correct side with the correct side up (each arm is labeled accordingly).
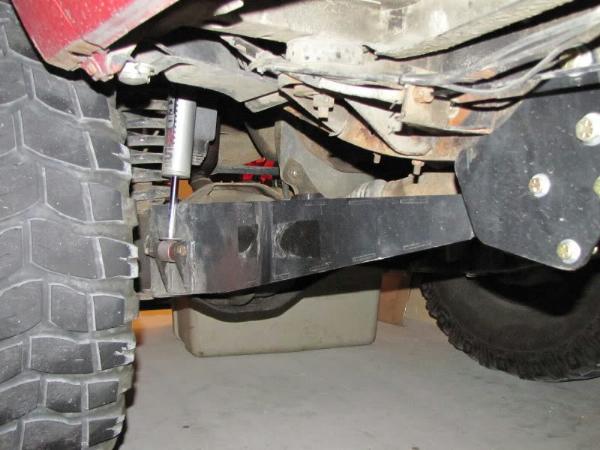
(Skyjacker radius arms installed on axle beams) 5) Position the ends of radius arms into the new radius arm mounting brackets using the polyurethane bushings provided along with the original washers (as shown in illustration #3), and the 3⁄4" stover nuts provided. Do not fully tighten at this time. Using the floor jack, raise axle and radius arms and check clearance on frame. Some models may need clearance at the OEM radius arm washer. Check again to be sure that all radius arm bushings and hardware are installed correctly. Apply Loctite and torque radius arm nuts to 100 ft. lbs. (DO NOT EXCEED 100 ft. lbs. TORQUE). Torque axle beam pivot bolts to 180 - 220 ft. lbs.
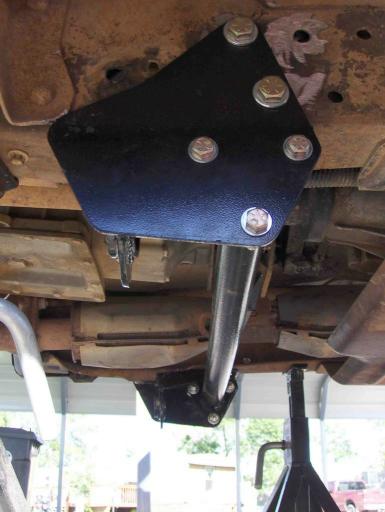
(Photo of Skyjacker crossmember installed) 6) Position Transmission Crossmember between radius arm mounting brackets so that the upper mount aligns with the existing transmission bracket. Loosely fasten the new trans crossmember to the existing transmission bracket using existing hardware. Now loosely fasten new trans crossmember to each of the radius arm mounting brackets us the 3⁄8 x 1-1⁄2" supplied bolts . Once all bolts are started, torque per specification chart.
7) Remove the factory bumpstops from the frame. Using a 3⁄8" drill, enlarge holes and install the bumpstop extensions using 3⁄8" lock nuts provided. Install new polyurethane bump stops into the new extensions. 8) Referring back to illustration #4, install new coil springs. Install new shocks as shown in illustration, using the 1⁄2 x 3" supplied bolts. Tighten shock bolts and stems. Reinstall the front dirveshaft and torque the U-bolts to 12-15lbs.
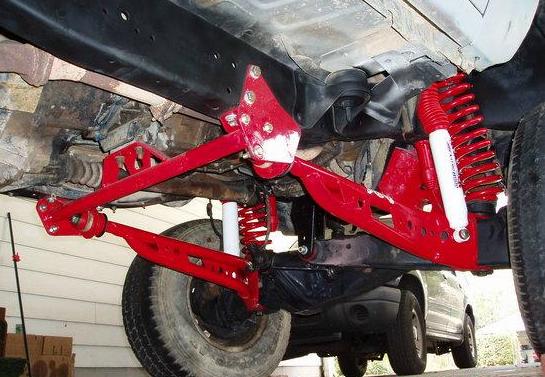
Everything Installed Tip: Set the rear of the radius arms in the crossmember and start the retaining nut on, but don't tighten it up. Also, don't tighten up the radius arms at the axle beams. Get the axle beams in their pivot/mounting points. Once everything is in it's mounting point you can tighten it all up. This makes it much easier for all the components to move freely while you try and get everything lined up. Design Change: Sometime around 2011, Skyjacker changed the design of their Ford Ranger extended radius arms. The crossmember is the same, and the radius arm length should be the same as the original style, but the arms are boxed steel now instead of tube.
|
|
|