• Welcome Visitor! Please take a few seconds and Register for our forum. Even if you don't want to post, you can still 'Like' and react to posts.

The ‘RAITH Party Cart….


Rick W

Well-Known Member
Supporting Member
TRS Event Participant
TRS 25th Anniversary
Joined
May 15, 2020
Messages
2,473
Reaction score
4,054
Points
113
Age
69
Location
Atlanta
Vehicle Year
1997 1987
Make / Model
Ranger XLT x2
Engine Type
4.0 V6
Engine Size
4.0 & 2.9
Transmission
Manual
2WD / 4WD
4WD
Total Lift
97 stock, 3” on 87
Total Drop
N/A
Tire Size
235/75-15
My credo
Never put off ‘til tomorrow what you can put off indefinitely
Sounds good. Be aware that there is galvanic corrosion between steel and aluminum. On my 1980 Grumman van with aluminum body, they used hardwood between frame and body. I would probably use vinyl floor tile. Also paint or coat your steel bolts to protect against galvanic corrosion. On my 1977 Pintos, the connection of the aluminum bumper and frame broke away on both of my rear bumpers. Steel bolts against aluminum with moisture is not good....
Also, I would suggest that the holes are drilled exactly same size as bolt shank, and that the shank supports both pieces being bolted together. If necessary, use extra washers until you get to the threaded portion of the bolt. No need for grade 8 IMO, grade 5 is all I've seen on bolt on hitch receivers.
SAE grade is number of lines plus 2 on the bolt head. So 3 lines is grade 5, 6 lines plus 2 is grade 8, etc. No lines is grade 2.
Good advice, most of this I know/knew, but always good to get reinforcement.

In between other distractions, I sat out there scratching my head, playing with bolts and steel pieces and the springs, etc.

The corrosion issue is virtually nonexistent down here, but I was planning on painting the bolts, they’re all used bolts. I was going to do it for cosmetic reasons, but I never forget the practical side as well. I’ll probably quickly wire brush them first, it only takes a second on the wheel, and again, I’m going to bathe/bed/coat/bury everything in E6000/goop.

With going up a little bit on the bolt size and the 1/2” bolts, I’m really not worried at all about the bolting surface not being parallel on the outside. And I understand about having the bolts be snug in the holes, but nothing else is that precise on these projects, and I’m sure what I’m doing is safe and adequate. Aluminum has good surface tension at a lower bolt torque, so I’m sure all of that is going to be fine, plus I’ll be bonding it. if I was doing something more heavy duty, I would either shave the surface, so it’s flat, or wedge it like you suggested. I think that’s just overkill for this beer cooler. I’m not going to be carrying any backhoes.

The other brainstorm I had today, when I was trying to figure out how to make my spring hangers, is, I think I’m going to do what I did with the Road Ranger, make a steel sub frame to hold the axle assembly that rests underneath the trailer frame. It won’t have to be near as heavy duty, but it’ll take away any doubts I have.

I hate it when fooling around turns into work, but I know it’ll pay off, even though I’m playing. I don’t know what’s come over me, maybe it’s hanging around that casket, but I’m feeling very mortal these, paying attention to some details I’d probably go with year ago.


Rick W

Well-Known Member
Supporting Member
TRS Event Participant
TRS 25th Anniversary
Joined
May 15, 2020
Messages
2,473
Reaction score
4,054
Points
113
Age
69
Location
Atlanta
Vehicle Year
1997 1987
Make / Model
Ranger XLT x2
Engine Type
4.0 V6
Engine Size
4.0 & 2.9
Transmission
Manual
2WD / 4WD
4WD
Total Lift
97 stock, 3” on 87
Total Drop
N/A
Tire Size
235/75-15
My credo
Never put off ‘til tomorrow what you can put off indefinitely
I got the bolts beefed up and swapped out. I’ve got enough aluminum to build 10 of these, but I was able to flip the brackets over and re-drill them, and only wasted the first one while I was figuring it out.

IMG_1564.jpeg
IMG_1563.jpeg


I feel like I spent the last week getting back to where I started. Anyway, I like this much better and I’m much more confident about dragging it behind me. The delays also helped me get my head right on how to mount my axles.

I don’t know how I did it, but I seized up two of the brand new half-inch stainless bolts in the brand new nuts. One I had to cut off with the saws all, and I was astounded that I snapped one!

IMG_1568.jpeg


I tried using a breaker bar to finish tightening the one I snapped off, and I banged my finger pretty good when the socket slipped off the bolt. But after seeing @superj ‘s guts hanging out the end of his finger, I’m embarrassed to just mention that I got a little pinch. And yes, my gloves were sitting right there.
 

sgtsandman

Aircraft Fuel Tank Diver
TRS Forum Moderator
U.S. Military - Active
TRS 20th Anniversary
TRS Event Participant
Ham Radio Operator
GMRS Radio License
TRS 25th Anniversary
Joined
Mar 11, 2017
Messages
12,942
Reaction score
12,806
Points
113
Location
Aliquippa, PA
Vehicle Year
2011/2019
Make / Model
Ranger XLT/FX4
Engine Size
4.0 SOHC/2.3 Ecoboost
2WD / 4WD
4WD
Total Lift
Pre-2008 lift/Stock
Tire Size
31X10.5R15/265/65R17
Another method that works for separating different types of metals from each other is some kind of RTV. I used the paint able acrylic kind quite a bit on my trailer rebuild. The side benefit is that it also prevent water from getting in the gaps and staying there long enough to do it's work. All fasteners got installed "wet" as well. Meaning, a glob of RTV was placed on the shank of the fastener before it was installed. It's a messy way of isolating everything but very effective.
 

racsan

Well-Known Member
Supporting Member
TRS 20th Anniversary
TRS Event Participant
Joined
Aug 17, 2007
Messages
4,990
Reaction score
4,505
Points
113
Location
central ohio
Vehicle Year
2009
Make / Model
ford/escape
Engine Type
2.5 (4 Cylinder)
Engine Size
2.5/151 I-4
Transmission
Automatic
2WD / 4WD
2WD
Tire Size
235/70/16
My credo
the grey-t escape
Another method that works for separating different types of metals from each other is some kind of RTV. I used the paint able acrylic kind quite a bit on my trailer rebuild. The side benefit is that it also prevent water from getting in the gaps and staying there long enough to do it's work. All fasteners got installed "wet" as well. Meaning, a glob of RTV was placed on the shank of the fastener before it was installed. It's a messy way of isolating everything but very effective.
I do that, great idea when mounting a trailer hitch, keep water out & silicone in the threads will help with disassembly if it ever has to come apart, I use a silicone at work that comes in a 5 gallon bucket, its on a machine that squirts out a bead onto a moving part. When the bucket is changed there is still some in the bottom that couldn’t get used, so on occasion I bring home a bucket just for the goop. Free bucket as well. I must have 20 around here.
 

RobbieD

2.9l Mafia
Joined
Aug 6, 2007
Messages
3,964
Reaction score
3,579
Points
113
Location
Georgia
Vehicle Year
1984,1990,1994
Make / Model
Ford
Transmission
Manual
2WD / 4WD
2WD
My credo
Toonces drives a Ranger . . . . just not very well.
There once was a man from Nantuckett,
who got his silicone in a bucket.
 

Rick W

Well-Known Member
Supporting Member
TRS Event Participant
TRS 25th Anniversary
Joined
May 15, 2020
Messages
2,473
Reaction score
4,054
Points
113
Age
69
Location
Atlanta
Vehicle Year
1997 1987
Make / Model
Ranger XLT x2
Engine Type
4.0 V6
Engine Size
4.0 & 2.9
Transmission
Manual
2WD / 4WD
4WD
Total Lift
97 stock, 3” on 87
Total Drop
N/A
Tire Size
235/75-15
My credo
Never put off ‘til tomorrow what you can put off indefinitely
Another method that works for separating different types of metals from each other is some kind of RTV. I used the paint able acrylic kind quite a bit on my trailer rebuild. The side benefit is that it also prevent water from getting in the gaps and staying there long enough to do it's work. All fasteners got installed "wet" as well. Meaning, a glob of RTV was placed on the shank of the fastener before it was installed. It's a messy way of isolating everything but very effective.
That’s basically what I do with the E6000/Goop. It has all the same characteristics of the silicone, except it’s a much stronger adhesive. But it still has that characteristic that makes the bolts easy to break free if you have to take them loose down the road.
 

Rick W

Well-Known Member
Supporting Member
TRS Event Participant
TRS 25th Anniversary
Joined
May 15, 2020
Messages
2,473
Reaction score
4,054
Points
113
Age
69
Location
Atlanta
Vehicle Year
1997 1987
Make / Model
Ranger XLT x2
Engine Type
4.0 V6
Engine Size
4.0 & 2.9
Transmission
Manual
2WD / 4WD
4WD
Total Lift
97 stock, 3” on 87
Total Drop
N/A
Tire Size
235/75-15
My credo
Never put off ‘til tomorrow what you can put off indefinitely
I forgot the overall look

IMG_1571.jpeg


Now I’m seeing progress
 

Rick W

Well-Known Member
Supporting Member
TRS Event Participant
TRS 25th Anniversary
Joined
May 15, 2020
Messages
2,473
Reaction score
4,054
Points
113
Age
69
Location
Atlanta
Vehicle Year
1997 1987
Make / Model
Ranger XLT x2
Engine Type
4.0 V6
Engine Size
4.0 & 2.9
Transmission
Manual
2WD / 4WD
4WD
Total Lift
97 stock, 3” on 87
Total Drop
N/A
Tire Size
235/75-15
My credo
Never put off ‘til tomorrow what you can put off indefinitely
I wanted to start on the axle mounts and axles, but I realized it will be much easier to bend in the tongue, and do the frame for the gas grille etc.,, before I put all that extra weight on it.

Gas grill has a bolt on base that sits about 5” off the ground. The sides are bent inward and actually bolt to the base from the top. I’ll take that off.

IMG_1581.jpeg
IMG_1582.jpeg


I’m planning on more channel around where it will sit, but placed so the gas grill will slide inside the frame, not sit on top of it. Before I flip the frame over, I’m going to put a solid floor across that area, so when the gas grill slips in, it’ll actually sit about 4 inches lower. With removing the skirt, that takes 9 inches off the height, which should be about right - and I don’t have to cut anything. 20 pound tanks will still fit underneath it, but not the big tank. I’d like to keep the big tank, so that may take some more figuring. I might be able to let it hang out the bottom, but I don’t want it too close to the road.

I’ll also bolt through the sides into the aluminum frame so it’s solid solid as a rock.
 

Rick W

Well-Known Member
Supporting Member
TRS Event Participant
TRS 25th Anniversary
Joined
May 15, 2020
Messages
2,473
Reaction score
4,054
Points
113
Age
69
Location
Atlanta
Vehicle Year
1997 1987
Make / Model
Ranger XLT x2
Engine Type
4.0 V6
Engine Size
4.0 & 2.9
Transmission
Manual
2WD / 4WD
4WD
Total Lift
97 stock, 3” on 87
Total Drop
N/A
Tire Size
235/75-15
My credo
Never put off ‘til tomorrow what you can put off indefinitely
I think my biggest fear was bending the channel for the tongue, been fretting over it for weeks. I can pick up the whole frame (so far), almost with one hand. I slid it off the sawhorses, laid it standing on its side, and bent the channel in place in less time than it’s taking to write this. Flipped it, did the other side. Maybe 15 minutes total, piece of cake, perfect.

IMG_1583.jpeg


Then took forever to get the base off the grille: 6 Phillips screws. Actually 3.

There’s a lead counterweight on the bottom (40#s?), all together I think it weighs 80-100. Very awkward & top heavy, and I didn’t want to damage or scratch it. If I laid it down, I couldn’t reach the screws. I ended up laying on the bricks on some 2x4s and plywood. Too old for that crap.

6 screws hold the sides on the base. 3 zipped right out. The screws are high quality and the stainless is very high quality, but the built in female threaded thingies are crap and three of the screws were frozen. I stripped the Phillips slot on one, and the other two spun the nut thingies. Angle grinder couldn’t get at either side, and my fat ass (head?) barely fit inside. I took the guard off my 4-1/2” cut off wheel, and chipped away at the screw heads. And, BANG, just like that 2 hours later the base popped off!

The facia on the right also proved a challenge. Three teeny tiny high quality screws held it in from the back side. No way to see them, & couldn’t get a screwdriver on them, only about 2-1/2” head space. I fiddled with one of those tiny ratchet screw drivers for 30 minutes before I realized they were the only three screws with a slot head, not Phillips, on the whole thing. Got them off 10 minutes later.

IMG_1585.jpeg


With the grille sides free and clear, I got the measurements for the trailer slot spot. I made and installed another 4” channel cross piece and put it in in less than an hour, drilled, tapped, screwed and back up bolts. Then I split a piece of channel into two heavy angles and mounted them on top (actually under-it’s upside down), so between the channels and the angles, it’ll cradle the grill. I’m going to use the same six holes to screw it down, and also drill 4 bolts through the channel. I need one more little support I have to add across the back side.

IMG_1584.jpeg


Sweet pea’s birthday weekend, so I quit before I got buried in the thing…
 

Rick W

Well-Known Member
Supporting Member
TRS Event Participant
TRS 25th Anniversary
Joined
May 15, 2020
Messages
2,473
Reaction score
4,054
Points
113
Age
69
Location
Atlanta
Vehicle Year
1997 1987
Make / Model
Ranger XLT x2
Engine Type
4.0 V6
Engine Size
4.0 & 2.9
Transmission
Manual
2WD / 4WD
4WD
Total Lift
97 stock, 3” on 87
Total Drop
N/A
Tire Size
235/75-15
My credo
Never put off ‘til tomorrow what you can put off indefinitely
I finally figured out my spring hangers, got them made, and got them painted and temporarily installed.

IMG_1617.jpeg
IMG_1618.jpeg


I used a piece of 2-1/2” angle, and welded it to some heavy unistrut pieces I had for the other side. Sounds crazy, but I want to mount a side to side cross piece to reinforce the spring mounts. I did a little research, and with potential liquid loading, sloshing around, there’s a concern with the aluminum channel warping. I think it’s all overkill, but it fits in with the whole fooling around with it with no purpose whatsoever motivation.

The holes in the unistrut were a hair smaller than a half inch bolts I’ll be using. I up drilled the appropriate holes to that half inch. I cut a little piece of 2 x 4 the exact width of the axle with its bushings, and then bolted the pieces together. That way when I welded it, everything would line up.

IMG_1592.jpeg


I also needed some kind of risers to hold the fenders. That little bit of unistrut ends up being a universal bracket to hold the spring, hold it to the frame, hold the cross piece, and hold the verticals to hold the fenders. And remember the two axles are overkill, so I’m not worried about any loading on these funky hangers.

Once they were welded, they’re the same dimensions as the 2000 pound spring hangers. The unistrut steel is a hair thinner, but the bolt will run through both sides, and both sides together actually end up being thicker. They’re bolted to the bottom side of the channel like usual, but there will also be a bolt through the unistrut into the web to take flex out.

I may have to shim the center mount on both sides for the equalizer, to make sure I have enough motion on the shackles. If I have to do that, I’m going to use one of those aluminum blocks that came off the channel beams.

Like everything, it’s taking time, but I’m pretty happy with how it’s going now.
 

alwaysFlOoReD

Forum Staff Member
TRS Forum Moderator
TRS Banner 2012-2015
TRS 20th Anniversary
Joined
Apr 13, 2009
Messages
13,991
Reaction score
5,146
Points
113
Location
Calgary, Canada
Vehicle Year
'91, '80, '06
Make / Model
Ford, GMC,Dodge
Engine Size
4.0,4.0,5.7
Transmission
Manual
2WD / 4WD
4WD
Keep an eye on the unistrut. You might want to put a tube inside to prevent the wall from collapsing. The bolt goes thru the tube...
 

Rick W

Well-Known Member
Supporting Member
TRS Event Participant
TRS 25th Anniversary
Joined
May 15, 2020
Messages
2,473
Reaction score
4,054
Points
113
Age
69
Location
Atlanta
Vehicle Year
1997 1987
Make / Model
Ranger XLT x2
Engine Type
4.0 V6
Engine Size
4.0 & 2.9
Transmission
Manual
2WD / 4WD
4WD
Total Lift
97 stock, 3” on 87
Total Drop
N/A
Tire Size
235/75-15
My credo
Never put off ‘til tomorrow what you can put off indefinitely
Keep an eye on the unistrut. You might want to put a tube inside to prevent the wall from collapsing. The bolt goes thru the tube...
I’m not worried at all about the strength carrying the load. But I just realized you’re talking about crushing the unistrut, as if I continue to tighten the nut & just flatten it out. Yes/no?

That’s not a bad idea, and it’ll take a second, so I’ll probably do it. Having said that, I’m not sure it’s necessary. If you think about the loading, the load up from the road through the spring, would hit the spring hanger equally on either side of the spring. To put a significant load on the far side of the unistrut to the point that it pulls inward, the spring would have to twist so far off center, i’d probably already be on my way to the afterlife…

I realize that the hole in the side of the unistrut adjacent the spring may wear more quickly, but that should quickly be kept in check by the outer side of the unistrut.

And again, double axles aren’t necessary, just for show, and if this thing gets a couple thousand miles on it the whole time I own it, I’ll be amazed. But let me also say when I build these crazy things, I’m pretty good at looking at these kind of details every time I drag it out.

Funny thing is, I’m not sure I need it on the spring bolt, but it’s definitely a great idea for the bolt through the channel web. That bolt needs to remain snug.

But still all good, keeps me thinking, keep those cards and letters coming in.

I worked on the three boiler drain valves today for the Casket, because I’m going to use an aluminum block on the inside side, and I’ll make my central hanger equalizer spacers at the same time. I like to group tasks that involve the same tools and materials if I can.
 
Last edited:

alwaysFlOoReD

Forum Staff Member
TRS Forum Moderator
TRS Banner 2012-2015
TRS 20th Anniversary
Joined
Apr 13, 2009
Messages
13,991
Reaction score
5,146
Points
113
Location
Calgary, Canada
Vehicle Year
'91, '80, '06
Make / Model
Ford, GMC,Dodge
Engine Size
4.0,4.0,5.7
Transmission
Manual
2WD / 4WD
4WD
Yes, im talking about inside the unistrut. Any time a bolt goes thru a tube there should be support to prevent crushing the tube. It doesn't take much to have some slop introduced and that's never good.

A lot of times I realize you probably already know about what I suggest. But there are (future) people reading this that may not know. So lets just say I'm talking to them... Lol
 

Rick W

Well-Known Member
Supporting Member
TRS Event Participant
TRS 25th Anniversary
Joined
May 15, 2020
Messages
2,473
Reaction score
4,054
Points
113
Age
69
Location
Atlanta
Vehicle Year
1997 1987
Make / Model
Ranger XLT x2
Engine Type
4.0 V6
Engine Size
4.0 & 2.9
Transmission
Manual
2WD / 4WD
4WD
Total Lift
97 stock, 3” on 87
Total Drop
N/A
Tire Size
235/75-15
My credo
Never put off ‘til tomorrow what you can put off indefinitely
Amen! I have the same approach on a lot of things I get long-winded about.
 

Rick W

Well-Known Member
Supporting Member
TRS Event Participant
TRS 25th Anniversary
Joined
May 15, 2020
Messages
2,473
Reaction score
4,054
Points
113
Age
69
Location
Atlanta
Vehicle Year
1997 1987
Make / Model
Ranger XLT x2
Engine Type
4.0 V6
Engine Size
4.0 & 2.9
Transmission
Manual
2WD / 4WD
4WD
Total Lift
97 stock, 3” on 87
Total Drop
N/A
Tire Size
235/75-15
My credo
Never put off ‘til tomorrow what you can put off indefinitely
I had to go to an old timey hardware store here in town, Howard brothers, to get the bolts with the right balance of smooth shank and threads. Then I got all the spring mounts mounted and aligned.

You know a lot of my design on these things is based on what I have in the shed of miracles. You know how I hate buying anything at retail. I don’t want to imply I’m cheap, but I actually ran a dye over a couple of bolts to save them, in addition to the few bolts I had to buy. I still have to get three more tomorrow, but I was able to get the springs mounted.

IMG_1625.jpeg


Then I did some measurements to try to figure out if I want to be on top of the springs or below the Springs with the axles. From the tape measure, I think I want to be below, which puts my fender height next to the Casket only about 5 or 6 inches off the deck. It’ll be easy to swap it back-and-forth after I narrow up the axle widths.

I was out of time, but I threw the axles on top, just to see.

IMG_1628.jpeg


Lincoln was trying to tell me that they looked out of line from where he was sitting, but I think I can work it out with a crowbar. We’ll see…
 
Last edited:

Sponsored Ad


Sponsored Ad

Staff online

Members online

Today's birthdays

Member & Vendor Upgrades

For a small yearly donation, you can support this forum and receive a 'Supporting Member' banner, or become a 'Supporting Vendor' and promote your products here. Click the banner to find out how.

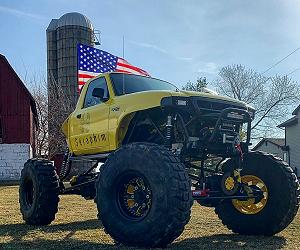
Truck of The Month


Mudtruggy
May Truck of The Month

Recently Featured

Want to see your truck here? Share your photos and details in the forum.

Follow TRS On Instagram

TRS Events

25th Anniversary Sponsors

Check Out The TRS Store


Sponsored Ad


Sponsored Ad

Sponsored Ad


Amazon Deals

Top