• Welcome Visitor! Please take a few seconds and Register for our forum. Even if you don't want to post, you can still 'Like' and react to posts.

The Road Ranger. 1997 SEMI


Rick W

Well-Known Member
Supporting Member
TRS Event Participant
Joined
May 15, 2020
Messages
2,407
Reaction score
3,902
Points
113
Age
68
Location
Atlanta
Vehicle Year
1997 1987
Make / Model
Ranger XLT x2
Engine Type
4.0 V6
Engine Size
4.0 & 2.9
Transmission
Manual
2WD / 4WD
4WD
Total Lift
97 stock, 3” on 87
Total Drop
N/A
Tire Size
235/75-15
My credo
Never put off ‘til tomorrow what you can put off indefinitely
The Road Ranger

7C10E37E-4AA6-4693-9F60-D2CA758CED50.jpeg


Soooo, again (from “what did you do with your Ranger today”), I bought this 305,000 mile 97 for $800.

1C978BE8-4B40-4229-89C0-2CA37DEEDCC2.jpeg


Mechanically it was great, a one owner, and then the grandson inherited it and started to screw it up, decided to sell it, and I grabbed it. I look at Craigslist about 10 times a day, and I was the first one to call on it and go see it.

At the time, I still had bad legs and the blood disorder, so I was good for about two hours a day as long as I didn’t have to squat. The priority was The Missing Linc, so I mostly just drove this truck for the first year and a half (cuz it used half the gas of Big Red F250 diesel).

The Missing Linc had bad tires on steelies, and originally I wanted the bullet hole wheels for her. I had found a set of 15 inch OEM wheels with decent highway tires for $70. I pulled off the steelies, and painted them with the intention of selling them. But then I liked them, so the first thing I did to the 97 was to take the knobby tires off, put them on the steelies, and put them on The Missing Linc. Then I put the 15 inch bullet hole wheels on the 97 and pretty much just drove it while I was working on the 87.

The wheels that were on the 97 went into the tire pile next to the shed of miracles.

8C44156F-34A7-4942-BA0B-D43B78E00F8B.jpeg

88BF2B19-B94C-4E89-BCDB-DC4949C579CA.jpeg
E61B7CD8-80FD-4407-80F8-B9674F6BB640.jpeg


More to come…


Rick W

Well-Known Member
Supporting Member
TRS Event Participant
Joined
May 15, 2020
Messages
2,407
Reaction score
3,902
Points
113
Age
68
Location
Atlanta
Vehicle Year
1997 1987
Make / Model
Ranger XLT x2
Engine Type
4.0 V6
Engine Size
4.0 & 2.9
Transmission
Manual
2WD / 4WD
4WD
Total Lift
97 stock, 3” on 87
Total Drop
N/A
Tire Size
235/75-15
My credo
Never put off ‘til tomorrow what you can put off indefinitely
Next step was just driving it around making sure it was roadworthy until I got a chance to really start working on it.

Let me say everything was from Craigslist or the scrap yard or buried in my shed of miracles. If I actually broke down and bought something new, I’ll indicate that. Please ask questions. This is my passion, but I also like to help out other guys thinking about similar stuff.

I had to replace the dome light. Ceiling spots work but the dome still doesn’t work, someone said it was switches inside the door. And I think there’s only one back light bulb working on the dash, and the light behind the heater controls is out too. I haven’t gotten to any of that yet.

Since I knew I wasn’t going to keep the bed, I used some of the clear red repair tape to cover the left rear turn lens. And the pull on the tailgate was sketchy, so I went in there and I rigged it with some zip ties.

I put new brake pads and shoes all around. The radiator developed a drip. Considering my plans for the truck, I bought a higher capacity radiator brandy new, and I put in a thermostat I had. Knock on wood, since then I’ve just been driving it, runs like a top, no issues as long as I was gentle on the clutch.

Once I zeroed in on bullet hole wheels, which is also what I have on big red, I just started scouring craigslist and such for spare wheels and tires and 5x4.5 axles/brake axles and such to use on a few different trailers I was planning so they match the trucks. People were giving stuff away to clean house and make a couple extra bucks during the Covid craziness.

I ended up with 19 14” inch bullet hole wheels. Half for free with good or bad tires, but I never paid over $20 for any one of them. About half are in very good condition. When I was looking for them, twice I bought a “lot” of wheels that included a set of later model F150 Bullitt wheels, set of 14” Deerhoof wheels, 3 15” Deerhoof wheels, and a little pile of center cabs, different styles.

I had to buy a 15 inch deer roof wheel for $50 to make a set, and then I sold the set for $250. I sold the F150 wheels for $150, and once I decided on the one or two center cab designs I wanted, I sold the rest for five dollars each, about 15 of them.

I got/bought about 15 or 20 15” low profile tires for the trailers. For me to grab them they had to have about half the tread left. And I kept my eyes open for 235/75/15 tires that I use on both rangers, and picked up eight of them. I have a guy who will dismount the old tire, put on the new tire, and balance the new tire and throw away the bad one for $15 each. If I bring them six or eight at a time, he’ll do them for $10 each if I leave them.

I picked up three harbor freight trailers, and one folding trailer for a total of $500. I picked up another half dozen axles, Spring sets, Hubbs, fenders, etc., again all for a little money. While I was working on the 87, I was just stockpiling all his stuff. I also picked up eight sheets of 4 x 8 x 1/8” aluminum diamond plate that had been cut to 8’ x 42” for one day use in a trade booth, all for $75. And I picked up about a dozen sticks of aluminum angle iron of different sizes, again all for under 100 bucks.

Selling the extra wheels, and fixing up trailers after I swapped the 5 x 4.5 axle out, I definitely generated more cash than all this junk cost me. Remember I’m partially retired, and after my health issues, my therapy was to do this stuff but it also worked as physical therapy to get my legs and body in better shape.

I was just stockpiling it all until I got The Missing Linc roadworthy.

I’ll start with the disassembly and bodywork etc. in my next post.
 
Last edited:

Rick W

Well-Known Member
Supporting Member
TRS Event Participant
Joined
May 15, 2020
Messages
2,407
Reaction score
3,902
Points
113
Age
68
Location
Atlanta
Vehicle Year
1997 1987
Make / Model
Ranger XLT x2
Engine Type
4.0 V6
Engine Size
4.0 & 2.9
Transmission
Manual
2WD / 4WD
4WD
Total Lift
97 stock, 3” on 87
Total Drop
N/A
Tire Size
235/75-15
My credo
Never put off ‘til tomorrow what you can put off indefinitely
So fast forward maybe a year, The Missing Linc wasn’t complete, still isn’t, but it was on the road. During the time of accumulating tires and axles and such, I also got about 10 pickup truck boxes and a few tool boxes for little money, some free (one free beat up truck box can be the source of all kinds of shaped diamond plate pieces for ridiculous projects).

The next step on the Road Ranger was to pull the bed and bumper off. Bumper was bent up, no good, even the vinyl step/cap was torn up. The bed had a glancing dent on one side. Both the rear rack holes had a tear in them like someone hooked a chain in them and tore them a little. But the bed, like the whole truck, was completely rust free, very straight and easily fixed.

9B799A41-D5FA-46C3-83F4-E0F79146EB5A.jpeg
6AB749C7-77E3-4620-85E1-11B61E092EFF.jpeg
E434086A-CBF5-4150-9CBF-559412049E7A.jpeg
F0D6CE67-30E3-4ADF-BBB4-6B4540255622.jpeg


I pulled the wiring (into the shed of miracles) and put the good taillight on Craigslist (easy $15). Then I banged out the dent with the dollar store hammer @pjtoledo mocked, and it almost disappeared (bang that pj!). I left the struts, mud flaps and tail gate. The spare tire carrier is in the rafters of the shed of miracles (it takes a long time to recognize crap that you should keep cause you could cut it up for something later that you don’t even know you’re going to do yet).

I put the bed on Craigslist up and down the coast and up towards Chicago for $450. It took a few months, then one of you “I love old Rangers even if they’re rusty” guys (Ohio?) found it, had a buddy pulling a trailer back from Florida, and gave me $350 with a smile like he got the best of the deal. I took it as a win-win. Remember I paid $800 for the whole truck.

D9B1CD18-9CE2-4F4C-85EC-5BD8FDCF4C91.jpeg


I cut a piece of my always-in-stock bed frame angle*, drilled a few holes and rigged some temporary trailer lights. I added a couple 1-1/2” x 3” high low bright LEDs for the turn signals.

Then I cut a 2x4 the width of the frame, and grabbed a couple short pieces, and mounted it with some wood screws between them, pinching the frame flange in between (cuz I was too lazy to drill 2 holes in the frame), to mount the spare. I knew it was going to be temporary, so I didn’t waste a pressure-treated scrap ( I can’t throw money around like that). A ratchet strap, short chain and padlock, all from the shed of miracles, and I was on the road again!

* for those who haven’t discovered it, with a budget like mine, you can always find FREE bed frames on craigslist. Bed frames are typically made from a very hard steel, lightweight but very strong (like a Ranger frame). I always keep two or three up in the rafters for whatever. You have to drill it slowly with some oil so you don’t blunt your drill bits, and you have to cut it with a cut off wheel, not a saw, but it really comes in handy for a million things. If you’re going to weld it to something, you can’t use a 6013 (I’m ancient and I still have a my buzz box from the 80s), you have to use a rod that has a little more nickel for the hard steel. Also remember hard steel can be brittle/crack. Hope it helps.

(& no, my $100 HF trailer was not part of the deal)

More to follow…
 
Last edited:

Rick W

Well-Known Member
Supporting Member
TRS Event Participant
Joined
May 15, 2020
Messages
2,407
Reaction score
3,902
Points
113
Age
68
Location
Atlanta
Vehicle Year
1997 1987
Make / Model
Ranger XLT x2
Engine Type
4.0 V6
Engine Size
4.0 & 2.9
Transmission
Manual
2WD / 4WD
4WD
Total Lift
97 stock, 3” on 87
Total Drop
N/A
Tire Size
235/75-15
My credo
Never put off ‘til tomorrow what you can put off indefinitely
I got the Road Ranger 97 10/4/21, and after minor maintenance stuff and a bigger radiator, I pretty much just put miles on it until the Missing Linc 87 was on the road around 5/1/22. That’s when I started in earnest on the 97. I got Barney, the 93 almost simultaneously for the wheels and parts.

The grill on the Road Ranger was poor, bumper bent up & the lights faded yellow and the turn signals lenses were rough, chrome pieces sorry, etc. I pulled them all out along with the lower valence that was busted up. I took the same parts off the 93, which were in great shape, and I got a brandy new eBay grill.

7D107F6C-14DF-4BCA-A04D-8679FA6691F5.jpeg

F842E983-6F70-4969-9D68-FDF774F2DC48.jpeg


I pre-painted the valence rustoleum Sunrise red, the closest stock color to the ford red.

I picked the two best headlights, and I liked Barney’s more orange corner lights, and used a 800 grit to take the discolored skin off, then sanded them more finely with 1,500, then wet 1,500. When they were smooth and evenly cloudy, I used 2parts clear urethane with one part paint thinner, and rolled it on with a fine foam roller. I did it with the lenses facing upward on a jig I made in 10 seconds so there were no runs/drips. Came out 95% like new.

Barney’s bumper, lower valence and rubber guards were near perfect. I painted/dyed all the rubber w/Always Black, and cleaned and polished the rest. I held off installing it all until I had the truck painted.

I transitioned to body work, starting by removing the aftermarket side sun valences. Only one major dent in the right front, and then a dozen dings and chips. I let the bondo fly. While still soft, I cut it close with one of those cheese grater looking files/shavers. When they were smoothed out, I finished with a palm sander with show-quality 80 grit (beer goggles).

AD912576-F223-4DD6-8EDA-C7727C72D76D.jpeg
865AAB8B-684F-4645-8CA1-9708FF2296F5.jpeg
D443949E-0500-47FE-A6E8-B3EAD530C0ED.jpeg
3763B310-527D-4226-9346-64A1629B7383.jpeg


Then I swept it off, wiped it down with a diesel/gas mix (from when my friend thanked me for using my F250 diesel by filling it with gas), and started rolling. Rustoleum 70/30, precision measured with my eyeball, and used a dollar store 4” foam roller and tray. The dollar store roller started to disintegrate, but I made it through the first coat. Then I got a harbor freight four-inch foam roller for the second coat, and on the hood and the roof, a third coat. If you do it, you don’t want to be in direct sun, and not too hot, and not too cold, which in Atlanta means about 75°.

I picked the bugs and leaves off the first day and touched it up with a few Q-tips. After a couple days of air drying/curing, I put the grill and bumper back together.

92379B0E-6795-496B-A55A-44896286BB49.jpeg


It took about a quart and a half, like $30, maybe $50 with everything.

Suits the hell outa me!

More to follow…
 
Last edited:

cbxer55

Well-Known Member
Joined
Oct 9, 2009
Messages
1,865
Reaction score
767
Points
113
Location
Midwest City, Oklahoma
Vehicle Year
1998
Make / Model
Ford
Engine Size
3.0
Transmission
Automatic
I like that very first pic. Tell the truth though, does it have enough power to move all those wheels? LMAO!!
 

Rick W

Well-Known Member
Supporting Member
TRS Event Participant
Joined
May 15, 2020
Messages
2,407
Reaction score
3,902
Points
113
Age
68
Location
Atlanta
Vehicle Year
1997 1987
Make / Model
Ranger XLT x2
Engine Type
4.0 V6
Engine Size
4.0 & 2.9
Transmission
Manual
2WD / 4WD
4WD
Total Lift
97 stock, 3” on 87
Total Drop
N/A
Tire Size
235/75-15
My credo
Never put off ‘til tomorrow what you can put off indefinitely
I like that very first pic. Tell the truth though, does it have enough power to move all those wheels? LMAO!!
Hey hey hey!!!!

It was running perfect when I got it. 4.0. The 3rd axle is not a drive axle nor “underneath” on the frame, it pulls behind on a 4 link where the bottom “struts” are the springs, so it’s like pulling a trailer. I put in a heavier pressure plate and a ceramic clutch (looks more like a fan than a disk), and the matching flywheel. Killing my left knee, but I can burn rubber every time (I try not to). Hasn’t changed the mileage at all. The fenders are mounted on the frame. It does have a rougher ride like it was on stiffer springs but I don’t understand why yet.

I pulled a double axle equipment trailer (on the ball hitch) with an Isuzu rodeo on it, and it was like pulling it with the F250.

I’m sketching up the “design” for one of the next posts. Hard to see from just a picture.

edit afterthought: all tires are the same size 235/75/15 that came with it.
 
Last edited:

Rick W

Well-Known Member
Supporting Member
TRS Event Participant
Joined
May 15, 2020
Messages
2,407
Reaction score
3,902
Points
113
Age
68
Location
Atlanta
Vehicle Year
1997 1987
Make / Model
Ranger XLT x2
Engine Type
4.0 V6
Engine Size
4.0 & 2.9
Transmission
Manual
2WD / 4WD
4WD
Total Lift
97 stock, 3” on 87
Total Drop
N/A
Tire Size
235/75-15
My credo
Never put off ‘til tomorrow what you can put off indefinitely
Next steps:

After the bodywork and paint, when I was putting the grill together, I put recessed Amber LEDs across the top of the grill like a raptor. I also put two amber/white multi pattern strobes in the grill, flush, to be seen at angles, and on each side on the front of the fender, and I wired them all and ran the wires into the cab. I also pulled the oval and carefully drilled it from behind and put a 2mm blue flat top LED on each side. The raptor lights and the blue lights come on with the ignition switch.

83770A0C-410D-44F0-98DD-84FE97148623.jpeg


A tip for the next guy, The LED wires are like four or five human hairs, tiny, hard to work with. When I do it the next time, I’m going to solder some 20 or 22 gauge wire close to the lights on the leads provided, and put a double layer of heat shrink over the whole thing, so that when I’m trying to snake everything, I’m working with wires you can work with.

Behind the cab, I took out all of the wiring, all the extra clips, etc., down to a bare frame. I pressure washed it, alternating between a couple of different grease strippers, different soaps and just plain water. After the last rinse, I mixed up a very mild solution of white vinegar, and sprayed that all over it. It neutralizes all the caustic residue. Let it air dry a few days.

Then I mixed satin black Rustoleum 50-50 with paint thinner, and I slopped that all over everything with a floppy 4” brush, basically mopped it on, everything I could reach on the frame and anything metal as far as I could reach under the cab and all the way back to the tip of the frame, the springs, the axle, etc. When you mix it like that, if there are any hidden spaces that may have a little mud or rust, it soaks in, instead of laying on the surface, for long-term rust prevention. A few days later, I did the same thing with an 80-20mix as a final coat. Remember this was a lifelong Georgia truck with absolutely minimal surface rust, no rot.

On top, I put running lights across the front of the cab. I scored a couple of flat bottom roof racks from who knows what that I found in the trash pile in front of a house that was being renovated. I used some of my little aluminum angle to make cross braces (front to back) to hold the double bacon, and three air horns. The horns are one long one, and a smaller pair. I had to pipe them together carefully after bench testing, and I’m going to have to splice the two little air compressors together or the little ones don’t blow. Compressors will be in the tool box, on a separate hanging chain switch hanging off the CB mount on the roof, like the Missing Linc switch panel over the CB. I have a couple of 8 inch by half inch bright LED low profile mini floodlights that I’m going to mount over/under the roof rack bar on the opposite side of the horns (unless the wind blows another way by then…).

I put a thin foam gasket under the flat bottoms of the roof rack supports, covered with silicone on both sides around the hole, and then used some self tapping hex screws to hold the brackets down.

E3041D43-0086-47CD-933E-F348F808223A.jpeg


Suits the hell out of me!

Headache rack will be next post, and exhausts.
 

Rick W

Well-Known Member
Supporting Member
TRS Event Participant
Joined
May 15, 2020
Messages
2,407
Reaction score
3,902
Points
113
Age
68
Location
Atlanta
Vehicle Year
1997 1987
Make / Model
Ranger XLT x2
Engine Type
4.0 V6
Engine Size
4.0 & 2.9
Transmission
Manual
2WD / 4WD
4WD
Total Lift
97 stock, 3” on 87
Total Drop
N/A
Tire Size
235/75-15
My credo
Never put off ‘til tomorrow what you can put off indefinitely
Before bed, I realized it’s probably “big disclaimer“ time.

This whole project is me screwing around with an old truck and a bunch of junk I picked up or had in my garage. I am a seasoned engineer with pretty good hands on experience. I do not recommend anybody use this as a pattern to design their own similar truck. While I am comfortable with it for my very limited desires, which are mostly to play with it, certainly no heavy work, I have no idea how roadworthy it is or how safe it is.

It is offered here for whimsy and perhaps inspiration, but it in no way as a design to be copied by others.

Also, the lights, the exhaust, the horns, etc. etc. etc. may or may not be legal where you are located. I have talked to a lot of law enforcement and DOT folks and other knowledgeable people to get some guidelines before I did any of this.

And finally, as regards “design,“ most of this came to me in a dream, and I just scrap it together as I go. So if your brain doesn’t work the way my brain works, proceed with extreme caution. And if your brain does work the way my brain works, you’re screwed anyway.

Be safe!
 

Rick W

Well-Known Member
Supporting Member
TRS Event Participant
Joined
May 15, 2020
Messages
2,407
Reaction score
3,902
Points
113
Age
68
Location
Atlanta
Vehicle Year
1997 1987
Make / Model
Ranger XLT x2
Engine Type
4.0 V6
Engine Size
4.0 & 2.9
Transmission
Manual
2WD / 4WD
4WD
Total Lift
97 stock, 3” on 87
Total Drop
N/A
Tire Size
235/75-15
My credo
Never put off ‘til tomorrow what you can put off indefinitely
Better pics of the top and the fender

5CC02351-0712-47A3-8FB5-351150DC2DEE.jpeg
5B5C8484-0401-49B0-A324-25085BAC803C.jpeg


In addition to the amber/white strobes on the front of the fender, I also put the Amber marker lights wired to the turn signal up by the emblem. If I had to do it again, I would’ve used one of the smaller ones like I used on the Missing Linc, but it still suits the hell out of me!
 

Rick W

Well-Known Member
Supporting Member
TRS Event Participant
Joined
May 15, 2020
Messages
2,407
Reaction score
3,902
Points
113
Age
68
Location
Atlanta
Vehicle Year
1997 1987
Make / Model
Ranger XLT x2
Engine Type
4.0 V6
Engine Size
4.0 & 2.9
Transmission
Manual
2WD / 4WD
4WD
Total Lift
97 stock, 3” on 87
Total Drop
N/A
Tire Size
235/75-15
My credo
Never put off ‘til tomorrow what you can put off indefinitely
Headache rack:

I picked up 6-7 pieces of shopping mall type escalator fence for $100 a while ago. Craigslist. The second I saw them I said “that’s my headache rack.“

7916BC85-C3BD-4174-98FF-044F25D3035E.jpeg
3DB9EA75-2DBE-483E-9006-6F3E3A3C7051.jpeg


They’re made out of real heavy duty, really nice aluminum pieces, and everything was powder coated satin black. The bolts and washers were all stainless steel. They were all different widths, and the widest one was just perfect.

I drilled holes to match the bed mounting bolt holes in the front of the bed, and I used the same torx bolts to bolt it down, upside down. (A lot of my stuff is upside down.). Very solid without bracing. Then I cut up another one to make the extensions on the top to support/protect the lights I put on.

605C6B7E-6A5D-4CB1-B9FB-15B99F67161A.jpeg


Top to bottom, The five red marker lights are high/low brightness. They come on with the parking lights, and bright with the third brake light. I have an interrupter on the brake side (search 100a eBay), so they do three quick flashes, three slow flashes, and then hold steady.

The two floodlights are wired into the reverse lights. After I get everything together, and wire them into the cab, I’ll put a hot switch on them so I can turn them on anytime, along with the reverse lights.

Below that is a 6-section 17-pattern white/amber traffic advisor bar. I plan on replacing it with an 8-section that has the interior indicator, so I don’t have to step outside to see which pattern is flashing.

On each side, I had some new stop tail reverse lights to upgrade a ‘66 F600 dump truck I had 35 years ago that I never used. I connected both the parking and stop lights to the brake line for maximum brightness (not on with parking lights), and then I put Amber bulbs in the reverse lights and wired them to the turn signals. Those lights are also on pieces I cut from the fencing, that I trimmed down. I wanted to leave a little angle in them to give them strength in case somebody brushed by them, and just from road vibration. So far so good.

Somewhere in the middle, I got the exhaust changed over to dual exhaust. The two 3-foot chrome stacks, 3 inch, we’re close out I found on eBay. I think I paid $65 or $85 for both of them (usually that much each) and they were new. Basically, we cut the driver side pipe off the passenger side pipe, and capped/welded the hole on the passenger side. Then, on the driver side, it had to end up outside the frame in front of the gas tank for obvious reasons. The guy did a great job on the whole thing except where he hooked under the frame. It loops down to low. & Barely legal glass packs.

I think I’m going cut out the loop, and make a square box with the right cross-sectional area, with the correct angled pipes, inside facing forward, and outside facing backward. If you think about it, we went from the cross-sectional area of one pipe, doubled it to the cross-sectional area of two pipes, and then they expand to the 3 inch stacks. Whatever I cobble up, as long as it’s the right cross-sectional area of one pipe, shouldn’t mess up any back pressure or such.

I’ve never been a fan of the sound of a six-cylinder with straight pipes, but these things sound really mellow and really great. That was an unexpected positive. I actually like it so much, I’m thinking of doing the same thing to the exhaust on the Missing Linc, except I’ll run out under the bumper. Some day.

I made a bracket that comes out from the headache rack and then turns down, and then I just used 3 inch stainless hose clamps to hold the pipes up straight.


6594B53D-4CCB-4A83-BCE4-A792674D7499.jpeg
A2A2DAAB-6EE3-43AA-84F8-4B64EB1BB65C.jpeg


yeah, yeah, yeah, I’m going to fix all the wiring the last time I take it apart and put it together. At least the part that shows….

Next step were the CB antennas. I wanted the look of dual antennas, I have a small pile of them in the shed of miracles, and I picked out a couple of 6 foot fiberglass sticks. They were old and scratchy. I painted the top 1 foot with gloss white Rustoleum, a couple coats, and then I painted the rest of them Sunrise red, taping the top so I ended up with red and white stripes on top. For those who don’t know, you can paint the hound out of them and it won’t affect the performance at all as long as you make sure there’s nothing metallic in the paint you’re using. Some pigments have metals.

The other thing to know is you have to use a real “Y” connecting cable. It’s not something I advise putting together yourself. There are two choices, one where there are two wires, 50 ohms, that comes straight out of the connection on the back of the CB. The other is a true “Y” connecting cable Where the double leads are 50 ohms, but the common lead to the radio has to be 72 ohms. I got a used one off eBay for about $15.

I ran it through the headliner along with a bunch of extra wires when I did the running lights on the cab. Then I cut the two antenna extensions to the identical length, mostly to cut off the connectors so I didn’t have to make a big hole through the cab. Yep, I made the mounting brackets out of some of that fence stock, and I made a matching back plate for the inside to keep off fatigue cracking in the sheet metal. it killed me, but I bought two stainless springs at retail.

AD24904D-0121-40C6-81EB-C59AA5BC472C.jpeg
BF11C07D-E464-41FD-99EA-0F99E3EF980B.jpeg


I wrapped the tiniest bungee cord you can imagine around each antenna and attached it to the bracket for the brake lights with the smallest zip tie I could find. It keeps them from wobbling around and smacking the back of the cab, but it’ll break away if you hit a tree or something.

For best results, the antennas shouldn’t be blocked by any part of the cab, and they should be a minimum of 5 feet apart. Mine are partially behind the cab, and they’re a little less than 5 feet apart, but they’ll still work great for local transmission, and again, I wanted the look.

The headache rack is a little wider than the outside of the frame, and the two exhaust stacks are just inside the width of the toolbox, so all the iron tubing and such is hidden by the toolbox towards the back, and hidden by the spare tire on the right side, and the upcoming air tank that will be on the left side.

Next edition, tool box, 2nd battery, and other goodies
 
Last edited:

Rick W

Well-Known Member
Supporting Member
TRS Event Participant
Joined
May 15, 2020
Messages
2,407
Reaction score
3,902
Points
113
Age
68
Location
Atlanta
Vehicle Year
1997 1987
Make / Model
Ranger XLT x2
Engine Type
4.0 V6
Engine Size
4.0 & 2.9
Transmission
Manual
2WD / 4WD
4WD
Total Lift
97 stock, 3” on 87
Total Drop
N/A
Tire Size
235/75-15
My credo
Never put off ‘til tomorrow what you can put off indefinitely
Tool box:

When I was laid up I picked up 7-8 toolboxes for next to nothing by watching Craigslist, A couple of them were free. I got two used but excellent condition Weatherguard boxes, top of the line, for $150 bucks or something like that. It’s the kind that sits down in the bed, not the one that hangs over the fenders. Really solid.

I bolted a heavy aluminum square tube at the right height on the bottom of the headache rack, and then I put two little spacers on top of the frame where the front of the box faces backwards, so the box sits level on the truck frame. I did it so when I bolted the top and bottom of the back of the box to the headache rack, and ran two bolts through the frame through the front spacers, it was solid as a rock, and it held the headache rack in case I actually had to test it someday so it wouldn’t smack into the back of the cab.


EF995225-F6F6-4E04-8ECE-93BBED957536.jpeg


The box was wide enough, and spaced far enough from the cab, so that exhaust stacks have breathing room all the way around without touching anything so it won’t get anything hot. The box is wide enough to hide the ugly part when you look at it from the back. That’s how I got away with 3 foot chrome stacks.

I mounted my spare on the right side, I used a couple of plates I got with a little pile of steel from HVAC industrial stuff, and I made an 8 inch spacer, like a table with a top on top and bottom, and bolted it to the box. On the outside side, I had drilled it to match three holes in the wheel, and then pressed wheel studs in those three holes.

I welded a three-quarter inch piece of flat stock, with a padlock hole in the tip, to the center of the plate, and then I made a cross plate that would slide over it so nobody could steal the tire. The tire fit over the steel plate, and I tightened it with the OEM acorn flange lug nuts, so I could use an OEM center cap (all pull a part). I put the little cross piece on with a padlock, part of a matching set I’ve had for 40 years so I only have to have one key for everything.

E2B1A5D0-17F3-4149-84C3-44798DB4311F.jpeg
B7CEFE31-AB09-455B-A93B-69CFA5F9D120.jpeg
0EF793E3-241E-43FA-A277-1F1F238DF474.jpeg

14657FBB-72D6-42C6-82C5-D1C42BB1A71E.jpeg


Yep, free bed frame “legs.”

It’s spaced out even with the road tires, and I centered it where it doesn’t quite touch the truck cab or the antenna, and it is a little bit above the fender for the front axle tire. I’m planning on putting an air tank on the other side of the box that will do the same thing, and hide the ugly exhaust pipe on that side, so only the chrome shows.

I cut a fill neck assembly out of an old rusty bed I had, the fill neck was clean. I took the lid off and used it as a template to cut a slightly larger hole in the side of the box. I had to cut about a 4“ x 12“ oval hole in the bottom of the box for where the fill tube goes down to the tank. Then I had to play around trimming the fill tube and the overflow outside tube to get it all lined up where it went through the bottom through the box. I wrapped it with a cut up section of a small tire so it wouldn’t rub a hole in the rubber. I used a brand new fill tube and outer hose since the old one was disintegrating. Yeah, I still put them in the shed of miracles.

C7CB542F-E20D-4BBB-960F-6365DFABF35E.jpeg


It worked great for a month or two, and then acted like the tank was full when I was trying to fill it up. After taking it all in and out about it dozen times, I realized the center fill tube, which was rubber, was kinking because of the change in position. The original cruddy assembly had a poly plastic fill tube. I fiddled around with that about a dozen times, cutting it a little bit at a time, and I had to force it down the outer tube with KY jelly, excuse me, WD-40 to get it in and out. That was months ago and it all seems to be working correctly now.

One oversight, that I will correct someday, is I didn’t think about the fact that the fill neck cup drains right into the toolbox. I have a suspicion that gasoline and a battery and a bunch of tools banging around against each other might not be the ideal setup. I thought of just adding a spark plug to evacuate the gas very quickly, but I scratched that idea. So I just caulked around the fill assembly, and I plugged the hole in the bottom, so if I splash gas, it leaks down the side of the box and not into the box. If I had realized, it wouldn’t have taken a second to put some kind a little nipple on the bottom and a tube to let it drain under the box. Again, maybe later, but safe now even if sloppy.

Next thing was a second $35 pull a part battery. From the same free truck box I’ve been cutting up for a while, I cut out a corner to make a platform for a battery in the truck box, that also covered up and protected most of the rubber fill neck. I used a 10 gauge oil resistant wire, like you would pull through a conduit, doubled it by twisting it with a drill, and then connected battery to battery through a knife switch above the battery in the truck box. I grounded that battery to the box and the frame with an 8 gauge wire I had, and grounded it to a few more things with a 16 gauge. I put a stock hold down on the battery, and then I slotted a piece of PVC conduit to cover the terminals so nothing grounds out if something flops against it in the box. I ordered a real battery cut-off switch that I’m going to mount through the side of the box (you can see the hole to the bottom left of the fill neck) so I don’t have to open the box to run the accessories off only the second battery if I stop on the road.


D5DFE758-BBBA-45C8-B2D4-7656A8806EDF.jpeg
290AC7B1-2884-4583-BD3B-3172A2C81D93.jpeg


Yes, I’ll clean up the wires.

i’m cutting another quarter out of that truck box to make a similar protected compartment to hold the two little air compressors for the air horns and a couple of relays I’m anticipating I will need. That part is half done.

Next up, the much awaited tag axle assembly.
 

Rick W

Well-Known Member
Supporting Member
TRS Event Participant
Joined
May 15, 2020
Messages
2,407
Reaction score
3,902
Points
113
Age
68
Location
Atlanta
Vehicle Year
1997 1987
Make / Model
Ranger XLT x2
Engine Type
4.0 V6
Engine Size
4.0 & 2.9
Transmission
Manual
2WD / 4WD
4WD
Total Lift
97 stock, 3” on 87
Total Drop
N/A
Tire Size
235/75-15
My credo
Never put off ‘til tomorrow what you can put off indefinitely
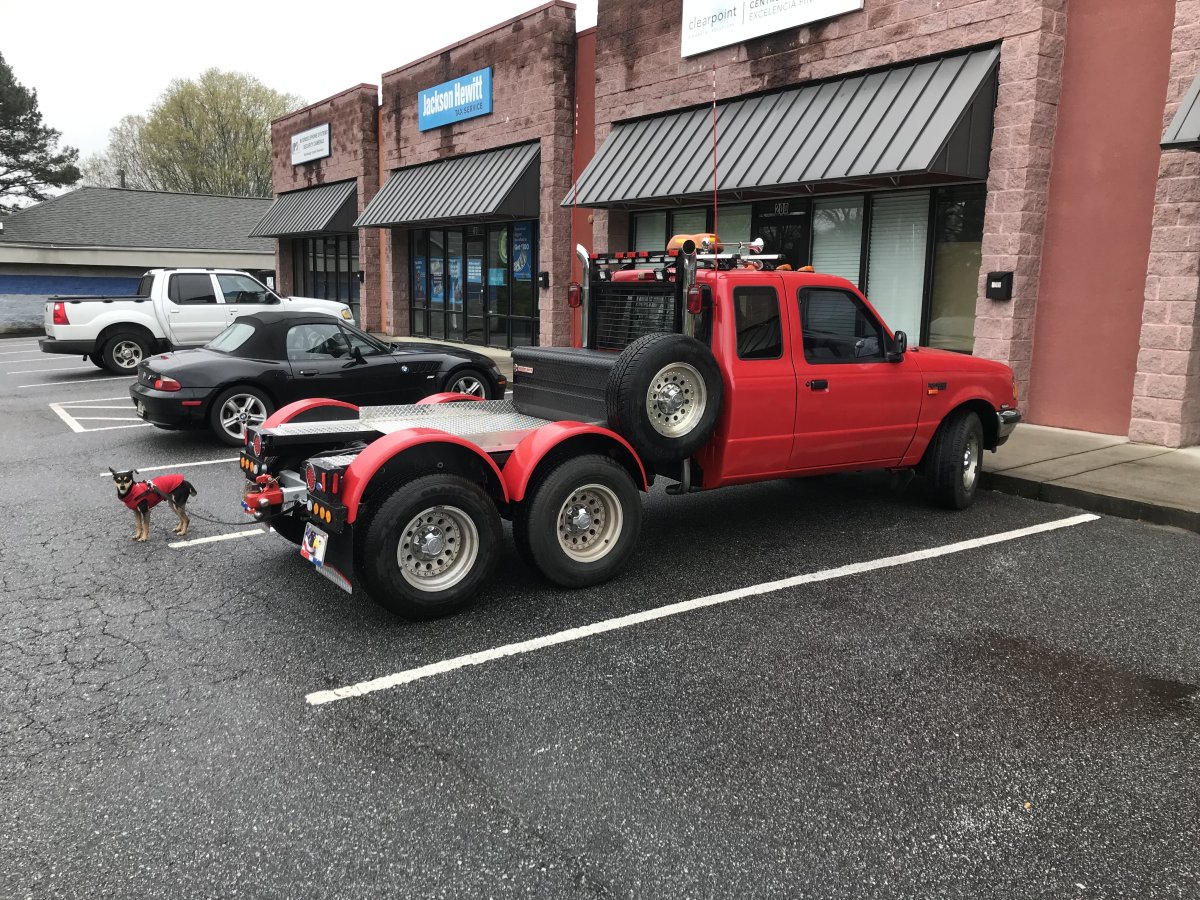
Tag axle Part I swing arm

Before any of you even think about doing something this stupid, read my disclaimer, posting #10 in this thread

The concept: Google how “B train” tractor trailer trains are put together out west. It provides much more stability going up and down the mountains and around the bends than the “A train” dollies used in the Midwest and the East Coast on relatively flat highways. B trains use fifth wheels and pins the whole length vs military hitch rings on A trains. The back axle of the unit in front sticks out behind the unit in front, and it becomes the front axle of the trailer that goes next, etc. etc. like a little red wagon.

In my travels in China and in Asia, this set up is used as well, but just on a truck and single trailer. They have little tiny diesel trucks with tough transmissions, and this set up let’s them pull pretty heavy long trailers. If you think about it, you are literally pulling the trailer like a little red wagon instead of carrying the front end of the trailer on the back of the truck.

I’m not sure mine is exactly what they do, I never looked that close, but the China stuff was really the inspiration. Also my pin will be a 2 inch ball, and my “fifth wheel” is an upside down 2 inch A shaped trailer coupler.

And I would be lying if I said I had a “design“ for this. It was a concept in my noodle that I kind of put together as I went with what was in my junk pile.

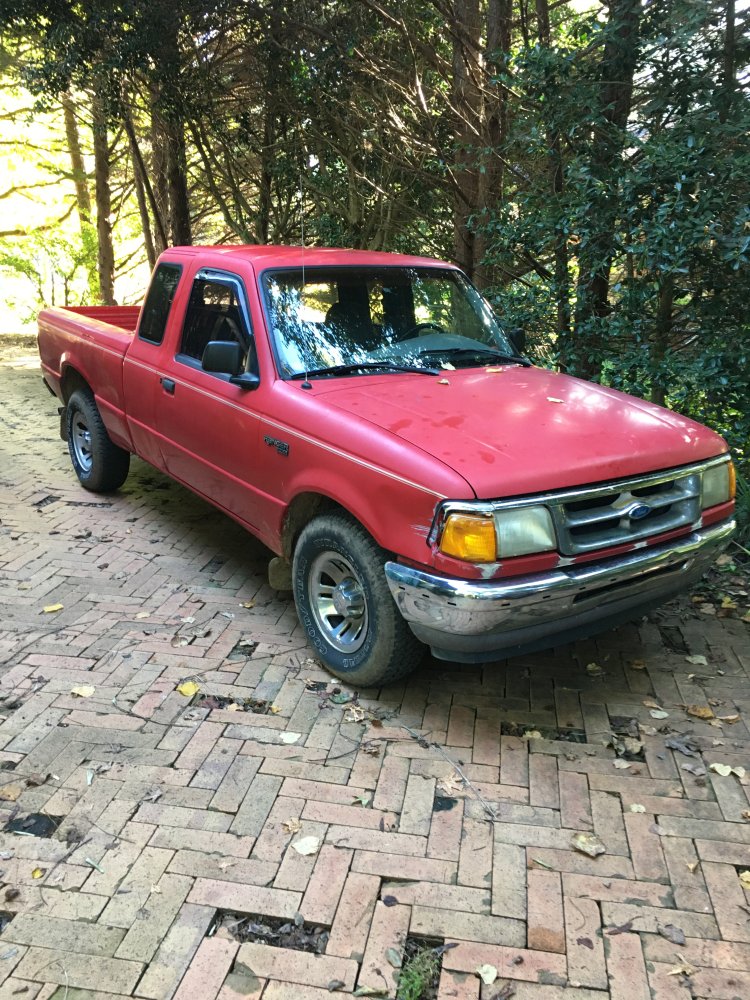
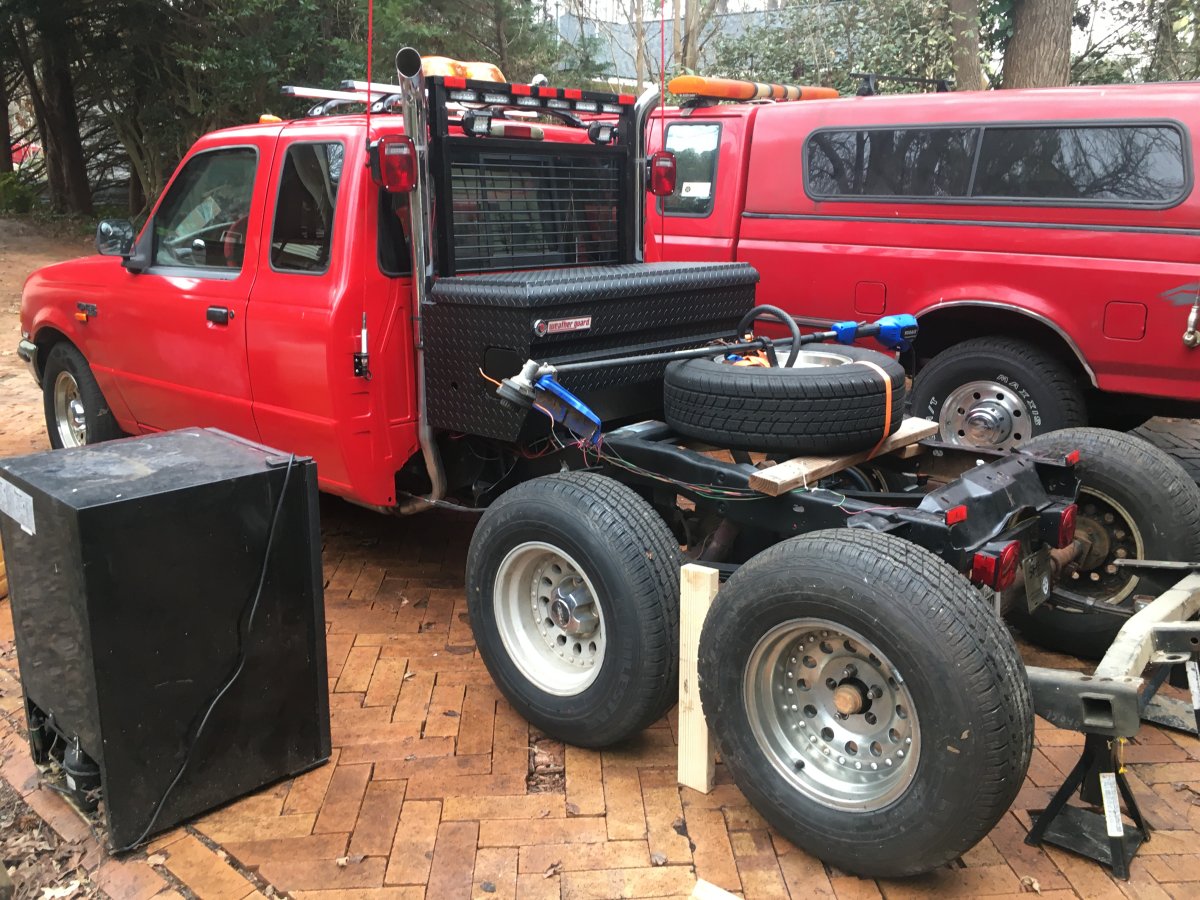
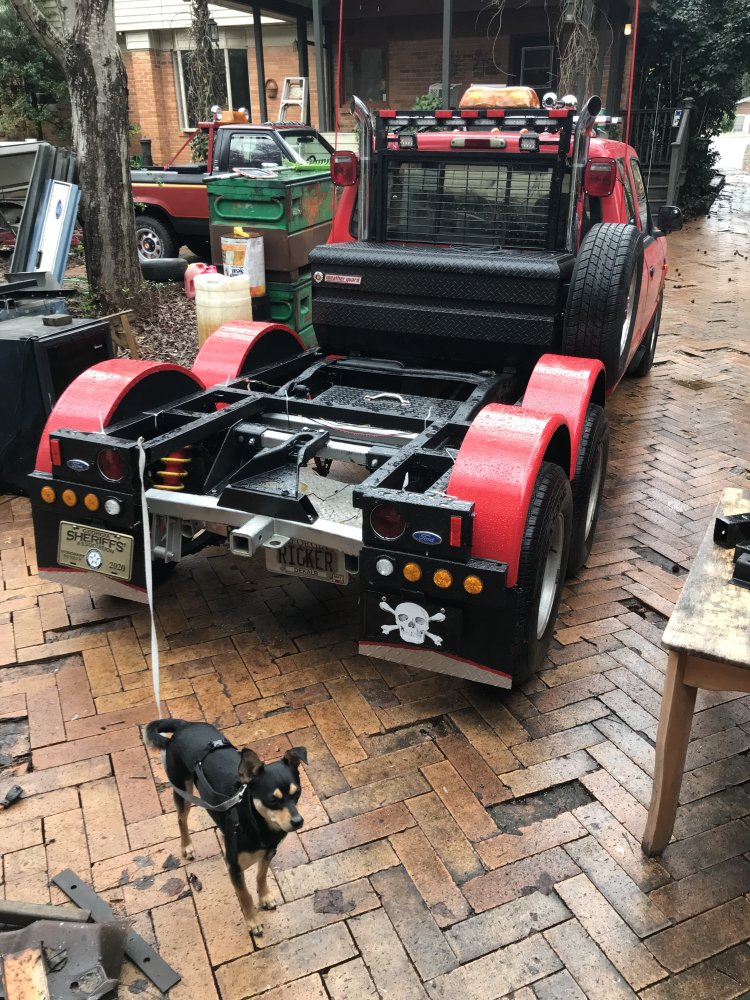
Sooooo, I stripped everything behind the cab except the axle and springs and shocks. I didn’t remove any of the original cross pieces and such until I pretty much got the swing arm assembled in place to keep all the alignment.


17FF818B-0BC2-4AF9-866C-C138A07AF83E.jpeg

I started with the pivot arm for the top of the swing arm. I had some 2 x 2 x 1/4“ steel, just like a 2” hitch bar. I welded HVAC 3/4” rod hangers on each end, exactly the width of the inside of the frame overall. I got 6 radius plates, 12 hangers and about 25 three-quarter inch by 6 foot threaded rods for $100 a while back without even knowing what I’d use them for.

5747B1DC-A87D-45BF-A2E4-49B8D4754A02.jpeg

2AE1602A-7E0A-42F2-9E3F-30760792EE7D.jpeg


Those hanger angle straps are about an inch and a half wide, and about a half inch thick, very heavy duty. And I welded spring hangers to the bottom of the cross piece just inside the frame. That’s where the arm pivots.

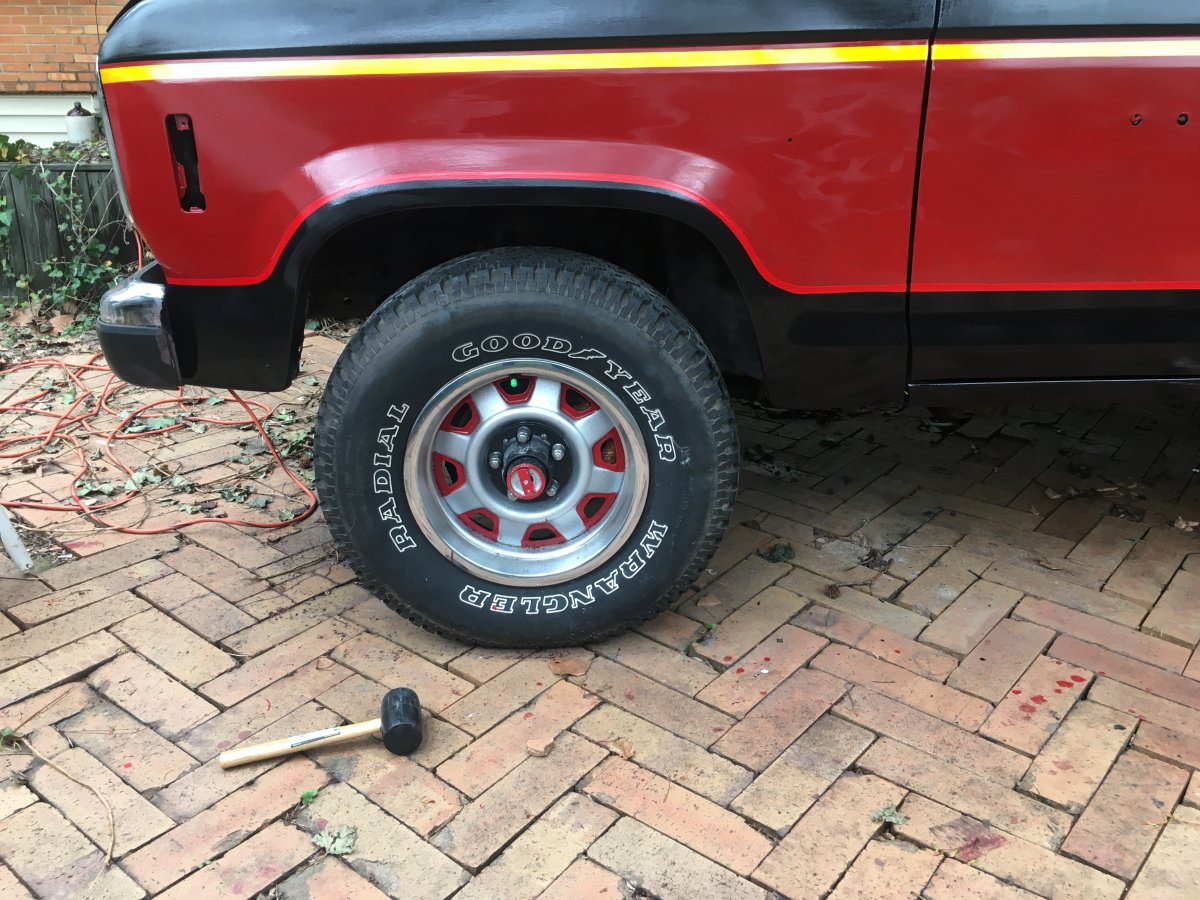
I hooked that pivot bar across and inside the frame, and of course it wouldn’t go all the way straight. I use the 8 pound adjustment tool I referenced earlier, and I pounded it around to get it between the rails, with just a tiny bit of friction left. I aligned it just behind the front axle, and I bolted it in with 4 half-inch bolts.

For the upper swing arm, I cut the center out of a class 4 receiver from an E350 van ($35 pull a part with bolts). I welded two D-shaped 2 x 4 pieces of not-so-square stock I cut out of a trailer tongue from a boat trailer on the bottom.

I spaced the back axle from the front axle by putting tires on everything and then putting a 2 x 4 between the tires. I held the axles together with ratchet straps.

From this precision set up, I bolted two axle hangers to the bottom of the Ranger frame just in front of the pivot arm hanger. Then I welded a couple more spring hangers outside the D tubes under the receiver for the shackles to the axle. Hence, the new springs run inside the OEM springs, not behind them.

The pivot arm pivots under the frame crosspiece, and the front of the springs pivot under the frame, and then there are shackles between the bottom of the pivot arm and the back of the springs. I made those shackles out of 1 1/2 x 1 1/2 x 1/4” angle iron using regular trailer bolts.

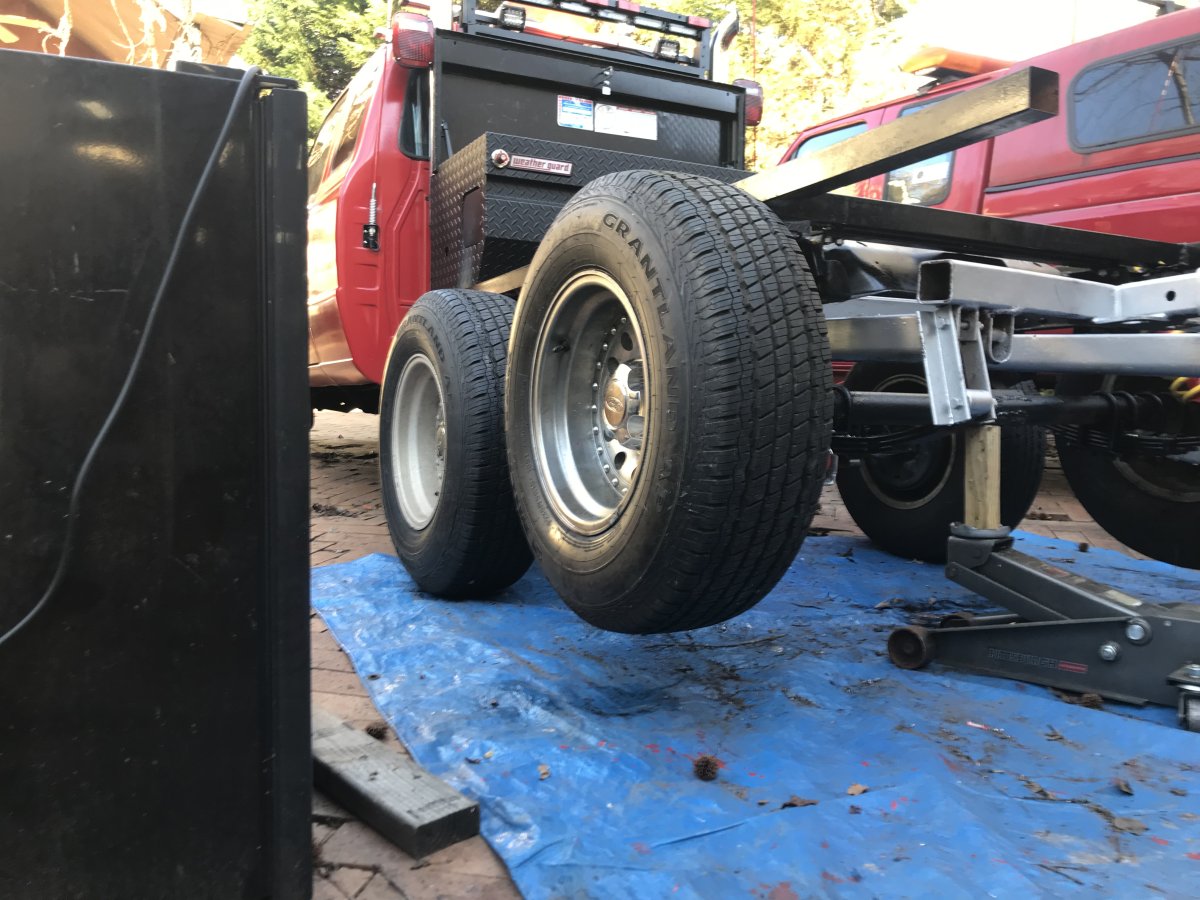
The second axle had to be independent and able to swing up so I never took the traction off the drive axle if I went over a curb or speed bump or such. I set it up where it can ride up on an 8 inch curb without the front axle leaving the ground. It will actually travel up more than that, but it won’t pivot down hardly at all, especially with the load.

3034BB67-D88D-4341-AADE-20B3E261A8F7.jpeg


9C3AE35B-F304-4B7E-A4C7-5046590FDD9A.jpeg


DA5635D7-07C8-41D3-B833-B212E12B97FA.jpeg


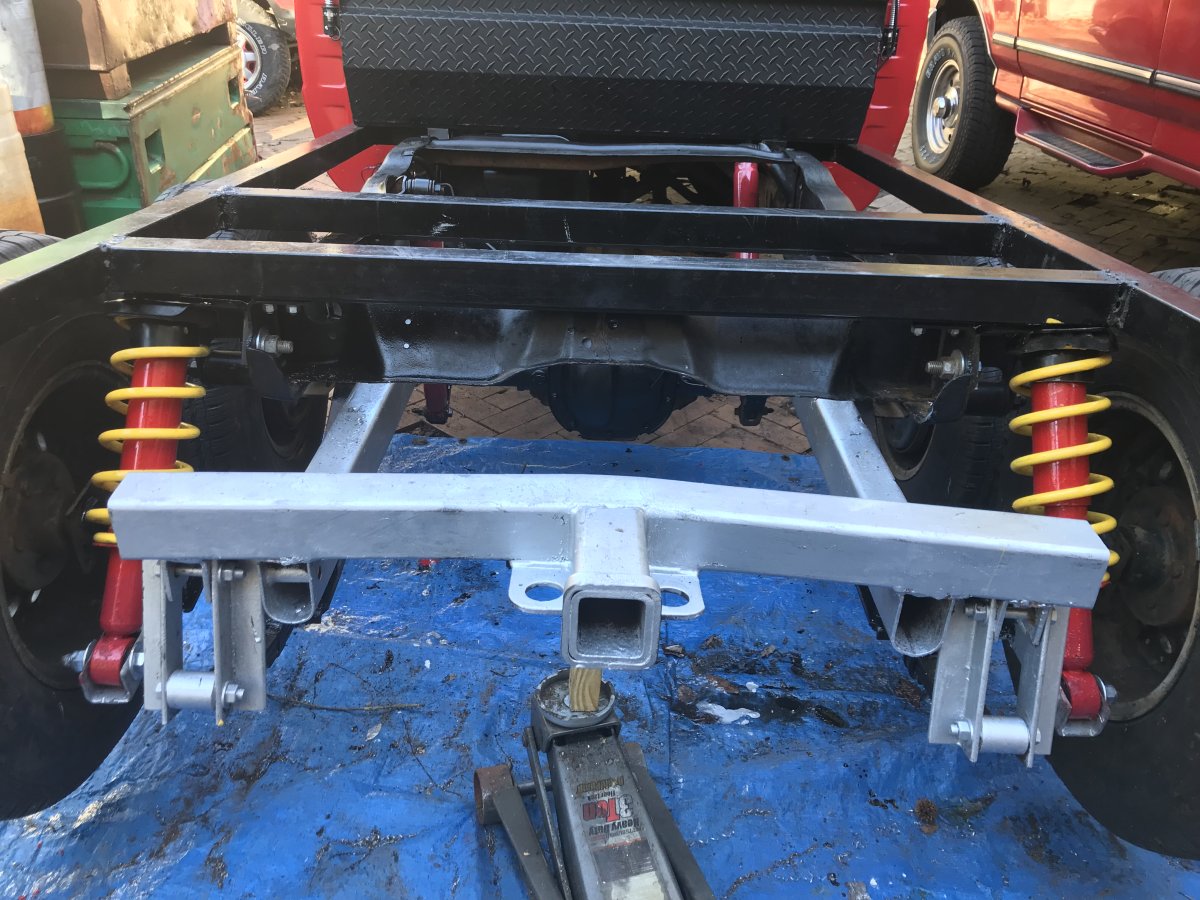
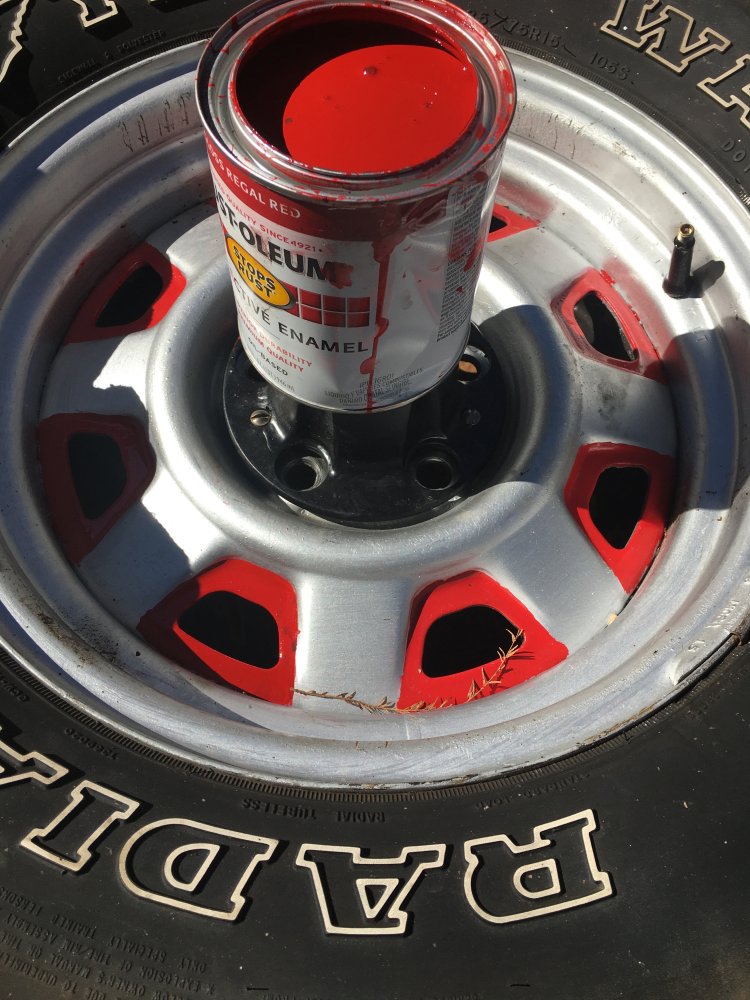
After I bolted it together, and I test drove it riding down the road, the back axle would actually bounce up off the ground once in a while. I went to the pull a part and I got some coil over shocks from a Toyota mini crossover, from the rear axle. Of course I had to add my Rustoleum red and yellow for effect. It may look like those coil overs are what’s holding up the frame above the tag axle, but actually the only purpose of those shocks and springs is to put a little tiny bit of down load on the back axle to keep it from bouncing. When I test drove it again, they may be too stiff. I only want a couple hundred pounds max of downforce. Right now I’m thinking I’ll pull the coils and cut a little bit off very slowly to where they just sit between the two ends unloaded. If that fails, I will have to get some lighter coil overs.

The complete swing arm assembly fits underneath the original Ranger frame cross pieces. To install the hitch, I had to remove the back cross piece to allow for swing travel. Using my free bedframe stock, I bolted a cross piece on top just in front of the pivot arm bar, and I bolted another across the top just before the ends of the frame and in front of where the hitch swings up and down. With the pivot arm crossbar low, those three should remove any toe in or toe out of the frame rails. I puckered my butt and I ground off the rivets and removed the back cross piece. I used a 36 inch pipe wrench to gently wiggle the frame rails back and forth to see if there was any play. None at all. Also, if you look at all the geometry, the loading is in tension or in compression, very little twisting with the ball mount.

E340DCE3-4D67-4CF5-9FDD-CF05271D2798.jpeg


The “5th wheel“ is actually an A-style coupler that I put in upside down. The wide back is bolted above the receiver bar with a 2“ x 4“ spacer that came out of another trailer tongue, more heavy duty. I had another class 3 receiver that was bolted together. I used the frame flanges upside down on top of the D tubes, and I had more 2x2x1/4” stock that I ran between them. The front of the coupler is welded and bolted to the cross bar.

Through the whole thing, I followed the automotive principles about what should be bolted and what should be riveted to allow for flex. My bolts being the equivalent of the rivets, all with locking nuts.

The 2 x 2 thin tubing frame above all this in the pictures has nothing to do with the swing arm. It is a light weight frame to just hold the diamond plate on top, and to hold the fenders. I built it early and mounted it a few inches above the frame, all very square and true, and I used it for measuring down to this and that and side to side to make sure things were square. Both fenders are actually attached to this tubing above the frame, and the back axle floats up and down underneath that fender.

A few things about the geometry and loading: The Ranger springs are much longer and softer than the tag axle springs. The tag axle is a 3500 pound axle I cut to length, adding stiffeners. The springs are shorter and much stiffer. This doesn’t matter nor affect the truck’s driving because it actually pulls behind the truck, it is not underneath it.

The two front mounting points are actually closer together height wise than the length of the shackle on the back end. That is actually on purpose to make the up and down motion stiffer.

The location of the trailer ball is actually mid height between the frame rails. The back spring is not mounted level, it angles downward towards the back. This way, the trailer force pulling or stopping is exactly along the length of the frame, and when stopping, it actually pushes the frame down just a hair.

The ball is mounted just slightly forward of the rear axle, and it is mounted on the swingarm, not on the frame. When the ball and swingarm are loaded, half the load is on the frame in the front, but the rear literally floats in mid air. That gives the proper weight balance over the front axle without overloading it, even with a very heavy trailer. I haven’t done it yet, I’m waiting for the trailer, but the rear axle and both the trailer axles will have electric brakes, with a trailer battery set up for an emergency lock up if power is lost to the trailer.

Fenders, tail light assemblies, and wiring or next.
 
Last edited:

2011Supercab

Well-Known Member
Joined
Dec 10, 2021
Messages
427
Reaction score
467
Points
63
Location
Washington
Vehicle Year
2023
Make / Model
Toyota Tacoma
Transmission
Automatic
2WD / 4WD
4WD
My big concern,

I don't think the hitch being mounted like that is strong enough to pull any weight, it wasn't designed for that.
Capture.JPG


You would be much better off with a true 5th wheel.
 

Sponsored Ad


Sponsored Ad

Members online

Member & Vendor Upgrades

For a small yearly donation, you can support this forum and receive a 'Supporting Member' banner, or become a 'Supporting Vendor' and promote your products here. Click the banner to find out how.

Latest posts

Truck of The Month


Shran
April Truck of The Month

Recently Featured

Want to see your truck here? Share your photos and details in the forum.

Follow TRS On Instagram

TRS Events

25th Anniversary Sponsors

Check Out The TRS Store


Sponsored Ad


Sponsored Ad

Sponsored Ad


Amazon Deals

Top