OFFROAD TECH BY 4x4Junkie
Securing your front 4WD hubs to the rotors |

Sick & tired of your hubs coming off with the wheels when changing a tire? Read on for a quick fix for this problem.
From the factory, Ford originally used these dumb little spring clips to secure the hubs.

They are generally considered to be "one-time-use" (disposable) parts and are rarely replaced after a wheel bearing or brake servicing. They also interfere with installation of most aftermarket wheels. With the clips missing, the hub can fall off with the wheel when removing the tire, exposing the wheel bearing.
Following is a simple step-by-step on how to securely attach the hubs to the rotors. Although a manual hub is shown here, this procedure will work with the automatic hubs also.
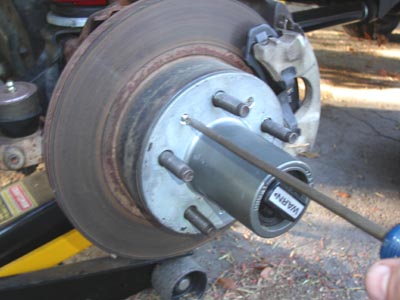
1. After removing the wheel, thread 2 or 3 lug nuts back onto the rotor to firmly secure the 4WD hub. Make sure the hub is centered around the studs (there's about a millimeter of slack around the holes)

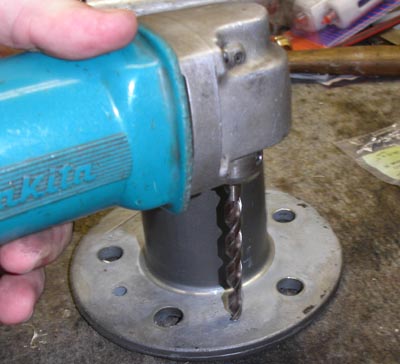
2. Using a 5/32" drill bit, drill through the hub and the rotor between two of the wheel studs. Be sure to position where you are drilling BELOW the wheel bearing so the drillings don't fall into the bearings. After you drill all the way through, remove the hub and clean the metal shavings out.


Don't let this stuff fall into your bearings!
Reinstall the hub and repeat in two more locations around the hub.
Note that the hub will already have one pre-existing hole between two of the stud holes. This hole can be utilized as one of the 3 screw locations around the hub.
3. Using a 10-32 thread tap, tap the three holes in the rotor. (Due to the proximity of the wheel studs, I modified the tap slightly to fit into a small socket & extension, and used a 1/4" drive ratchet to tap the threads.)

4. Enlarge the two holes you drilled into the hub flange using a 1/4" drill bit.

Now, using a 7/16" bit, chamfer the edge of all three holes slightly so that the head of a 10-32 flat (taper) head stainless steel screw is flush with the hub surface as shown here.

Be careful (go slow) around the one hole that was pre-existing, the drill bit may tend to grab & gouge around the hole while doing this.
5. Install the hub onto the rotor, aligning the three holes in the hub with those on the rotor, and screw it down using the 10-32 screws.

6. Finished!! No more fussing with the hubs during a tire change!

Below is one of the packages of 10-32 x 1" screws I bought at an OSH hardware store for this project.

If you are in a rust-prone area, you may want to put some anti-seize or something in the screw holes before installing the hubs, as the rotor itself obviously isn't stainless. ~TRS
|
|
