• Welcome Visitor! Please take a few seconds and Register for our forum. Even if you don't want to post, you can still 'Like' and react to posts.

2000 Ranger 4.0 to 2.3 EcoBoost Swap


Boost Bucket

Member
Joined
Mar 18, 2022
Messages
36
Reaction score
46
Points
18
Location
Midwest
Engine Type
2.3 EcoBoost
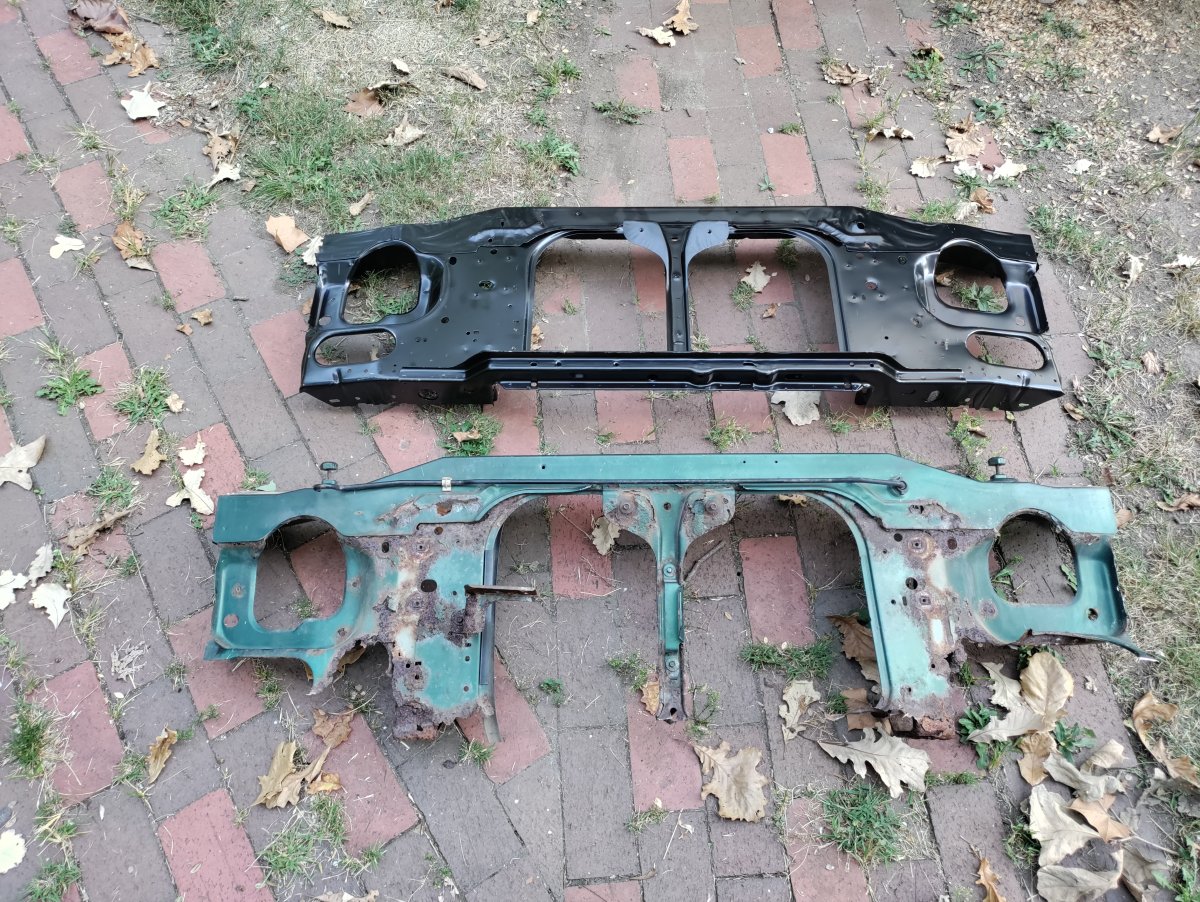
Temperatures have cooled down a ton and I've been able to get back to work on the project. The first order of business was correcting the rusted off radiator support. I am fortunate that you can purchase a complete drop in unit. I will probably cut it up to suit my needs but it is a much better foundation than the rusty junk that came off of it.
1695172083783.jpeg

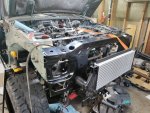
I couldn't resist peeking at intercooler placement while I was in there to try to get an idea of upcoming fitment issues. It is looking like it will work perfectly with the factory radiator and piping may be in a decent place too. I'll probably run it upside down of what I have in the picture but we'll see.
1695172175367.jpeg

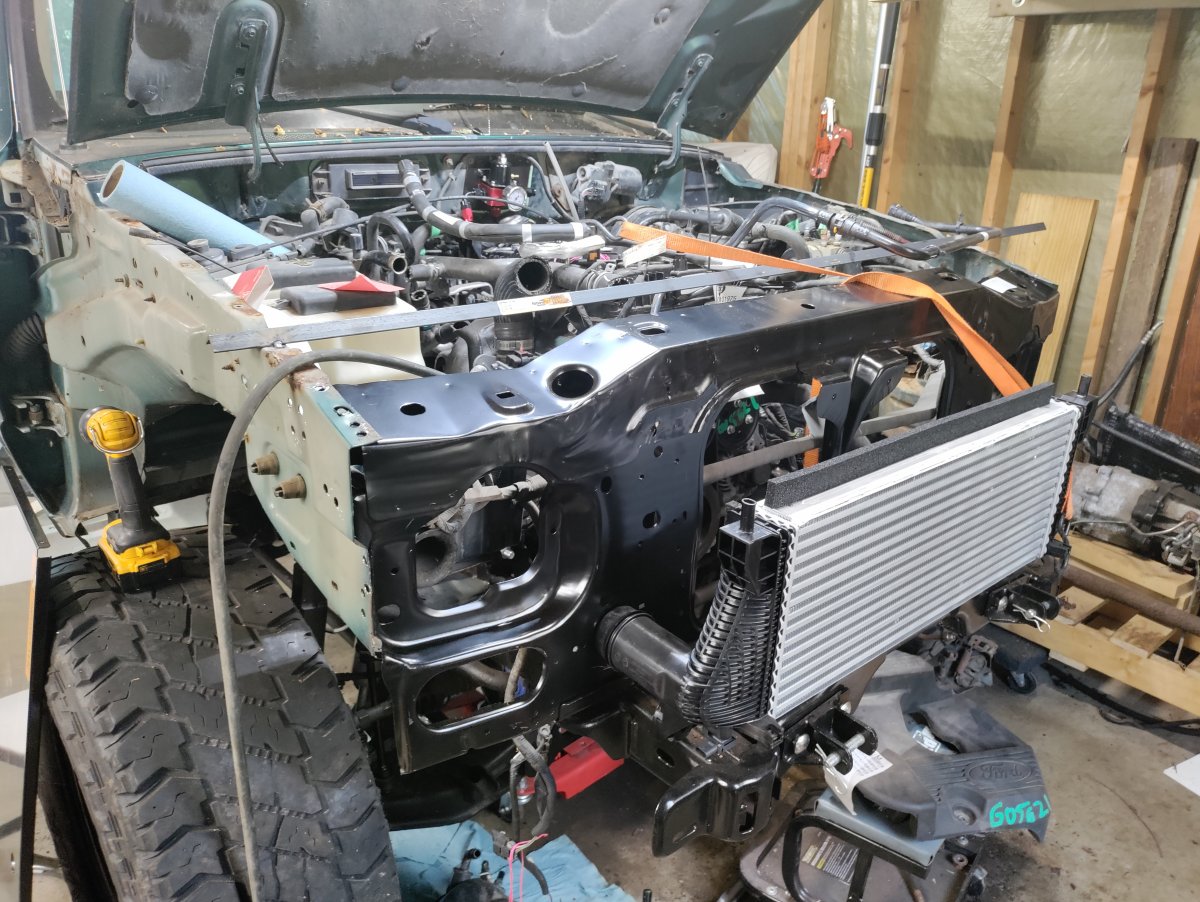
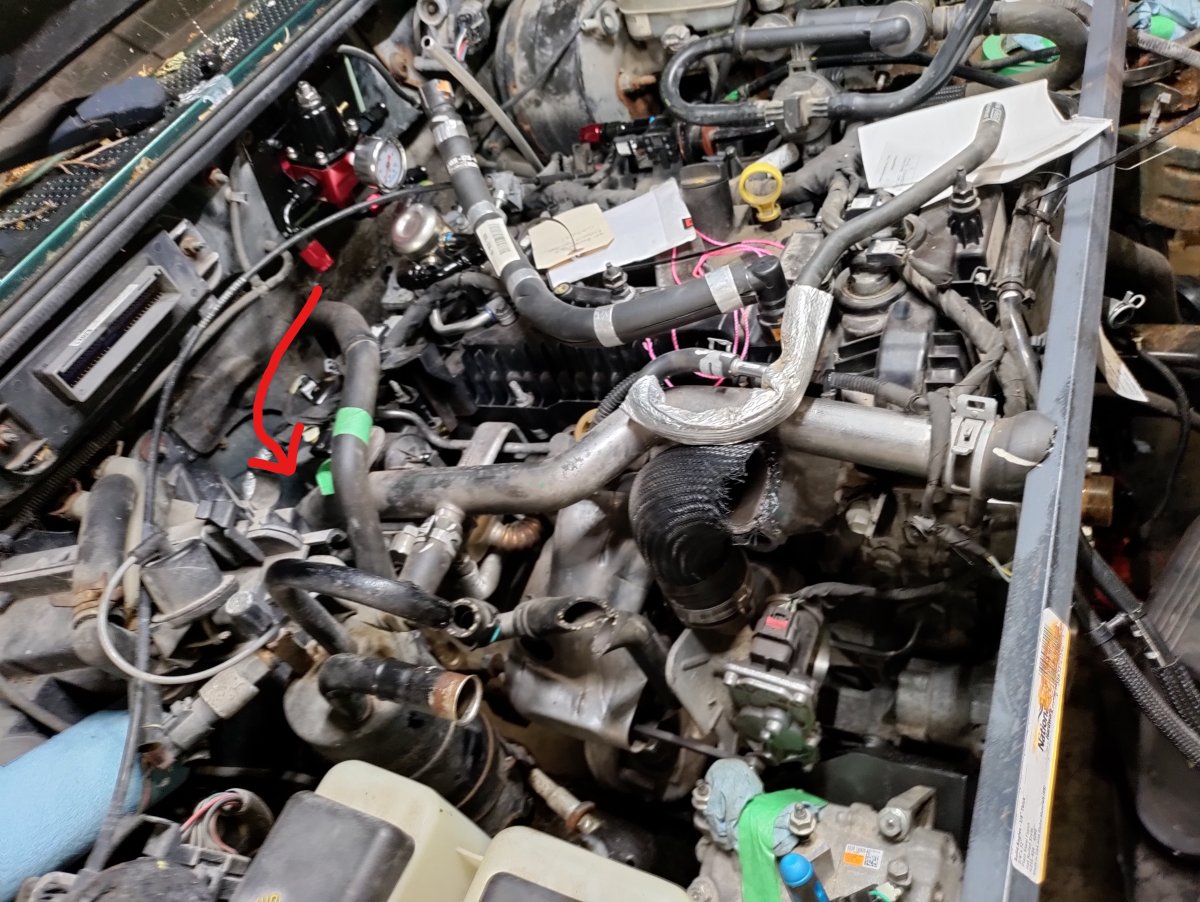
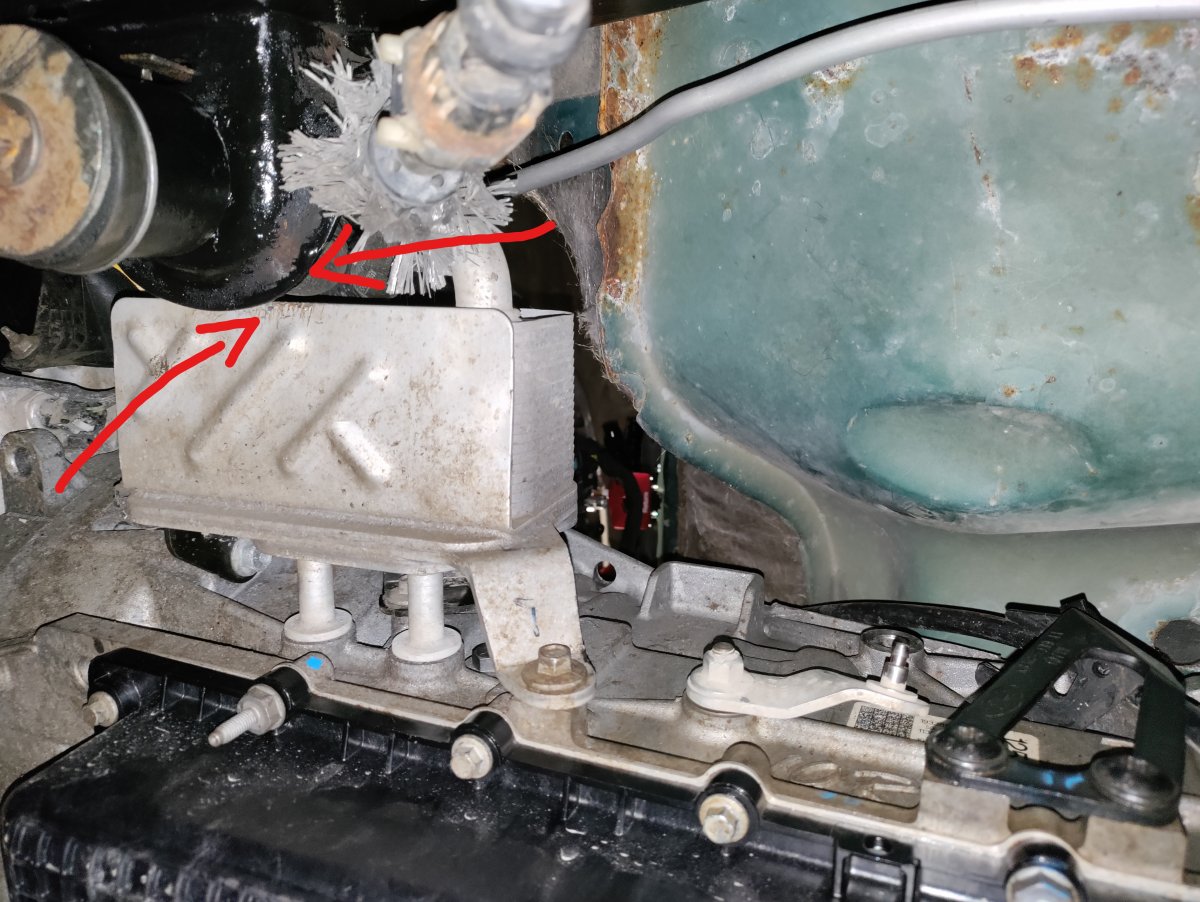
The four in-cab mounts until now have been loosely held on by finger tight nuts. Since I didn't have either of the two radiator support cab body mount positions to reference, I found out that the cab is off center by a decent amount. It turns out that the AC box is making contact with the coolant hose on the top of the engine and I need to scoot the engine towards the driver side another 3/4" or so. This creates a fitment problem for the factory transmission cooler since it was already rubbing in its current position. This will need to be relocated before I can secure the cab correctly and mock up coolant and air hoses. This will also put the driver side of the engine dangerously close to the factory steering shaft but I don't think it will be an issue. After seeing the intercooler in place I am hungry to get this fired up before the snow flies. We'll see what happens.
1695172579534.jpeg

1695172585523.jpeg
 

Attachments


Boost Bucket

Member
Joined
Mar 18, 2022
Messages
36
Reaction score
46
Points
18
Location
Midwest
Engine Type
2.3 EcoBoost
Waiting on some parts to arrive to remote mount my transmission cooler, I made some progress fitting up the other Mustang parts so they'll play nice with the wire harness.

Ranger/Mustang alternator is slightly different so I bored out one of the holes for the locating pin and the one on the top I opened up since it doesn't quite line up.
1695607078401.jpeg

1695607103348.jpeg
1695607095611.jpeg

I have less confidence in my work widening out the intercooler sensor. I don't know why they are very slightly different but they are.
1695607163124.jpeg

1695607174965.jpeg

I got the AC/blower box out of the way which in my current configuration was only possible by lifting the cab up, moving the box as far as I could, and splitting it open through the fender well. A sawzall was necessary both for the bolts to get it lose and for the AC lines coming out. Once I move the engine over and set the cab down this likely will be impossible to install or remove without lifting the cab up a bit so I'm glad I'm doing it now. I pushed that side of the cab up about 5 inches and it was still barely possible. I also bent one of the coolant hardlines so I'll need to fix that too.
1695607578007.jpeg

Once in a lifetime clear shot of firewall clearance and routing. We could've been another half inch or so back, but honestly it's perfect where it is otherwise the tunnel would've been rubbing the top of the transmission. The Harbor Freight laser and careful measuring paid off like crazy.
1695607669526.jpeg

This part is probably unnecessary but I pulled the dash out too after much effort. I'm struggling a bit with comprehending the wire routing of body controls and I need to get my own eyes on it to make sense of it all. I also figured that if I'm this deep in it anyway I might as well go all the way since that was about the last factory thing I had yet to touch.
1695607985395.jpeg

Since I had the front off anyway I figured I'd get a good shot of the belt routing so I can make a sticker for it on my new rad support. This also does a good job showing how it fits in there after it's all said and done. I'll be moving it about 3/4" to the drivers side but this is really close to final position.
1695608155641.jpeg

Now that I have all the related Mustang sensors installed, the standalone wire harness hooks up 100%. In theory it just needs the fuel lines finished and a battery hooked up to run. You wouldn't know it by looking at it, but we're nearing the end on this build and I'm excited to see a dyno and get started on the next one.
 

BiggSherm1988

Active Member
U.S. Military - Active
Joined
Feb 1, 2022
Messages
101
Reaction score
57
Points
28
Location
Germany
Vehicle Year
2008
Make / Model
Ford/Ranger
Transmission
Manual
Total Lift
none...yet
Total Drop
not for me
Working around the weather, I was able to squeeze in another work day. I found that the new frame section was too heavy for me to move around on my own with the rear bumper and hitch attached so those had to go. I wish I had a scale to tell exactly, but the rear frame section is lighter than I thought and I might guesstimate it between 80-100lb with the hitch and bumper off. For anyone curious like I was, with the bumper at hitch attached the best I could do was drag it where I wanted it but with them off it's not a huge deal to deadlift the whole assembly.
View attachment 87819
View attachment 87820
View attachment 87821
I also made a deal this week on the marketplace for some "jeep" wheels and tires. I've been looking high and low for chrome bullet holes but all the ones I found were generally 6 lug, 15", AND as pricey as buying new. I would've preferred to wait until the very end to think about wheels and tires but the clearance issues requiring the lift kit means I had to find some 16" wheels to fit the lift according to the documentation. I must admit I did not know how absurdly large 35s are. These are 5x5 pattern so I'm going to run 1.5" Rough Country adapters to get back to 5x4.5 and hope the spacing works.
View attachment 87824
View attachment 87823

Did those wheels go on with any issues, besides the lug holes? RC says you need 17s for this kit to fit but you are now the second person that I have heard run 16s and not talked about an issue with the fitment.
 

Sponsored Ad


Sponsored Ad

Members online

Member & Vendor Upgrades

For a small yearly donation, you can support this forum and receive a 'Supporting Member' banner, or become a 'Supporting Vendor' and promote your products here. Click the banner to find out how.

Latest posts

Truck of The Month


Shran
April Truck of The Month

Recently Featured

Want to see your truck here? Share your photos and details in the forum.

Follow TRS On Instagram

TRS Events

25th Anniversary Sponsors

Check Out The TRS Store


Sponsored Ad


Sponsored Ad

Sponsored Ad


Amazon Deals

Top