Big update,
Now that it's no longer winter, been making some good progress these last 3 weeks.
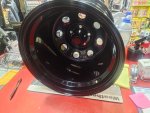
Got the rear rims in, 15x14's for the rear and will probably be 15x7's in the front. Tire's still on backorder for the last 6 months. ugh.
View attachment 110416
Continued boxing and welding the frame as well, got all the sections put in place and welded some temporary cross bars in place before I welded everything in completely. Beveled the edges of the frame and plate so the bead lays inside making for a cleaner finished product when ground down.
View attachment 110417View attachment 110418
Welded on the top half of the frame before flipping it over to weld the bottom side
View attachment 110425
View attachment 110422View attachment 110421
Underside;
View attachment 110419
Then came the fun part of grinding all welds flush so that once its painted you'll never know it wasn't supposed to be this way. No one will ever see it, but I'll know.
View attachment 110420
View attachment 110426
View attachment 110424
View attachment 110423
Motor in background getting a coat of paint, have to still paint the timing cover, it's cast aluminum and was not taking the paint I was using very well. Will most likely need to throw some etching primer on it first.
View attachment 110427
Then came the AJE part. Phew Finally! Fully mocked up minus outer tire rods and strut brace. Plan on dropping the cab on very soon and will square everything up once that is done.
View attachment 110428
Still didn't drill these rear holes as its kind of still a mystery where they go exactly but I think I'm just gonna go with my sharpie marks and call it good. Nothing pre existing on my 93 frame to give me any reference.
Also the AJE kit comes with grade 5 hardware, but I'm going to swap out everything for grade 8 zinc coated, I've got a mixture of some of it now just for mock up.
View attachment 110429
Next up was this front strut hoop mount. My frame from the factory is completely boxed in in this front section making it basically impossible to get a wrench or anything back there to get the nut in place. Those bolts are just in place with no nuts, but I think I can run a carriage bolt on a 1/4x1x3" plate the other way around and put a nut on the outside.
View attachment 110430
This next part is my own doing, as I boxed everything in I had to drill some access holes to get a wrench, a socket, crows foot wrench, everything in the toolbox to gain access to the back of the hardware without completely turning my nice new plate into swiss cheese. I'll plug these up with some rubber/plastic plugs eventually to keep big debris from getting in.
View attachment 110431
pass side, also side note; Milwaukee Dozer Hole Saws are as round as an egg. 0/10 purchase
") View attachment 110432
View attachment 110432
Front spindle mocked up with the race craft 2" drop spindles.
View attachment 110433
View attachment 110434
That's most of the useful pictures and updates I have for now. Will post again once the cab is down and hopefully the motor goes in for the first time.
Thanks for reading!